February 04, 2021
A Guide to Surviving “Firebase Z”
From intel on the map’s main areas to strategies around the two new Support items and Tombstone Soda Perk, this is a mainly spoiler-free guide on what you need to know about “Firebase Z.”

February 05, 2021
We share the five loadouts that were used to help create our guide to “Firebase Z,” including the Weapon Blueprint that we built upon to rake in those precious Raw Aetherium Crystals.
We share the five loadouts that were used to help create our guide to “Firebase Z,” including the Weapon Blueprint that we built upon to rake in those precious Raw Aetherium Crystals.
February 05, 2021
If you’re reading this on February 8th, then drop everything and get on Black Ops Cold War and Warzone™ right now.
Both games have Double XP active through this weekend, which means double the XP rewards for clearing out Daily Challenge reserves, chasing camos, and exploring everything added in yesterday’s update within Season One Reloaded. That includes the next chapter of the Dark Aether story known as “Firebase Z,” which tests even the most seasoned Zombies veterans with new mechanics, such as Assault Rounds, and otherworldly creatures that make the undead army even deadlier.
With these new challenges in mind, let’s level up:
This Week’s Featured Operator
As part of this week’s update, the Store received the “Zombie Dozer” bundle, which includes a new skin for Bulldozer called “Belligerent.” Featuring a crimson mask that is sure to strike fear in the living and the dead, this suit of armor is fit for slaying the undead within the most recently discovered Omega Group facility.
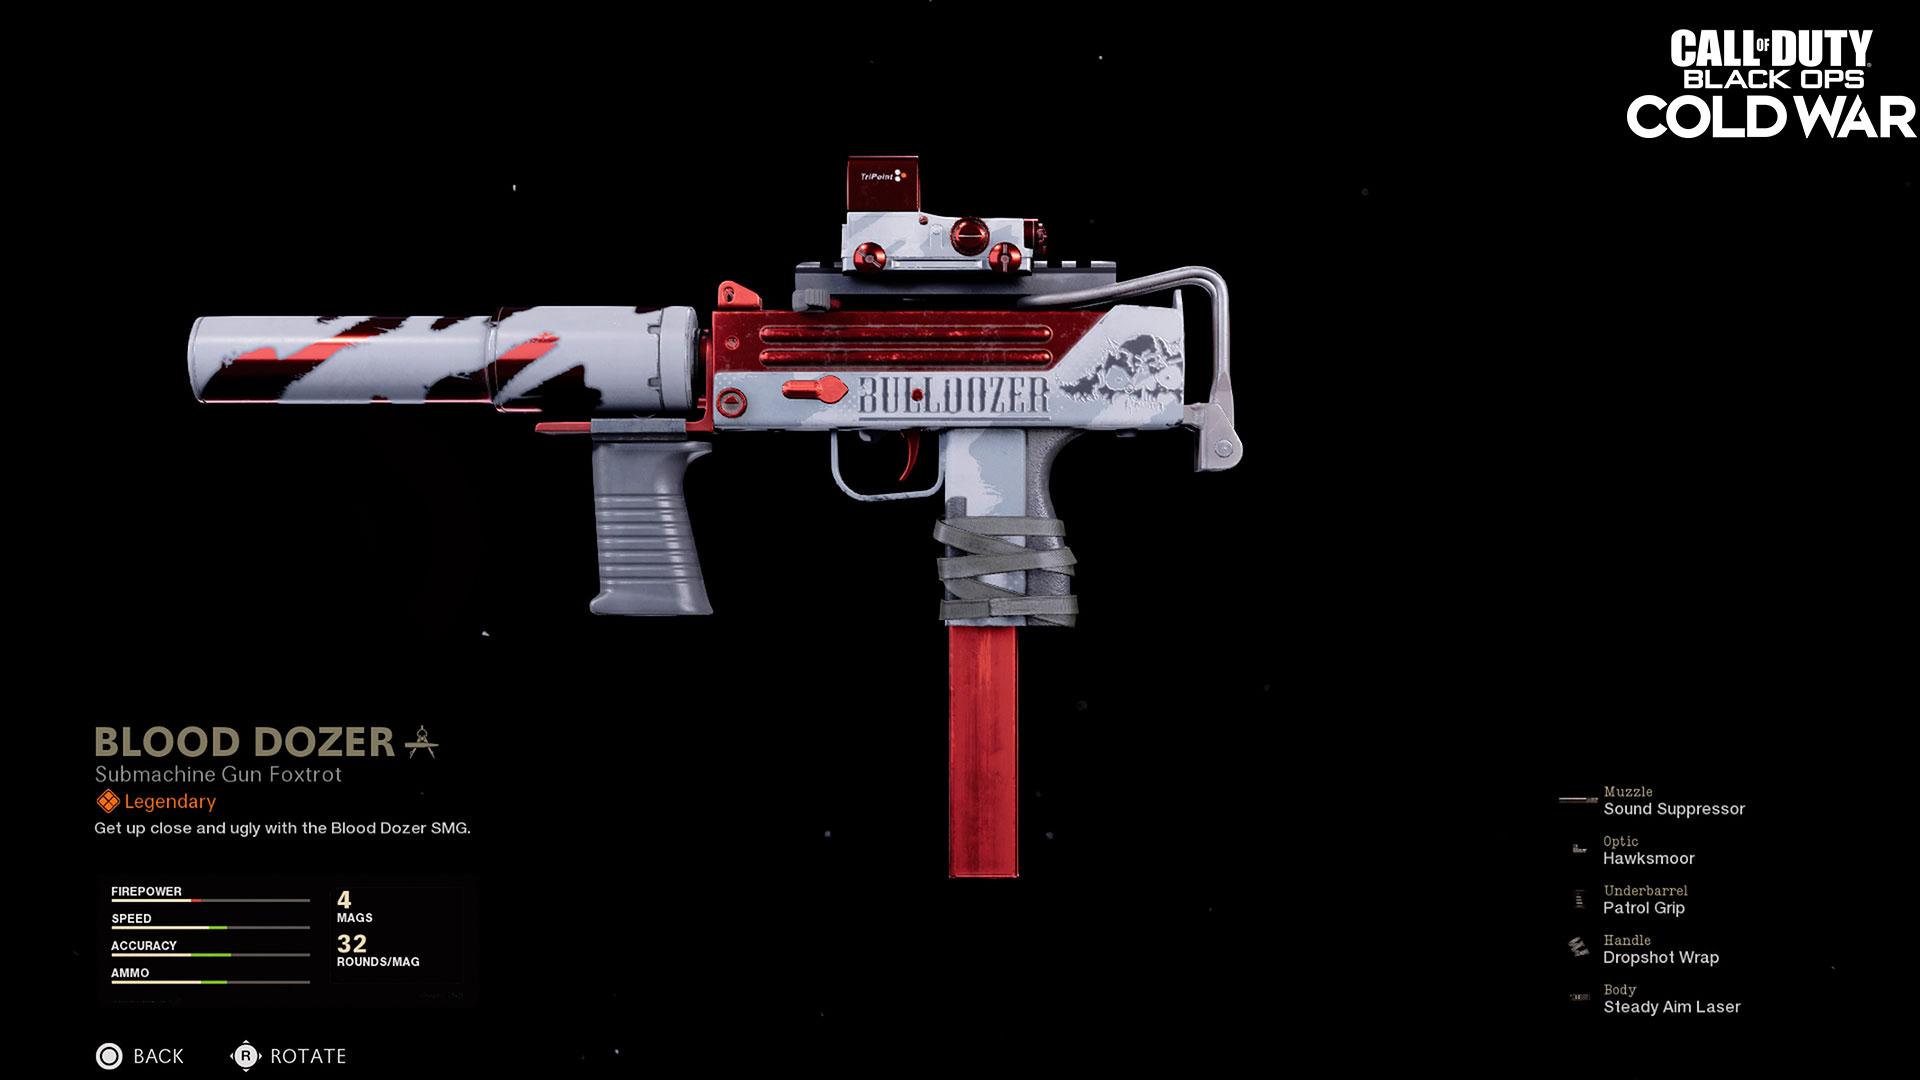
This bundle also comes with two Weapon Blueprints, including the “Blood Dozer” Legendary SMG Blueprint, as well as a new Finishing Move, Calling Card, animated Emblem, and a Weapon Charm.
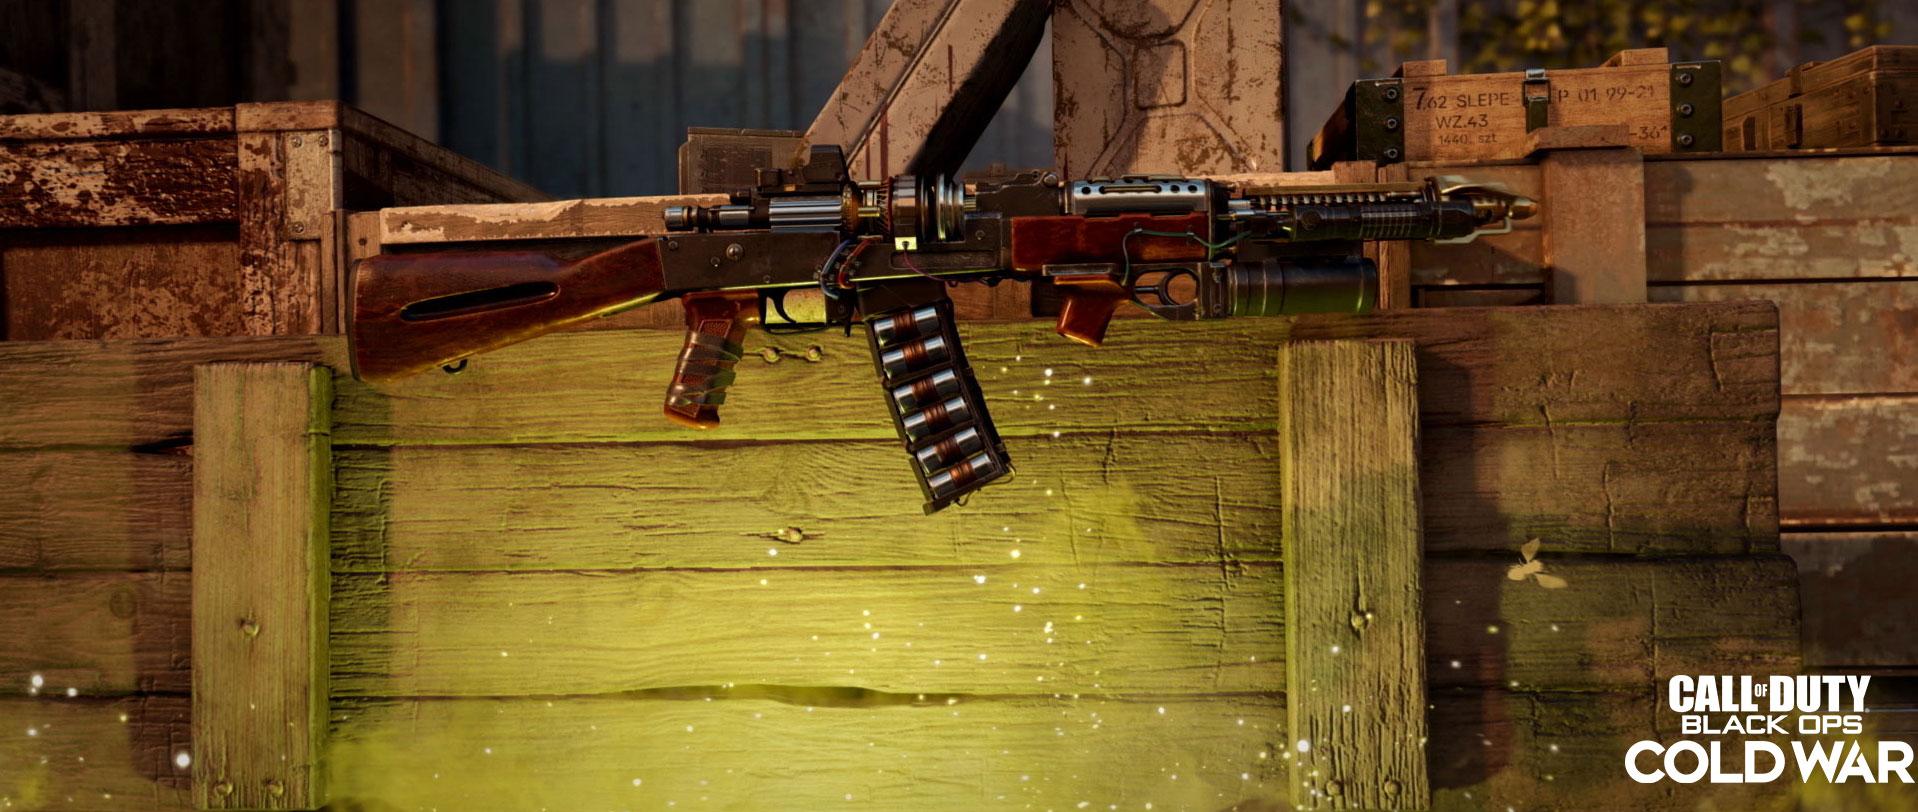
Yes, pulling a R.A.I. K-84 from the Mystery Box can help bolster your loadout for “Firebase Z,” but these five loadout weapons will hold you over while you’re hunting for this incredible Wonder Weapon.
Top Tip – Five Recommended Loadouts for Firebase Z
As a radical departure to the familiar sights in “Die Maschine,” “Firebase Z” offers its own strategies for outlasting the undead thanks to its design and new enemies.
In writing the guide for “Firebase Z” – something we recommend reading if you’re having trouble surviving – we gravitated toward a few weapons and attachments across several loadouts.
Here’s what we recommend:
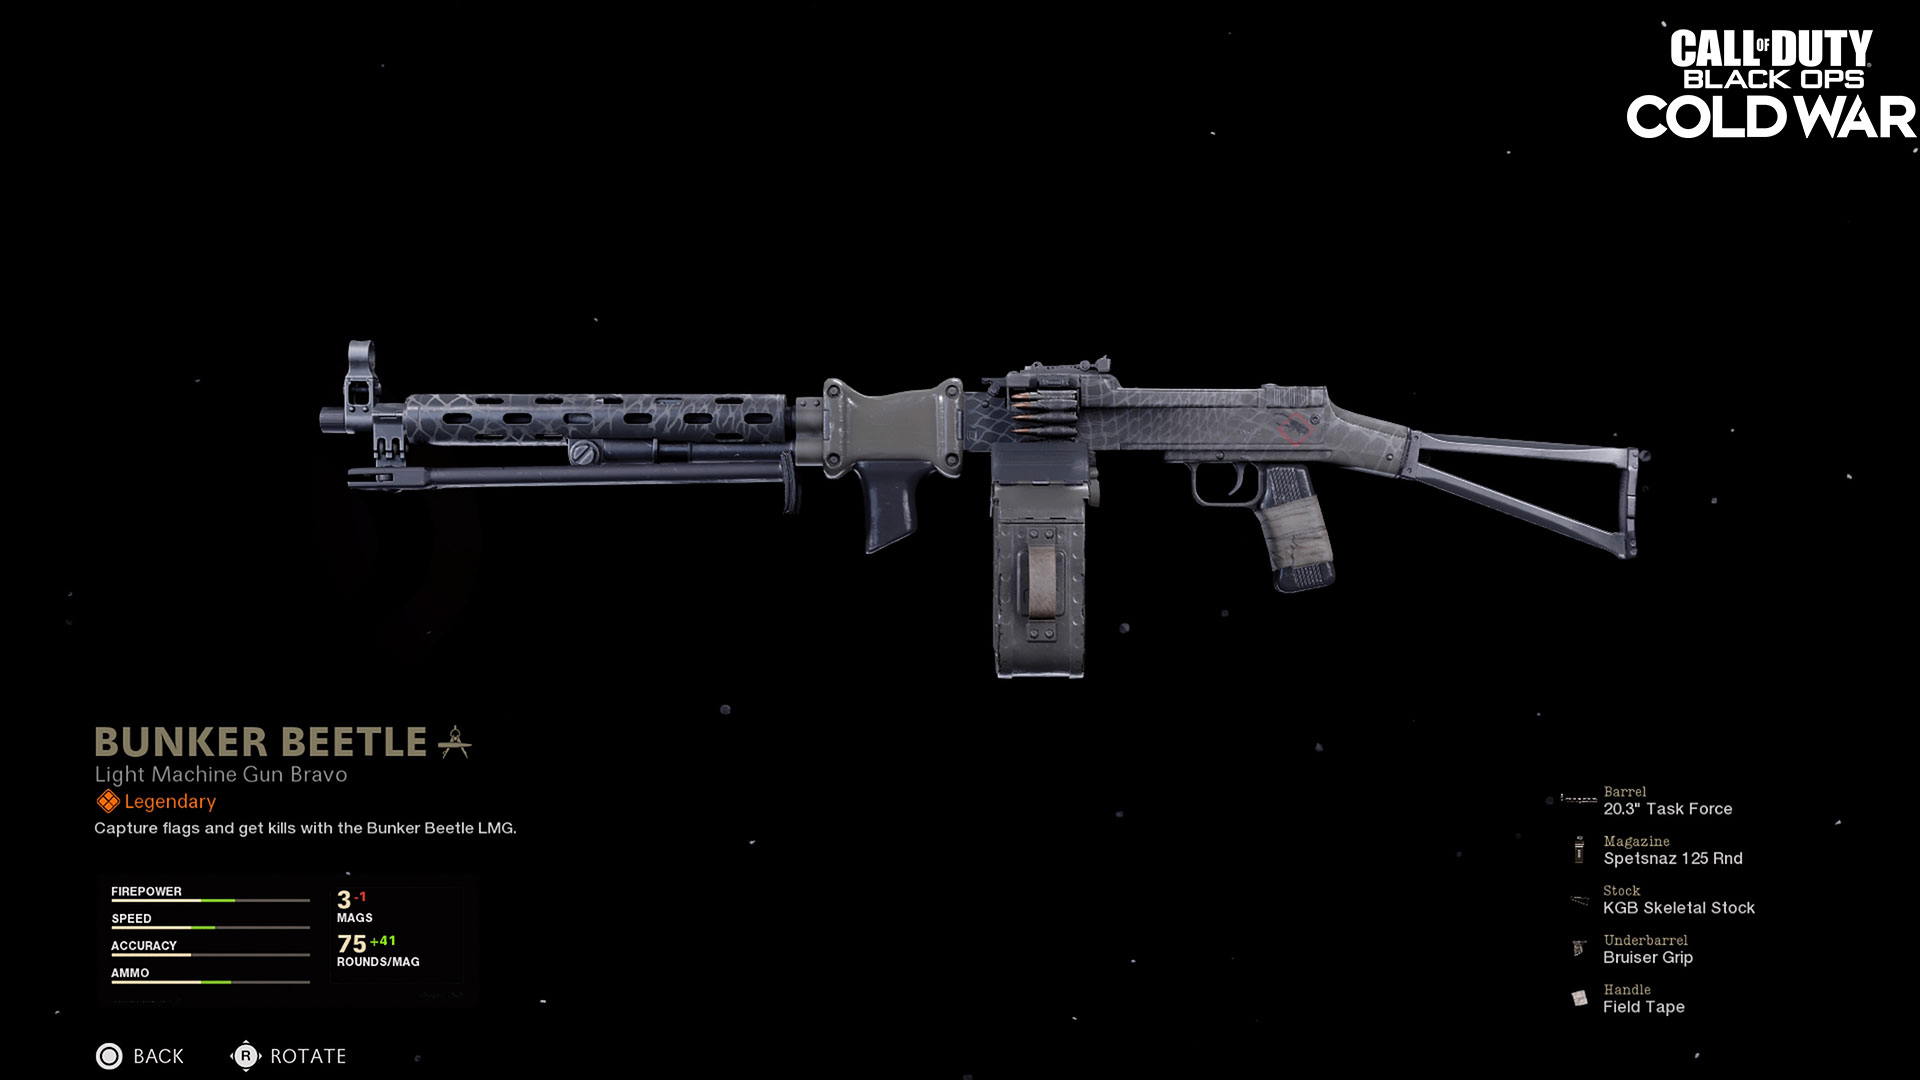
1. High-Capacity LMGs
Our bread-and-butter since Requiem recruited us, any of the three LMGs are viable starting loadout weapons that scale well with Arsenal upgrades (with Salvage) and Pack-a-Punch (with Essence). Although these weapons were already great in “Die Maschine,” their incredible base Effective Damage Range makes them even better in “Firebase Z,” which features long sightlines across the research facility like in the three Defense areas.
The “Bunker Beetle” Blueprint, found at Tier 65 of the Season One Battle Pass, shows off one must-have attachment across any LMG: any magazine with 125 rounds. That amount of ammo is more than enough to clear a whole train with well-placed headshots, and if you can handle a bit worse Aim Down Sight (ADS) speed, it’s worth changing this out to its Fast Mag variant (in this case, the VDV 125 Rnd Fast Mag).
LMGs really start to shine when using the Ring of Fire Field Upgrade, which powers up their already high damage output to ludicrous levels.
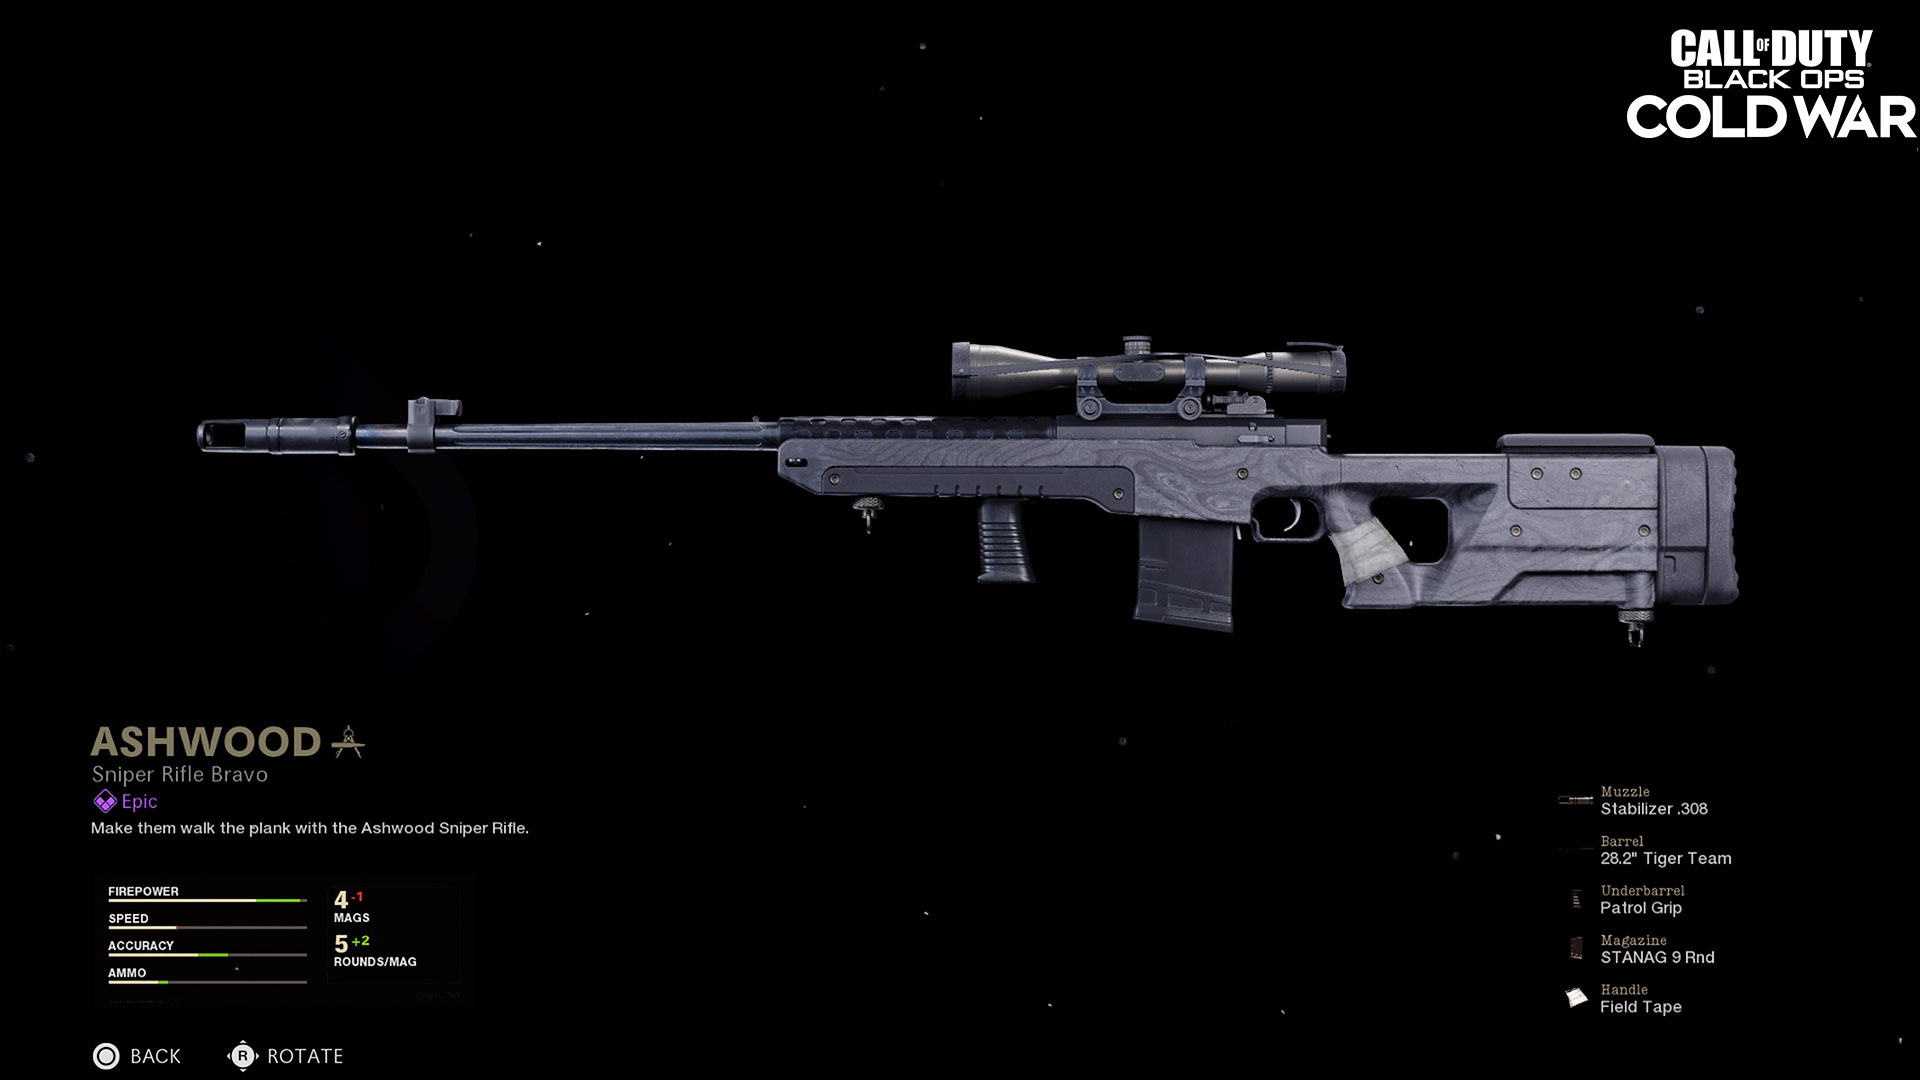
2. Sniper Rifles for Assault Rounds
Usually reserved for tackling elite enemies with accurate critical shots, the sniper rifles find a whole new place in the Zombies meta thanks to the new Assault Rounds in “Firebase Z.” Because these take place across the three Defense areas (Rocky, Scorched, and Jungle), where the undead rush forward from one of several lanes, an Operator with a sniper rifle can easily line up multiple zombies at once for satisfying collateral eliminations.
The “Ashwood” Blueprint, found at Tier 51 of the Season One Battle Pass, is a great starting point for a sniper rifle Loadout. It may not be as efficient in early rounds, where we recommend just melee-killing zombies (ideally with the Bowie Knife, unlocked through the Tier III Melee Skill). But once the map opens up and Assault Rounds become a factor – especially after some upgrades – this weapon can wipe out lines of undead with a single shot.
Snipers will most likely play further back from the horde than their fellow squad members, making the Healing Aura a great Field Upgrade to pair this weapon with. When fully upgraded, the Healing Aura immediately revives downed teammates, allowing you to become the savior of the party when those more aggressive squadmates are all down.
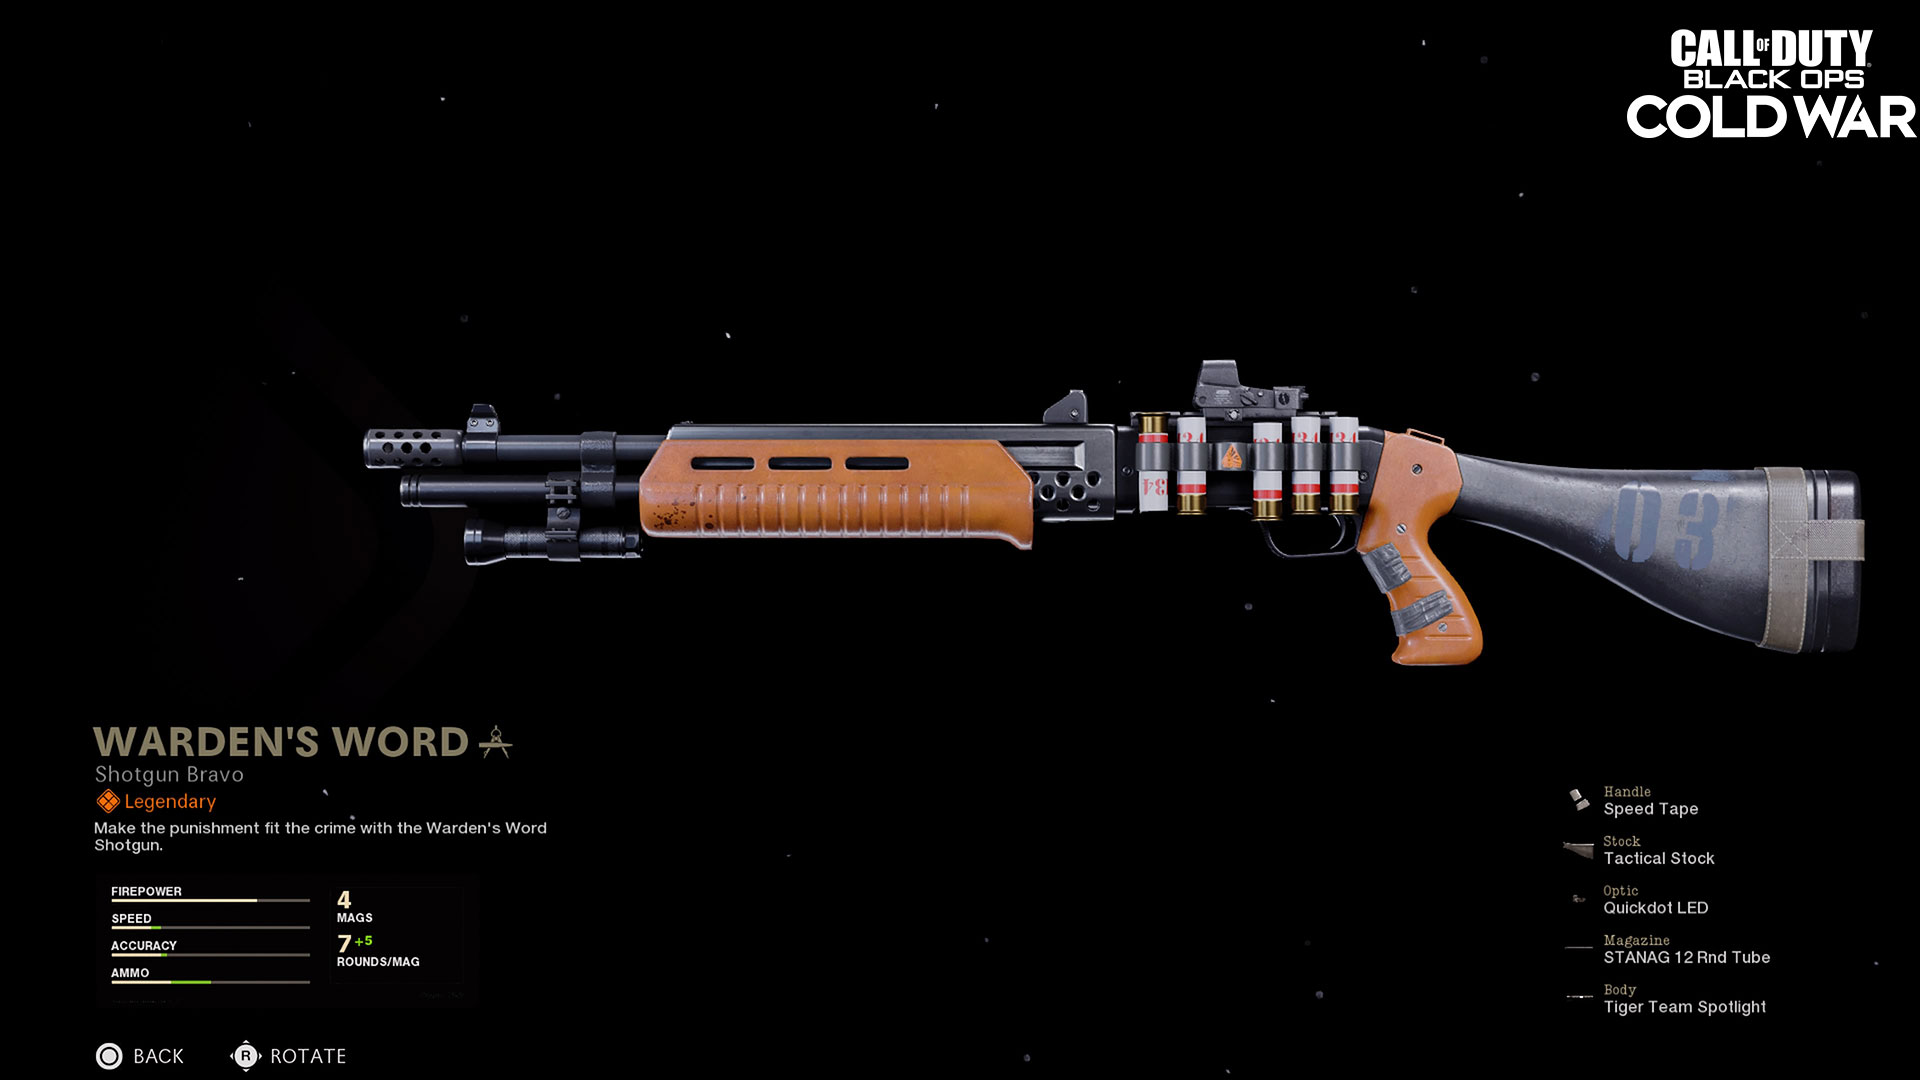
3. Shotguns for Objectives in Close Quarters
Before reaching the Assault Rounds, there’s a main objective that involves defending collection units across the facility in mostly CQB situations. This is where shotguns of Black Ops Cold War perform at their best, and the “Warden’s Word” Blueprint, which is a free unlock at Tier 55 of the Season One Battle Pass system, is an excellent platform to base a successful survival strategy around.
Outside of the STANAG 12 Rnd Tube, a near-necessity in order to adequately feed this semi-auto beast, the “Warden’s Word” comes pre-equipped with the Tiger Team Spotlight. This Body attachment and the Ember Sighting Point are phenomenal for racking up Salvage quickly. More Salvage means more opportunities to upgrade weapons and Armor at the Arsenal, not to mention crafting equipment and Support, so we cannot recommend these attachments enough, as long as you can deal with the drawbacks.
We prefer pairing shotguns up with the Frost Blast or Energy Mine Field Upgrades, two tools to use in close quarters to get out of jams quickly by either freezing zombies or outright eliminating them.

4. Melee Tools: Unconventional, Yet Super Effective
Another great weapon for close quarters, especially in early rounds, is any of the three available melee weapons like Bulldozer’s favorite tool: the Sledgehammer.
Melee weapons are pure point plays; a melee kill is worth just as much Essence as a Critical Kill (115), and after upgrading the Melee Skill to Tier II with enough Raw Aetherium Crystals, these tools are one-hit knockouts without any upgrades through Round 11. When using these weapons in a Primary Loadout, it’s often best to use that excess Essence to head for the Mystery Box and attempt to roll a strong ranged weapon, or get a Wall Buy gun to fend off deadlier creatures like the Mimic.
Even in a worst-case scenario, these melee weapons can be upgraded and Pack-a-Punched, making them viable in later rounds and in panic situations when the horde starts to surround you. As for a Field Upgrade, it might be smart to use the Aether Shroud, as those five seconds of invulnerability (or eight, when upgraded) can get help you out of situations where there are too many zombies to melee through to safety.
Gunsmith Blueprint of the Week
Our fifth loadout that we recommend syncs up with the Weapon Blueprint we want to highlight this week: the “Crimson Dozer” assault rifle, the other Blueprint featured in the “Zombie Dozer” bundle.
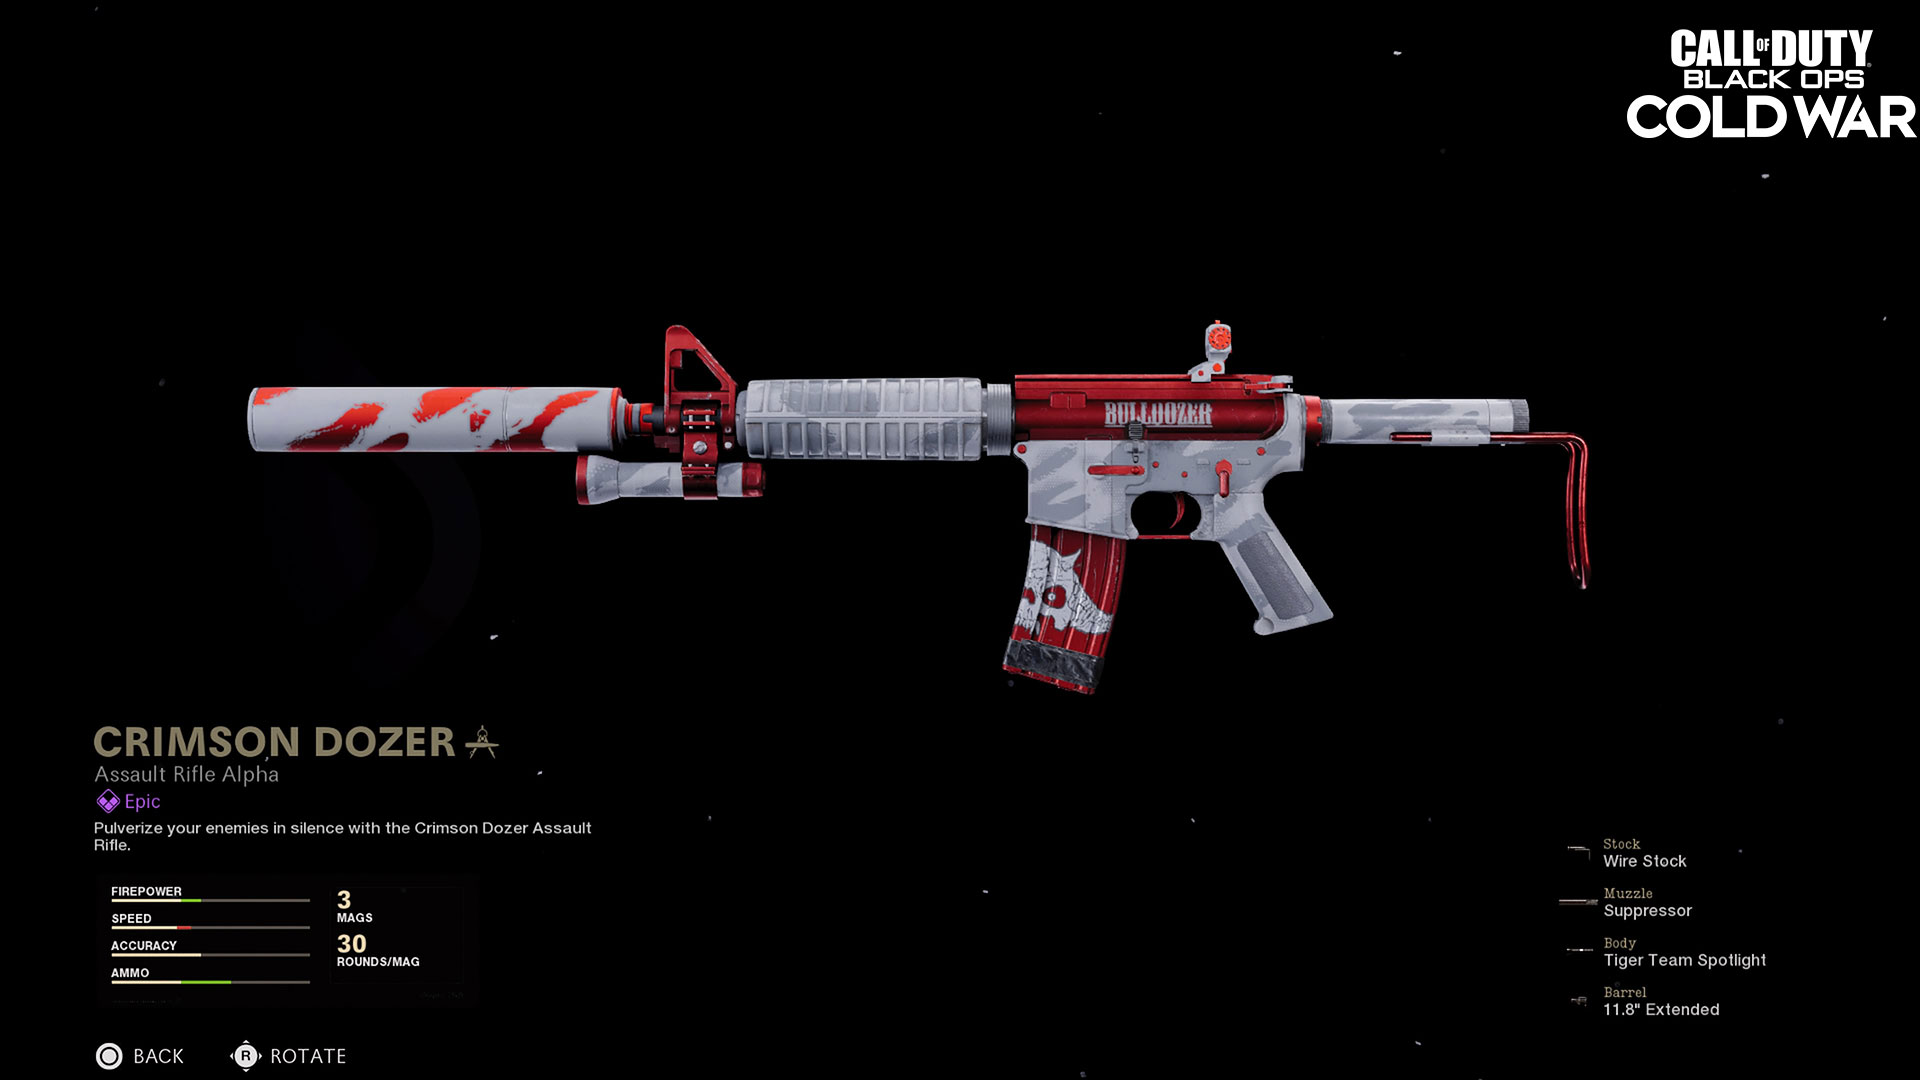
This is the definition of a weapon with massive potential; when Pack-a-Punched, this assault rifle is an absolute jack-of-all-trades force against all threats. Even before it goes through that transformation, it’s a solid weapon for Operators of all skill levels, as its recoil pattern is easy to manage (or mitigate, with attachments), and its high fire rate make it a forgiving weapon if a shot or two misses its mark.
The “Crimson Dozer” comes with four attachments pre-equipped, including the Tiger Team Spotlight and its awesome Salvage Drop boost, as well as the Wire Stock, which slightly counters the Tiger Team Spotlight’s Sprint to Fire debuff. It might be good to keep the Blueprint’s included Suppressor as well, due to its increased Equipment Drop Rates, but you may want to swap the included Barrel out for one that boosts Effective Damage Range should you use this weapon down range during Assault Rounds.
In addition to these attachments, we recommend adding the highest capacity magazine you can to this weapon as a fifth attachment – ideally the Salvo 50 Rnd Fast Mag – so that it can handle larger waves better. Should you have an additional three attachment slots thanks to some upgrades, it doesn’t hurt to also add the Optic of your choosing, a Field Agent Grip for better recoil control, and any Handle that increases ADS speed to counter any penalties that a bigger magazine would bring.
Execute the mission.
For more information on Call of Duty®: Black Ops Cold War, check out: www.callofduty.com, www.youtube.com/callofduty and follow @Treyarch, @RavenSoftware, and @CallofDuty on Twitter, Instagram, and Facebook.
© 2021 Activision Publishing, Inc. ACTIVISION, CALL OF DUTY, CALL OF DUTY BLACK OPS, CALL OF DUTY WARZONE and WARZONE are trademarks of Activision Publishing, Inc.
For more information on Activision games, follow @Activision on Twitter, Facebook, and Instagram.
