
Firing Range
Advanced Map Tips
Map Focused Loadouts
Prebrief

Deploy to Firing Range, returning for Black Ops 6 in a faithful remaster of the fan-favorite map. Fight for control of the center Tower, weave between shooting targets moving back and forth on their tracks, and perfect your marksmanship with crossfire down the main Road. Whether you’re new to the map or a veteran redeploying to the site, use this guide to help hit the bullseye and secure victory.


-
Show areas

-
Show hardpoints

-
Show domination flags

-
Show search & destroy sites

-
Show spawn points

-
Reset all overlays

POI Overview
Explore the following points of interest based on key areas around Firing Range. Click “Learn More” at the bottom of each image for additional tips and insights on the POI.

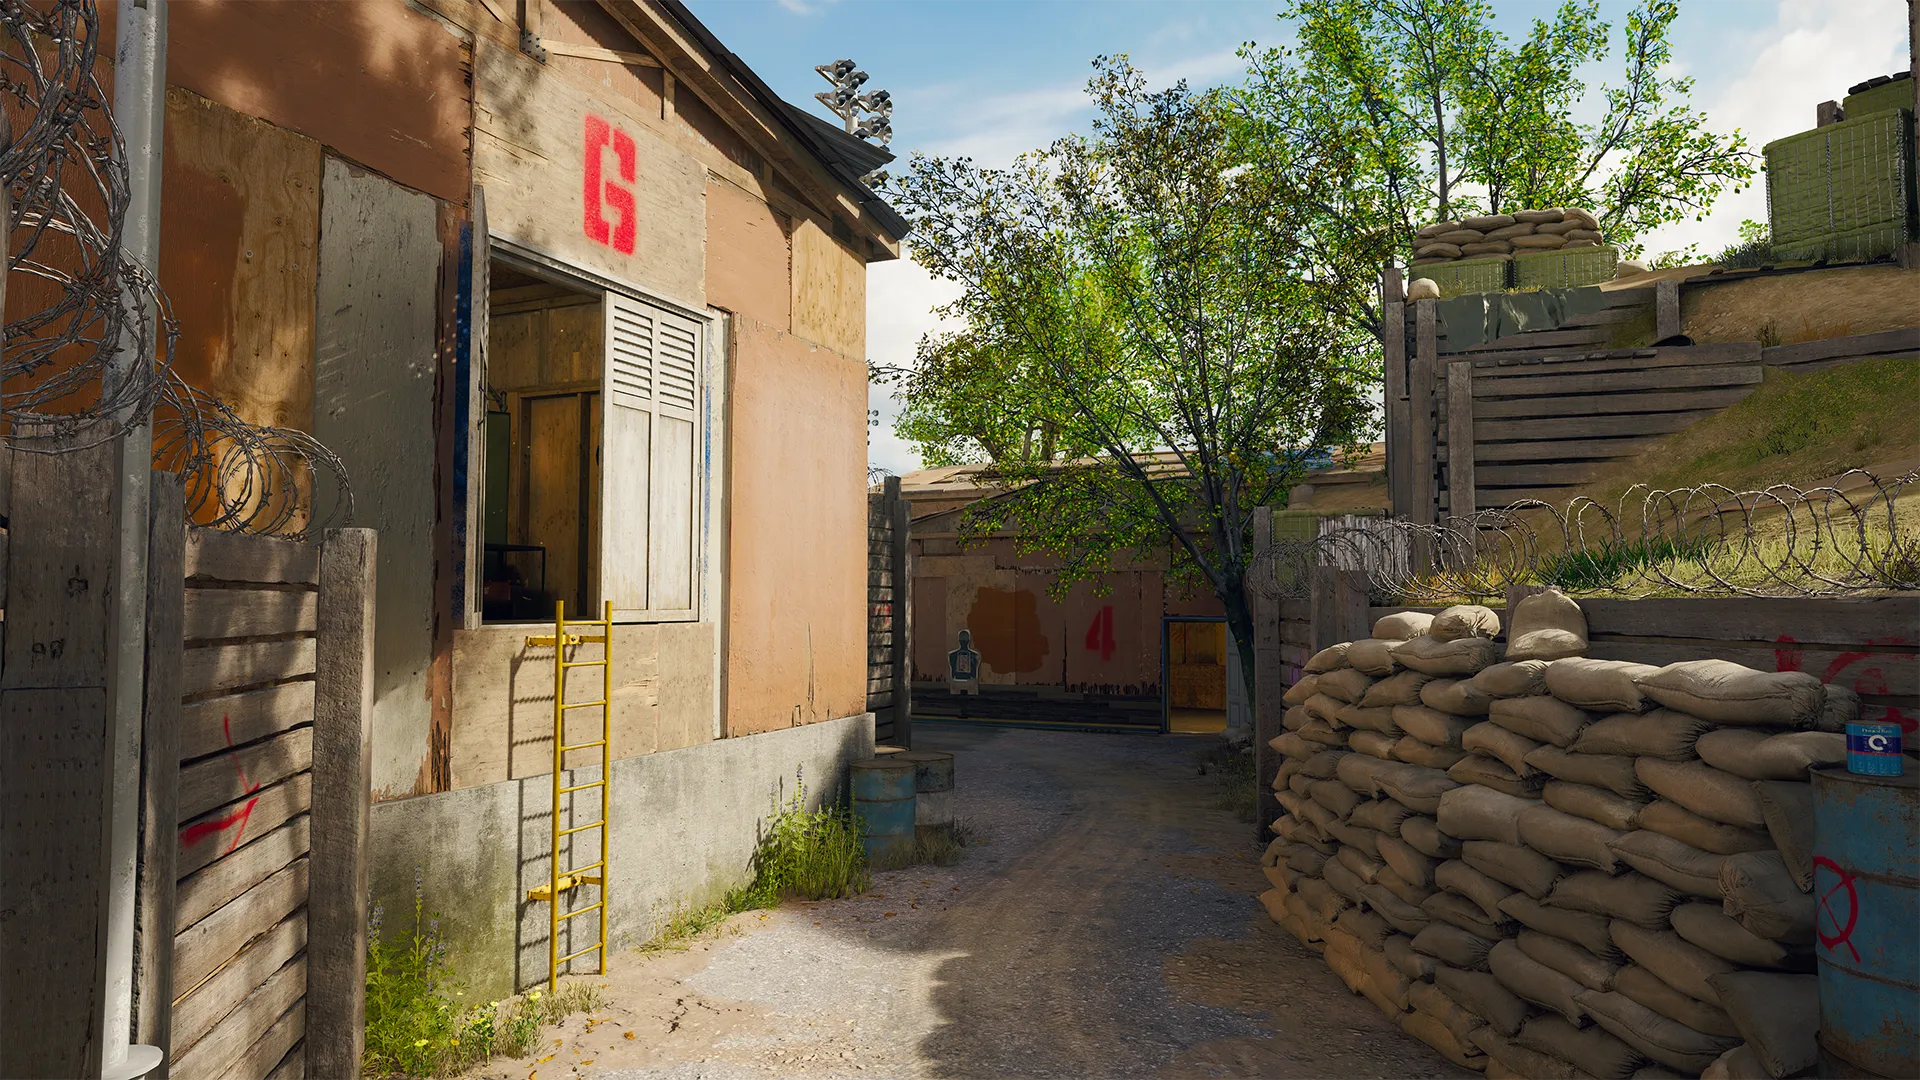
Main Spawn Point: Road
Enter via the Road next to the Showers, set back far enough to land distant shots against enemies incoming from the map interior. The Showers and covered shed offer some immediate cover in the area before branching out to the Shoot House and beyond. All three lanes converge here, so pick your route and start slaying.


// INTEL CARD
- BO6
Firing Range
// MULTIPLAYER MAPS // CORE

Trial by fire: The map’s center is flanked by multiple power positions along an open road, leading to constant crossfire in the area. If you can get into a strong position, though, this can be a huge advantage, providing target after target to feed your Scorestreaks.
A road less traveled: If the center’s not cutting it, set up a flanking path by the Dirt Road, Containers, or Range, cutting off enemies on the way. You might even try securing the back of the Office, catching targets near the center without exposure to the Tower and other power positions.
Enemy spotted: Equip the Engineer Perk or aim for the Strategist Combat Specialty to see enemy equipment through walls, helping you detect potential threats along dangerous routes like the center, Dirt Road, and Containers.
Advanced Map Tips
Hidey Hold — Alpha (A)
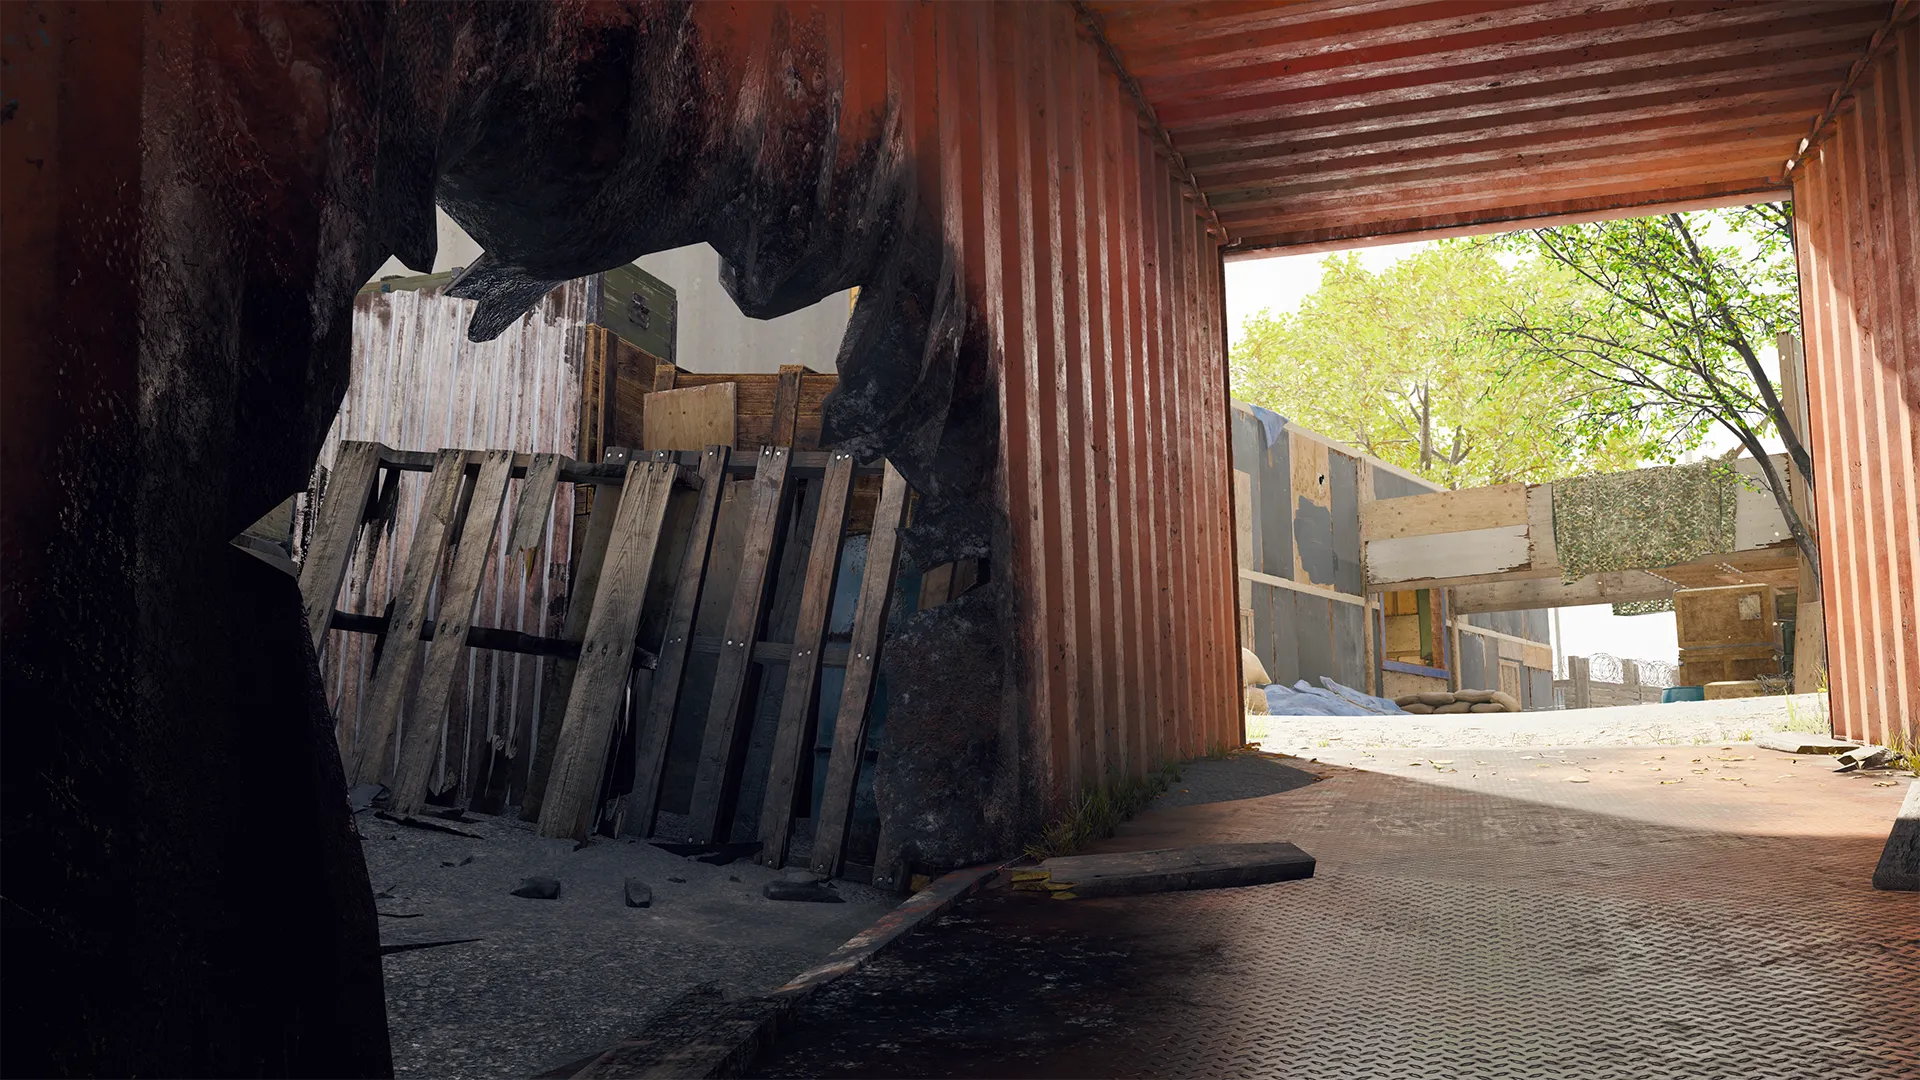
Blink and you’ll miss an opening blasted into the side of the shipping crate near Containers. It’s just large enough to hold an Operator or two and offers an ideal ambush point against targets racing through the crate. Use it for your own ambush purposes or toss a grenade in if you suspect an enemy waiting to pounce from within.
Shoot House Hero — Beta (B)
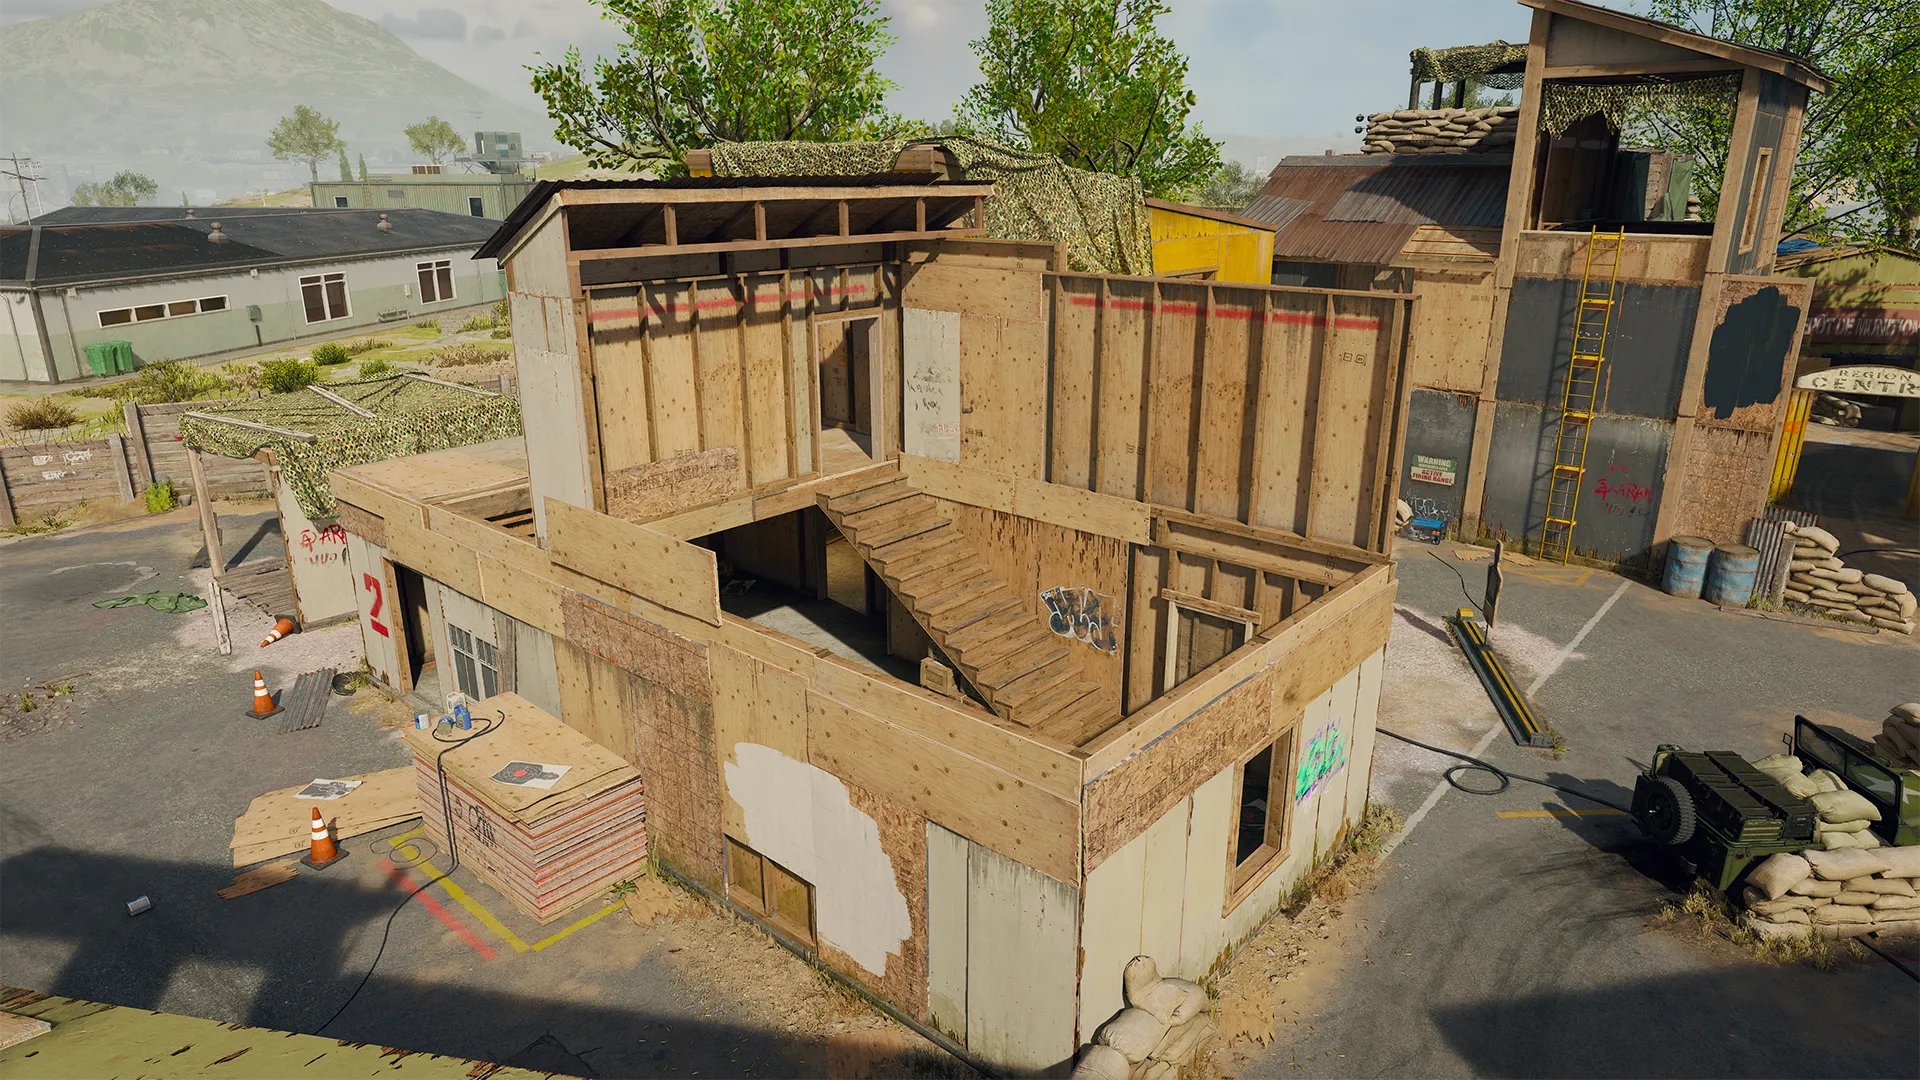
The Shoot House is a high risk, high reward location that’s worth squeezing every advantage out of. Two points often missed are the opening in the roof by the staircase, allowing you to drop down and surprise enemies on the first floor, and the ability to jump on top of the covered shed behind the building, maintaining your height advantage with a clear sightline down the Dirt Road.
Dirty Tricks — Gamma (Γ)
Be on your guard when passing the Storage building on the Dirt Road, another point where the risk of ambush escalates. As with the blasted hole in the shipping crate, a grenade can help dislodge any foes within, clearing the spot for your own use. Deploy a Trophy System to avoid a similar fate.
Map Focused Loadouts
Hit all your targets down range with these suggested Loadouts built for success on Firing Range.
Crossroads Gunner
LMG, Strategist Combat Specialty
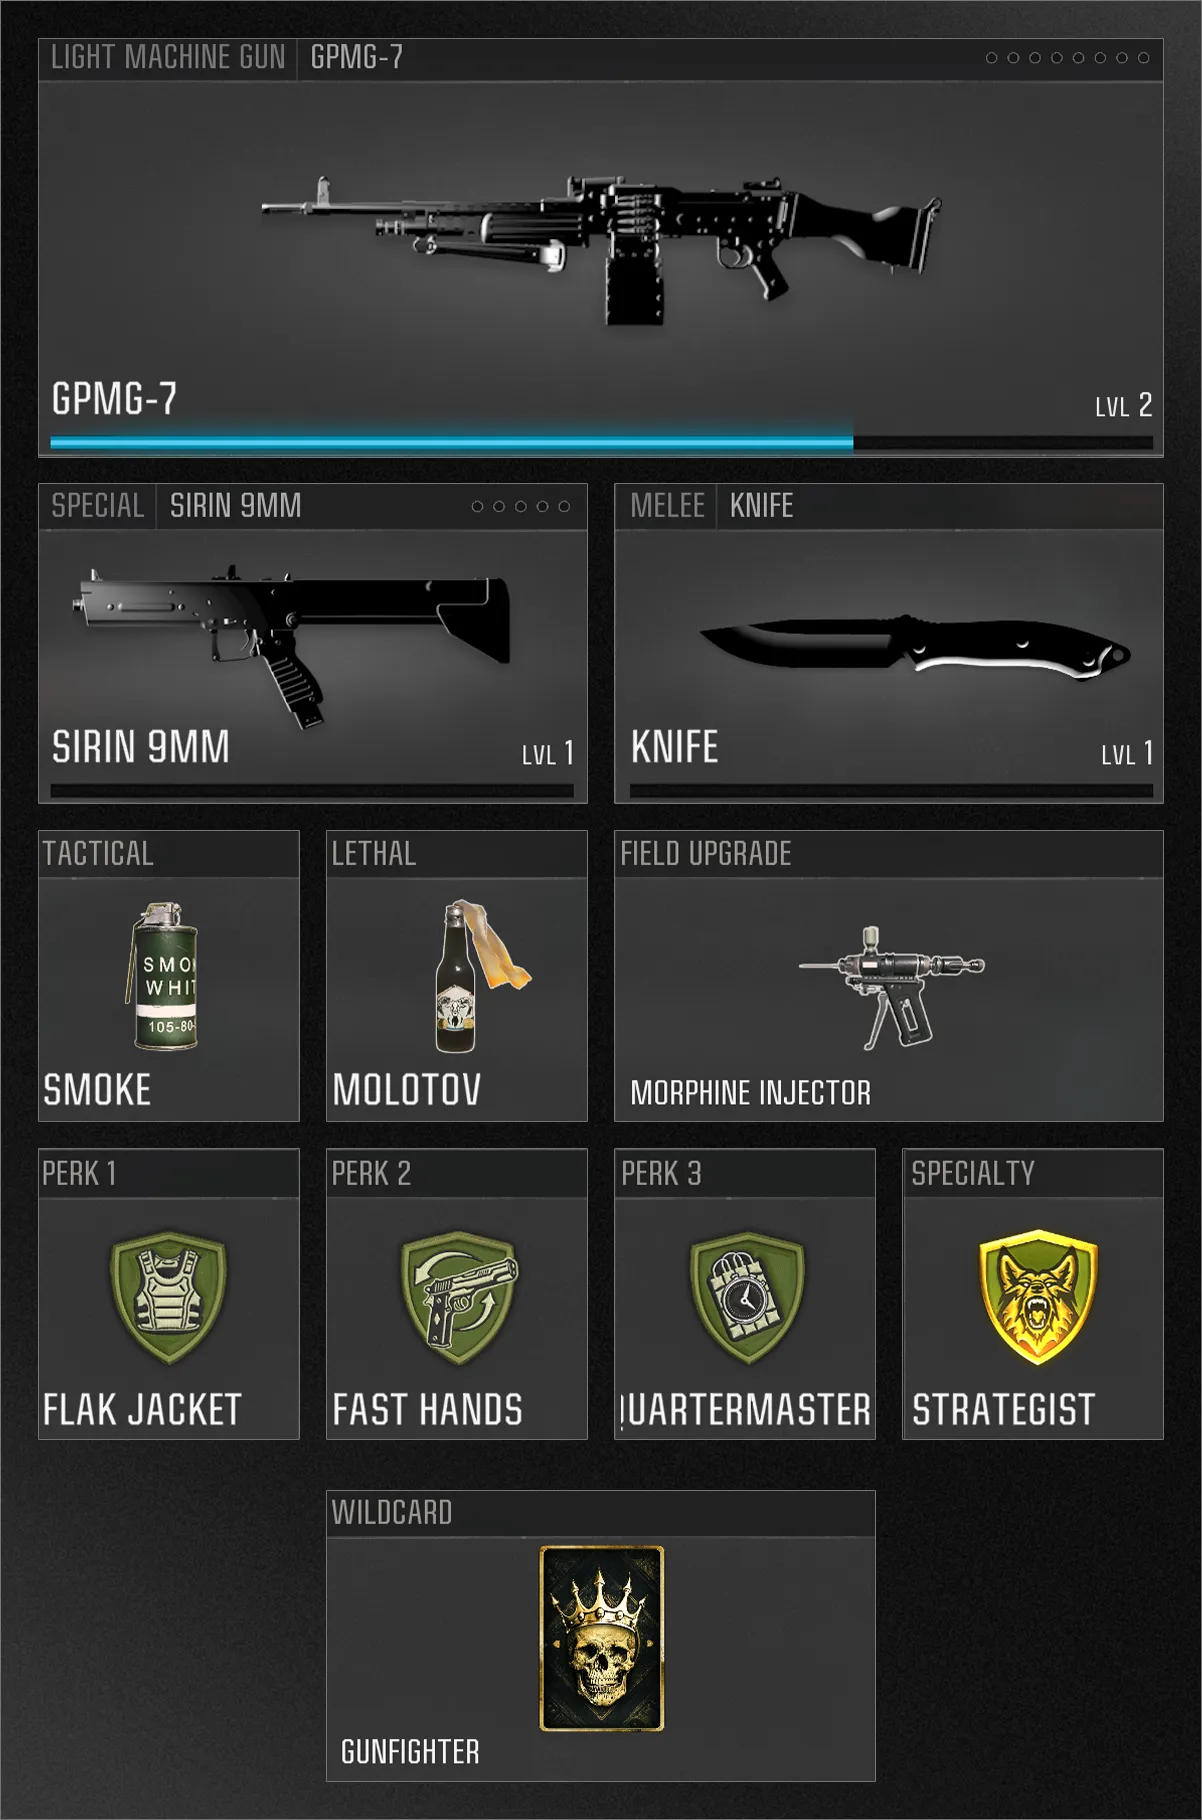
The action rarely lets up around the Tower and crossroads as Operators trade shots across the Road and between the various buildings. Post up and get aggressive with this high-damage, fast-firing LMG Loadout that ensures you’ve got plenty in the tank before needing to duck out for a reload.
If you draw too much attention, toss your Smoke Grenade and relocate, with the Morphine Injector giving you a second chance if you go down. Equip Flak Jacket to help shrug off enemy explosives and Fast Hands to swap more quickly to the Sirin 9mm when you need something better suited to close combat.
Scout
Assault Rifle, No Combat Specialty
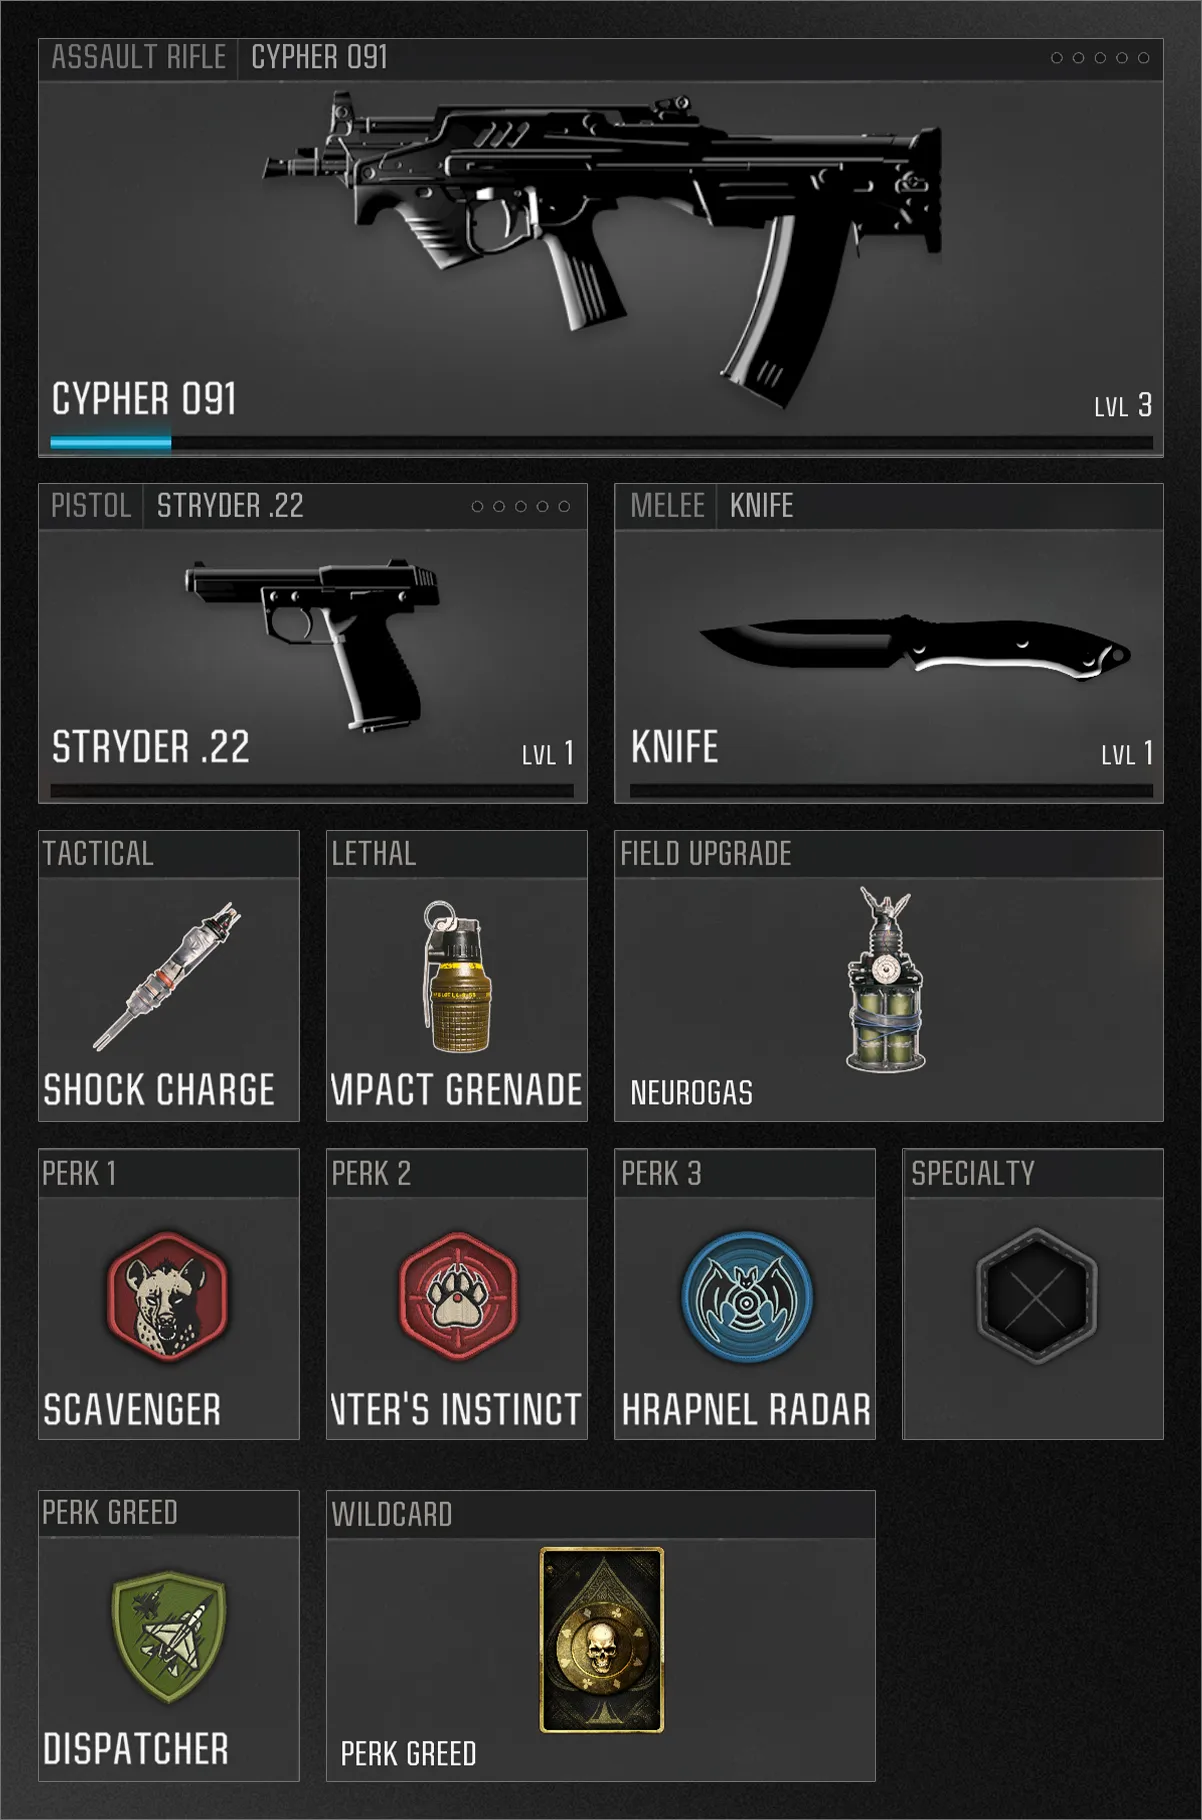
Amass intel on the enemy’s position with this Loadout featuring several means of lighting up your minimap. Reveal enemies via Shrapnel Radar when damaging them with your Impact Grenade — refillable via Scavenger — and mark the direction of the next closest enemy whenever you land an elimination. With Dispatcher, you’ll also earn non-lethal Scorestreaks more quickly such as the Scout Pulse or UAV.
Enemy on your tail? Drop your Neurogas to disorient and damage them, then turn around and finish the job. Though this Loadout doesn’t unlock a Combat Specialty, its rainbow of Perks makes for a powerful skillset focused on keeping the intel coming so that you’re always one step ahead.
Shoot House Slugger
SMG, Enforcer Combat Specialty
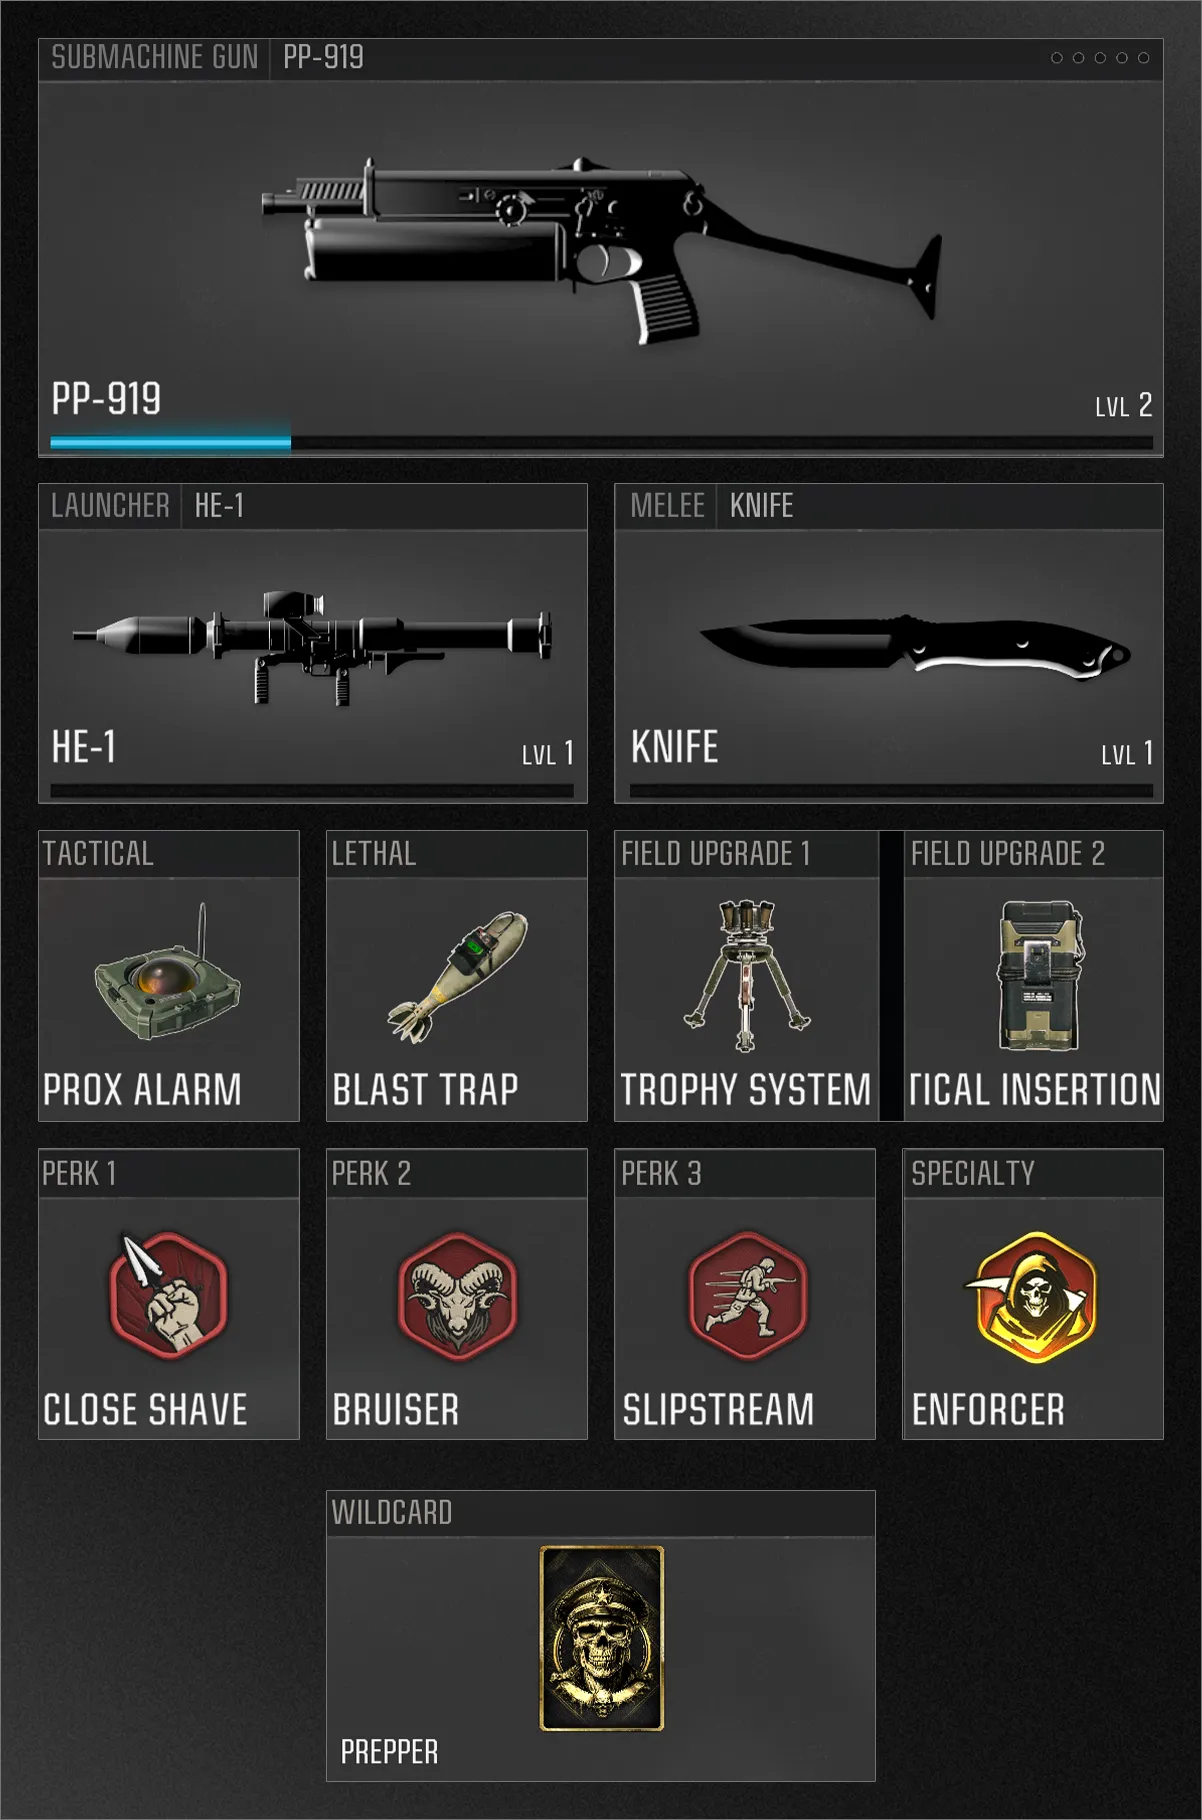
Choose your Dedicated Melee Weapon of choice and start slugging with this melee optimized build that pairs the new Season 03 Close Shave Perk with Bruiser, making it easier to eliminate Operators up close and rewarding your melee takedowns with health replenishment and extra score.
Keep tabs on your flank with the Prox Alarm and Blast Trap and place your Tactical Insertion to keep your spot when stationed in power positions like the Shoot House and Garage. Use Prepper to add on the Trophy System for defense against explosives and Slipstream to up your base movement speed when it’s time to reposition.
© 2024-2025 Activision Publishing, Inc. ACTIVISION, CALL OF DUTY, and CALL OF DUTY BLACK OPS are trademarks of Activision Publishing, Inc. All other trademarks and trade names are the property of their respective owners.
For more information, please visit www.callofduty.com and www.youtube.com/callofduty, and follow @Activision and @CallofDuty on X, Instagram, and Facebook. For Call of Duty Updates, follow @CODUpdates on X.
