
Nomad
Advanced Map Tips
Map Focused Loadouts
Prebrief
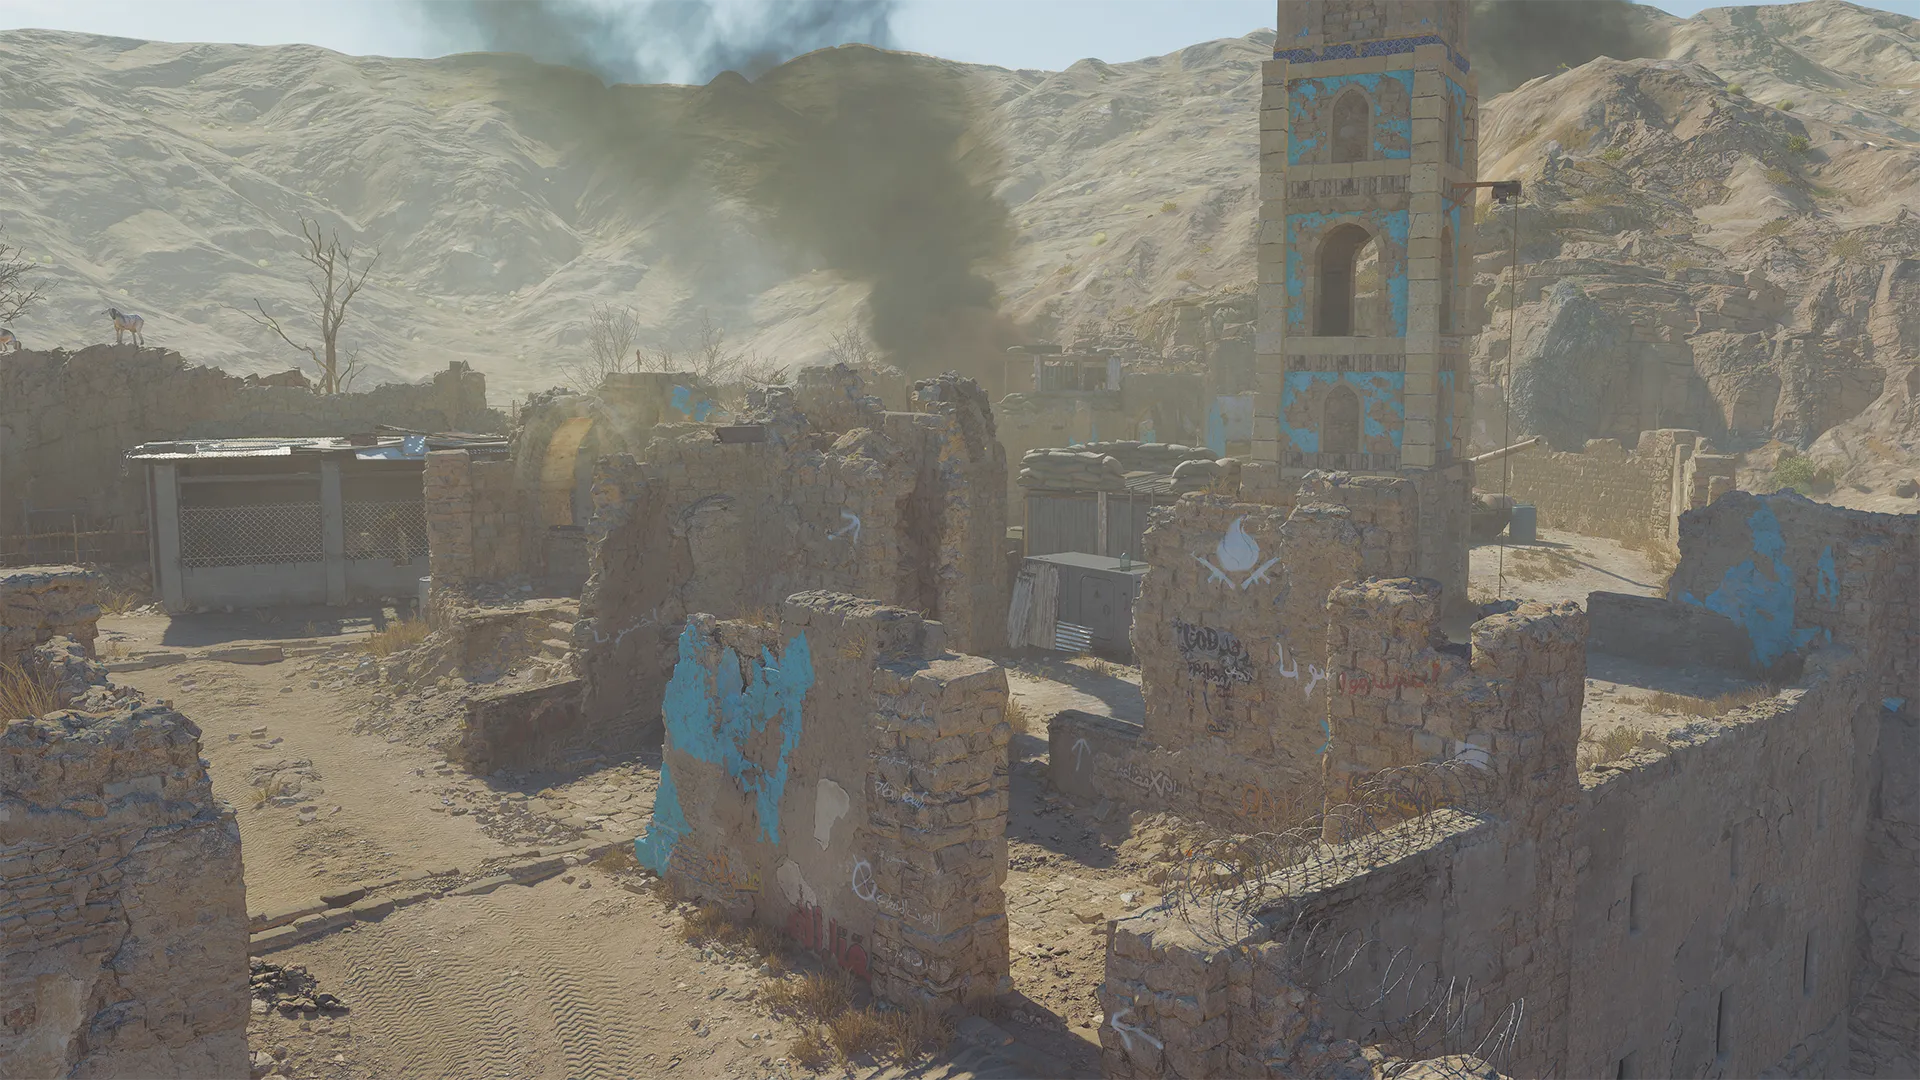
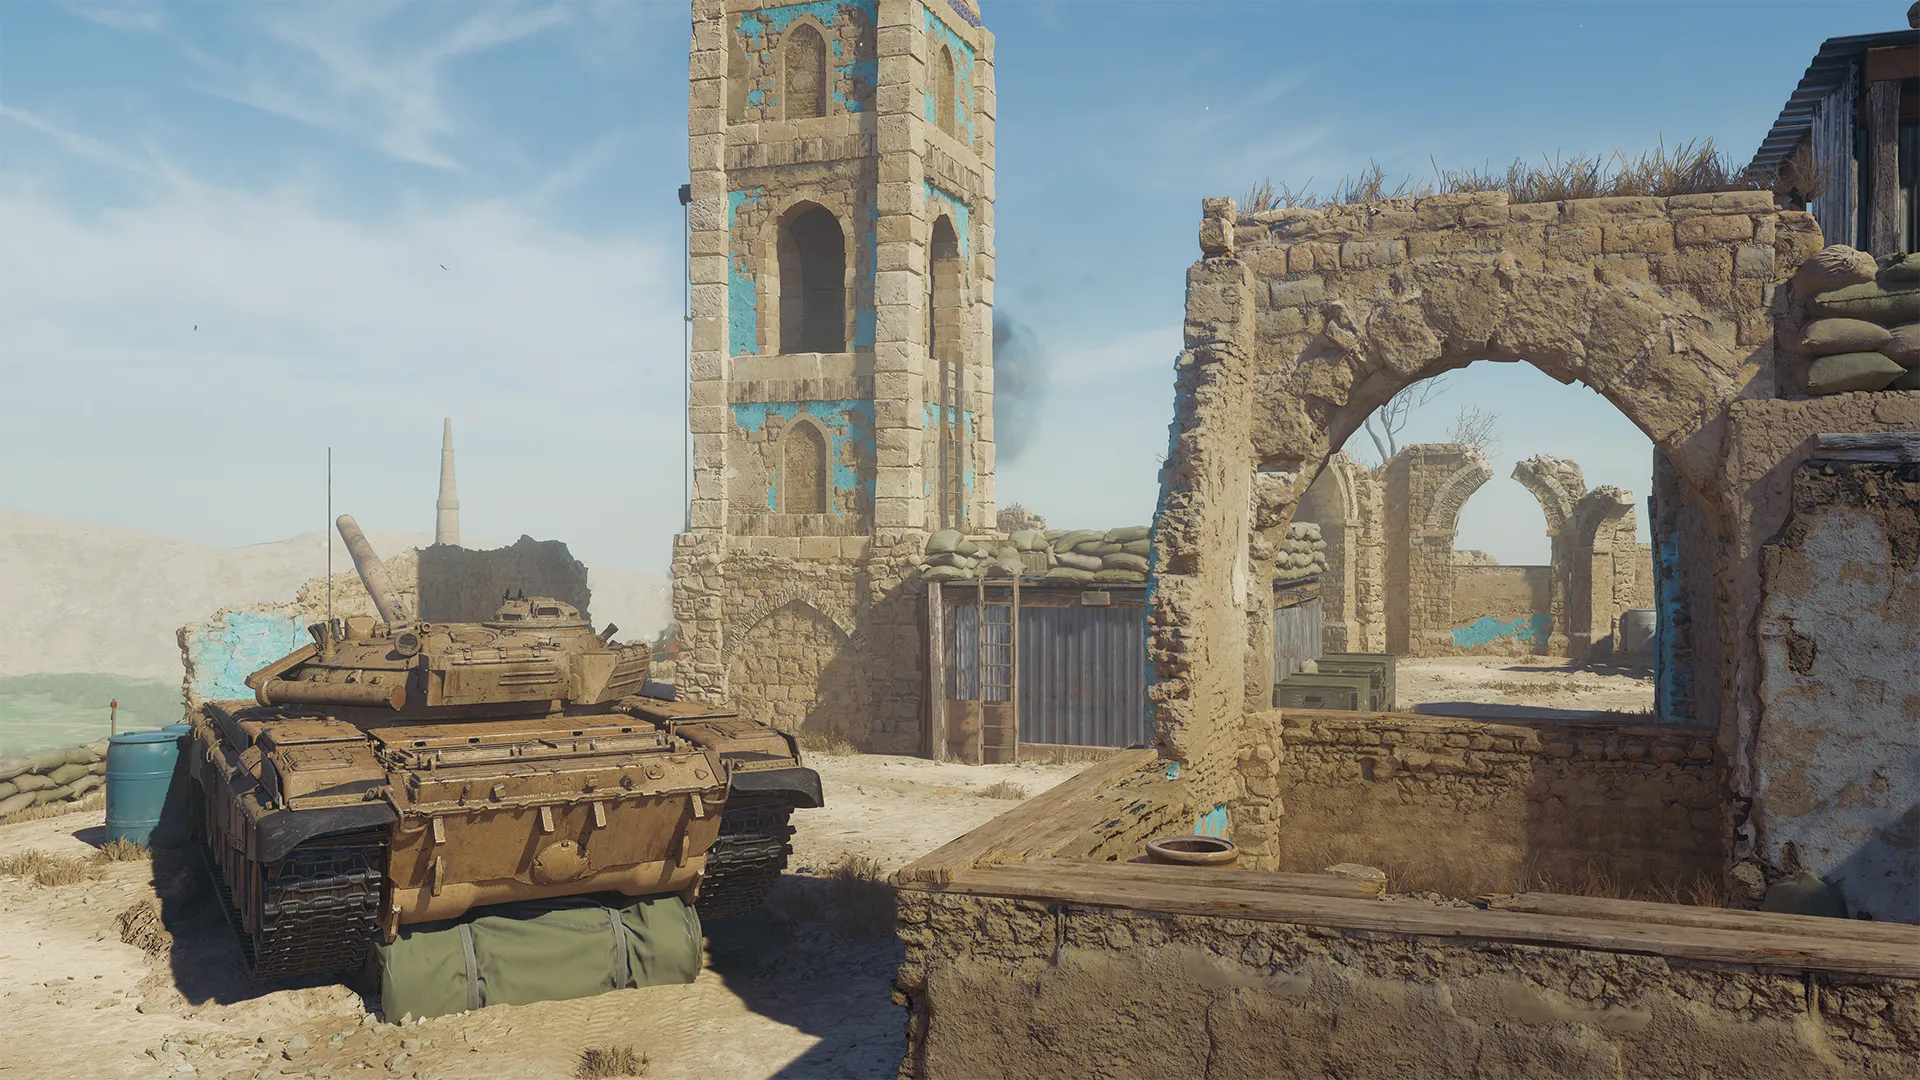
The Pantheon moles were in Afghanistan back when Woods fought here in 1986, now it’s your job to follow Hudson’s clues to find out why. The ruins of Nomad reveal a fortress commandeered for the ensuing battle. A parked missile carrier faces out over the valley where the convoy lies in ruins on the narrow road leading up to where you and your fellow teammates will fight the opposing team.
Navigate the crumbled archways and walls as you engage enemies in the open with the only accessible building being the Tower standing over the center of the map. A zipline offers fast access up and down the coveted position, promising frequent skirmishes for control of its views.


-
Show areas

-
Show domination flags
-
Show spawn points

-
Reset all overlays

POI Overview
You’ll need every advantage you can get on this Strike map. Here are the major points of interest. Click “Learn More” at the bottom of each image for additional tips and insights on the POI.

Main Spawn Point: Horses
This spawn point develops into three main pathways and provides a multitude of options including three additional tactical locations. Utilize the broken wall on the northern side as a sniper lane down the northern edge of the map. Alternatively, there are two semi-interior locations to take cover—one on each side of the center lane. The location on the right happens to be the location of Domination Zone A.


// INTEL CARD
- BO6
Nomad
// MULTIPLAYER MAPS // STRIKE

Crosstown crossfire: The center of the map from the Tower down to the House is a set of buildings that provide hard cover from one half of the map to the other. This also produces several key chokepoints for Nomad. Setting up a crossfire at any of these chokepoints can be key for securing the W.
Sniper Strike: The northern lane on Nomad appears to be built just for the 1v1 Sniper shootout many players seek. From one broken wall window to another, the timing in this location is paramount. Watch out for the crossfire runners on the road.
Flanking routes: Nomad may be a Strike map, but the town is dense and full of cover points that give you the opportunity to break line of sight with enemy Operators rather frequently. Use the layout of the map to slip past enemy defenses by moving swiftly and silently. Work with your team to take down your opponent’s crossfire setups.
Advanced Map Tips
Half-Wall Haven — Alpha (A)
Nomad is covered with Operator-height brick walls that can be used as cover, but more importantly the map is also littered with half-walls that are perfect for utilizing Omnimovement and quick-peek skills. Take advantage of the half-wall at the halfway mark on the southern end of Nomad to peer into either half of the map where most of the central action occurs. If you’re a Recon player who likes to move silently and cover your teammates, try equipping a Prox Alarm and Trophy System to help lock down your position while you defend the objective or a teammate’s location.
Central Counter — Beta (B)
A crossroads in the center of Nomad houses the Domination B zone objective. At either end of the crossroads is an elevated section that looks directly onto the point. Using these elevated platforms gives you a great line of sight on anyone attacking the point; however, you’ll have to compete against Operators taking control of the opposite platform. Work with your team to secure both this point and the opposite location, and this alone will help your team dominate the Tower POI.
Map Focuses Loadouts
Become an elimination artist using these suggested Loadouts made for Nomad.
Vice Grip
Assault Rifle, Recon Combat Specialty
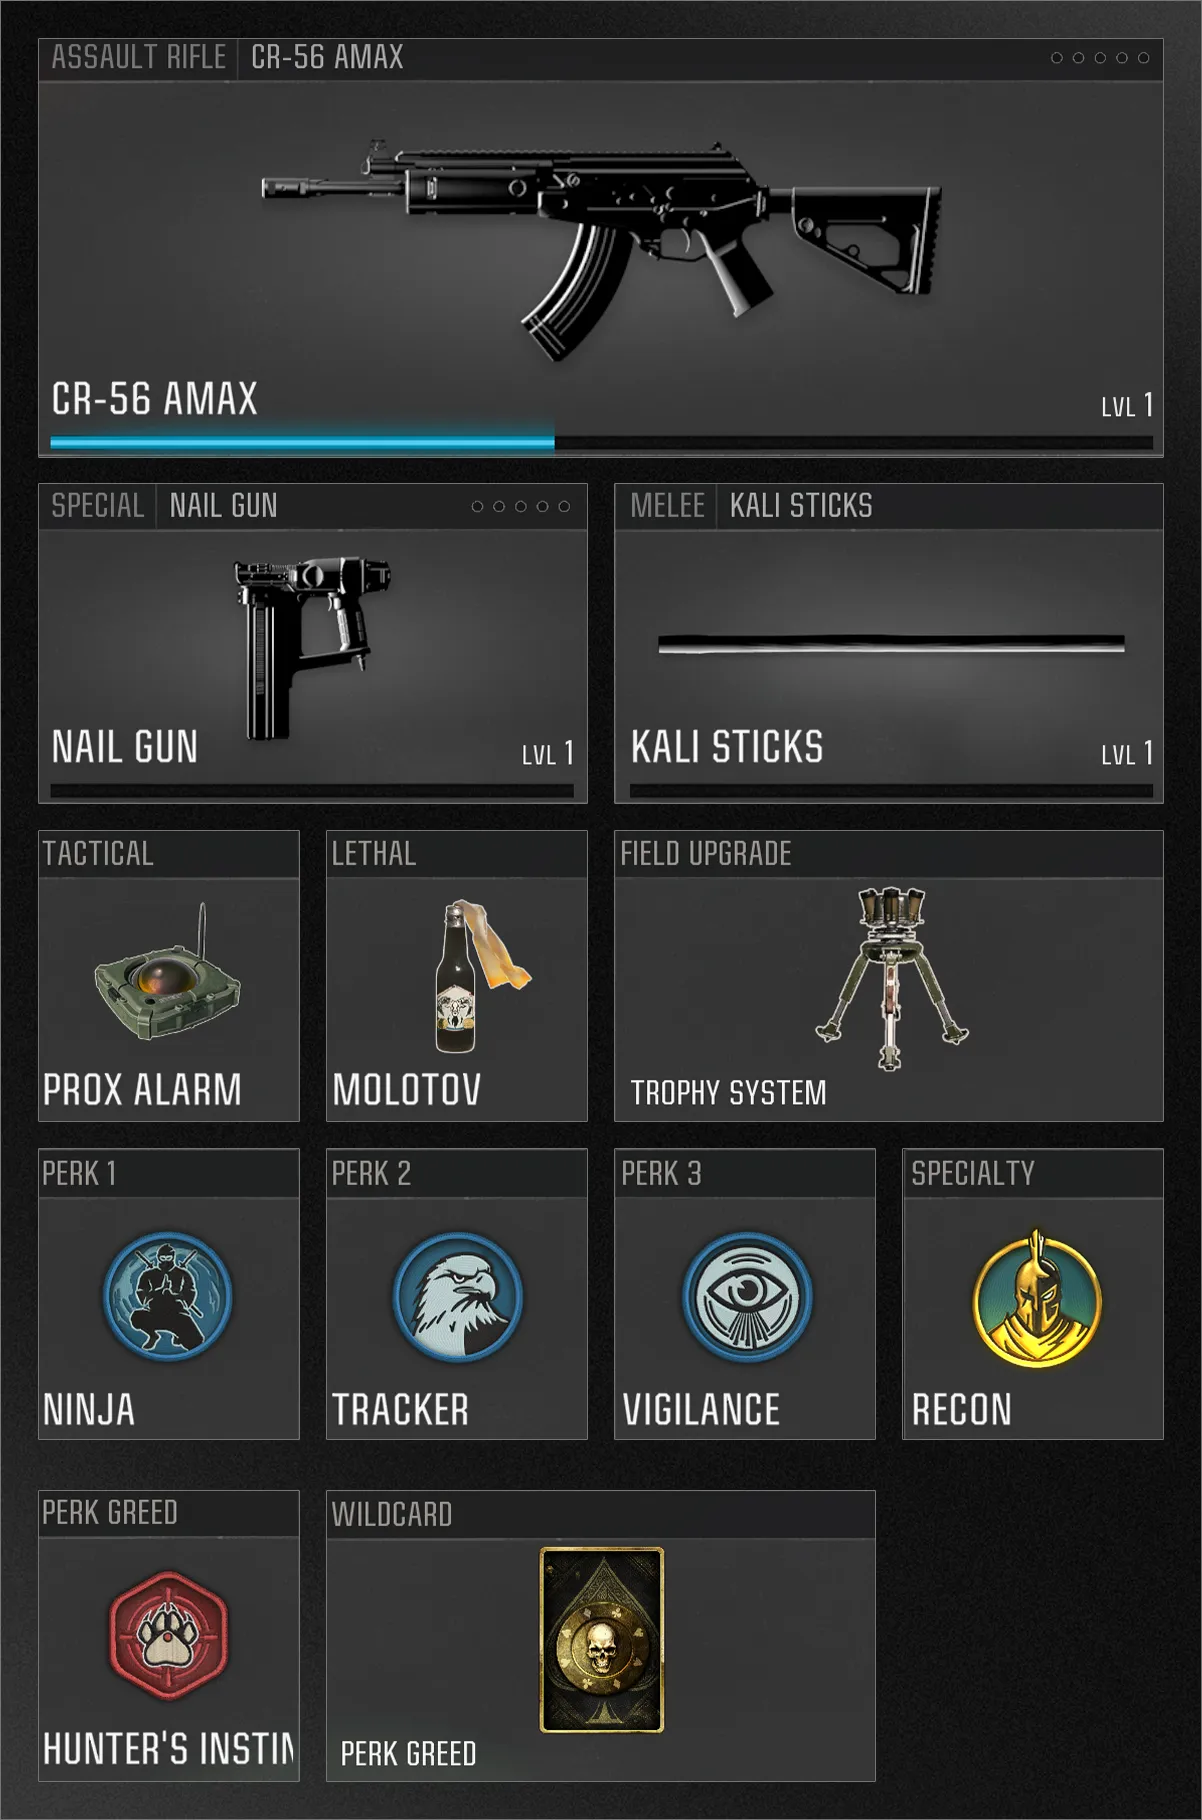
Time to put a vice grip on your position and the adjacent choke point. There are many sightlines through some very tight choke points on Nomad. So you’ll need a Loadout that both gives you the firepower to hold down a position and the freedom to outmaneuver any opponent attempting to get the drop on you. With the new CR-56 AMAX equipped, you can pack a real punch while still being able to swing a corner on an enemy location you were just alerted to.
Challenger
Sniper Rifle, Enforcer Combat Specialty
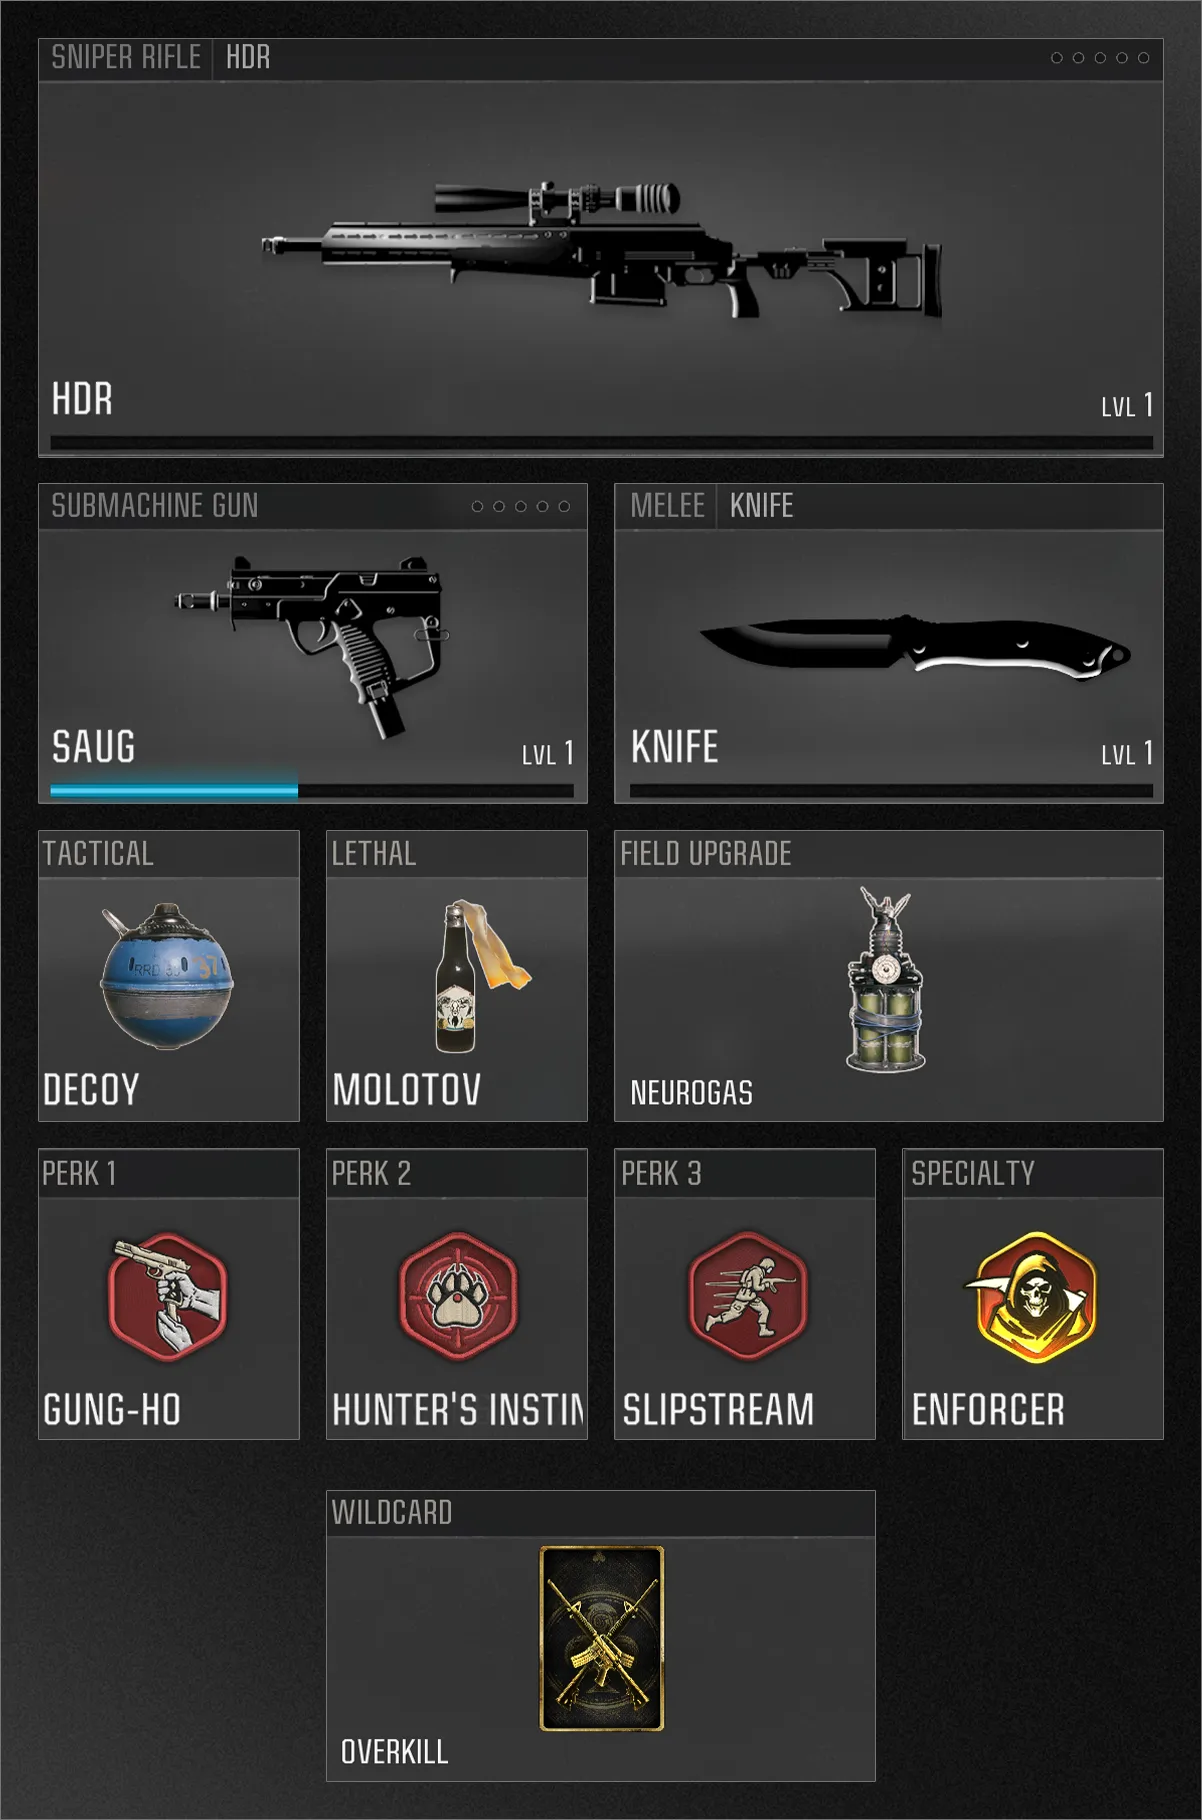
On Nomad, there’s no shortage of chokepoints or hot spots to challenge. Whether it be the highly trafficked Tower, or near one of the main spawn points, there will always be something or someone to challenge for dominance. If you’re quick on the trigger, watching over any of the medium-ranged stretches or even one of the common peaking positions is no problem for the HDR. With a hard-hitting Sniper Rifle and fast-firing SMG as a backup, you can be the ultimate aggressor at any point on the map. Try not to stay in one spot for too long, and when you leave, don’t forget to drop your Neurogas Field Upgrade at the spot where you just secured a few eliminations. This way, when the enemy seeks revenge on your position, you’ll have a nice present waiting for them.
The Seeker
LMG, Strategist Combat Specialty
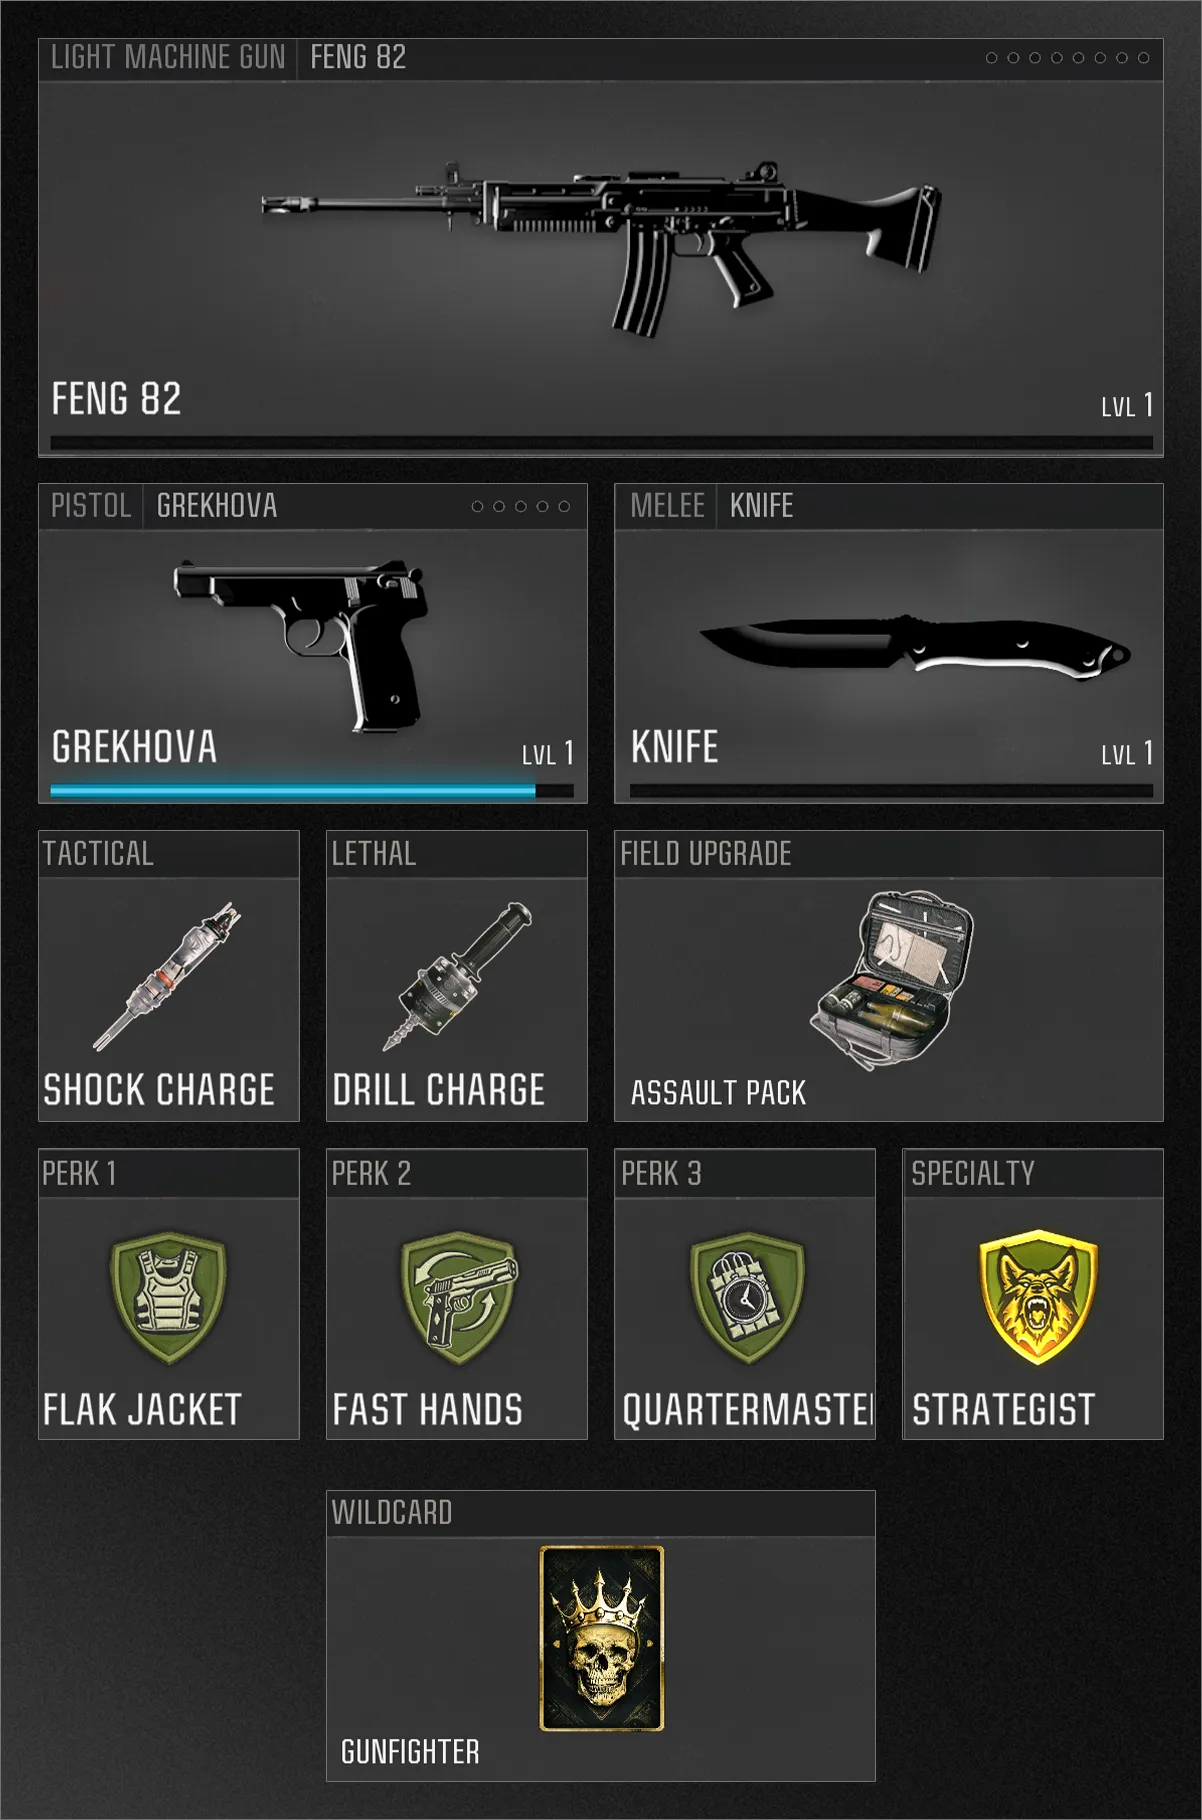
Opposite of the Vice Grip Loadout, The Seeker’s main goal is to seek and destroy the enemy and eliminate them. Additionally, with the Strategist Combat Specialty, stopping to complete an objective or attacking one will support your endeavors in destroying anything that can stop your carnage. Stay sturdy against explosives and never get caught sans ammo with an automatic pistol on your hip.
© 2025 Activision Publishing, Inc. ACTIVISION, CALL OF DUTY, and CALL OF DUTY BLACK OPS are trademarks of Activision Publishing, Inc. All other trademarks and trade names are the property of their respective owners.
For more information, please visit www.callofduty.com and www.youtube.com/callofduty, and follow @Activision and @CallofDuty on X, Instagram, and Facebook. For Call of Duty Updates, follow @CODUpdates on X.
