Modern Warfare III: Weapons and Loadouts

- Prebrief
- Weapons and Multiplayer Loadouts
- Intel Card — Loadouts I
- Intel Card — Loadouts II
- Intel Card — Loadout Idea: Running Exploder
- Primary and Secondary Weapons
- Intel Card — Primary Weapons
- Intel Card — Secondary Weapons
- When in Doubt, Melee Out
- Finishing Moves
- Intel Card — Finishing Moves
- Gunsmith
- Intel Card — Gunsmith
- Attachments
- Intel Card — Loadout Idea: All Out Assault
- Intel Card — MCW Attachment Setup
- Modifications
- Weapon Stats
- Intel Card — Weapon Stats
- Weapon Platforms and Attachment Streamlining
- Intel Card — Loadout Idea: Self-Sufficient Sniper
- Weapon Class–Specific Attachments
- Universal Attachments
- Aftermarket Parts
- Intel Card — Aftermarket Parts
- Customization and Progression — Camouflages, Stickers, and More
- Vests
- Intel Card — Infantry Vest
- Intel Card — Engineer Vest
- Intel Card — Gunner Vest
- Intel Card — Demolition Vest
- Intel Card — CCT Comms Vest
- Intel Card — Commando Vest
- Equipment
- Intel Card — Loadout Idea: Tactical Sweeper
- Intel Card — Striker Attachment Setup
- Tactical Equipment
- Intel Card — Tactical Equipment
- Lethal Equipment
- Intel Card — Lethal Equipment
- Field Upgrade
- Intel Card — Field Upgrade
- Gloves
- Intel Card — Gloves
- Boots
- Intel Card — Boots
- Gear
- Intel Card — Gear
- Killstreaks
- Intel Card — Killstreaks
Perfect the tried-and-true techniques of Loadout creation and weapon mastery. Use this guide to dig into the ins and outs of what makes a Loadout effective. These are the tools of the trade that will make you the best Call of Duty® player possible.
Prebrief
Learning how to be effective in Call of Duty®: Modern Warfare® III is an extensive but extremely fun journey. Once you’ve experienced a few matches and earned your way to Level 4 and have gained access to Custom Loadouts, it is now time to use this feature to its fullest. Custom Loadouts is the real core of what gives players the tools to play at their best. Follow this guide to learn how to use the tools made for Operators to utilize all of their skills.
Weapons and Multiplayer Loadouts
// INTEL CARD
- MWIII
- WZ
- WZM
Loadouts I
// MULTIPLAYER: PRE-GAME // WEAPONS AND LOADOUTS

Play the way you want: Your Loadout should be tailored to how you approach each combat. Remember the reason you put together your Loadout for the greatest chance of success.
Play your Loadout the way you designed: You aren’t beholden to your Loadout; that’s what makes Call of Duty so intuitive to every level of player. But playing to your chosen Loadout’s strengths is usually a good idea.
Not sure? Try an Assault Rifle: Not sure which type of Loadout to make? Start with an Assault Rifle. ARs are generally meant for medium-range use, but they are versatile at shorter or longer ranges too.

// INTEL CARD
- MWIII
- WZ
- WZM
Loadouts II
// MULTIPLAYER: PRE-GAME // WEAPONS AND LOADOUTS

Premade Loadouts are great starts: Look at the premade Loadouts, and get a feel for what they are built for. You will learn which weapons and equipment are more straightforward to use first, before experimenting with more advanced Loadouts.
Make the Loadout that fits YOU: Your eventual Loadout should be tailored to you! Individual elements (e.g., weapons, equipment, Gear, and Field Upgrades) should work in unison for a mode, map, or your general playstyle. Crafting effective Loadouts is the key to gaining tactical advantages during games.
Firing Range: Use the Firing Range if you’re not sure what each piece of your Loadout does.

The Basics
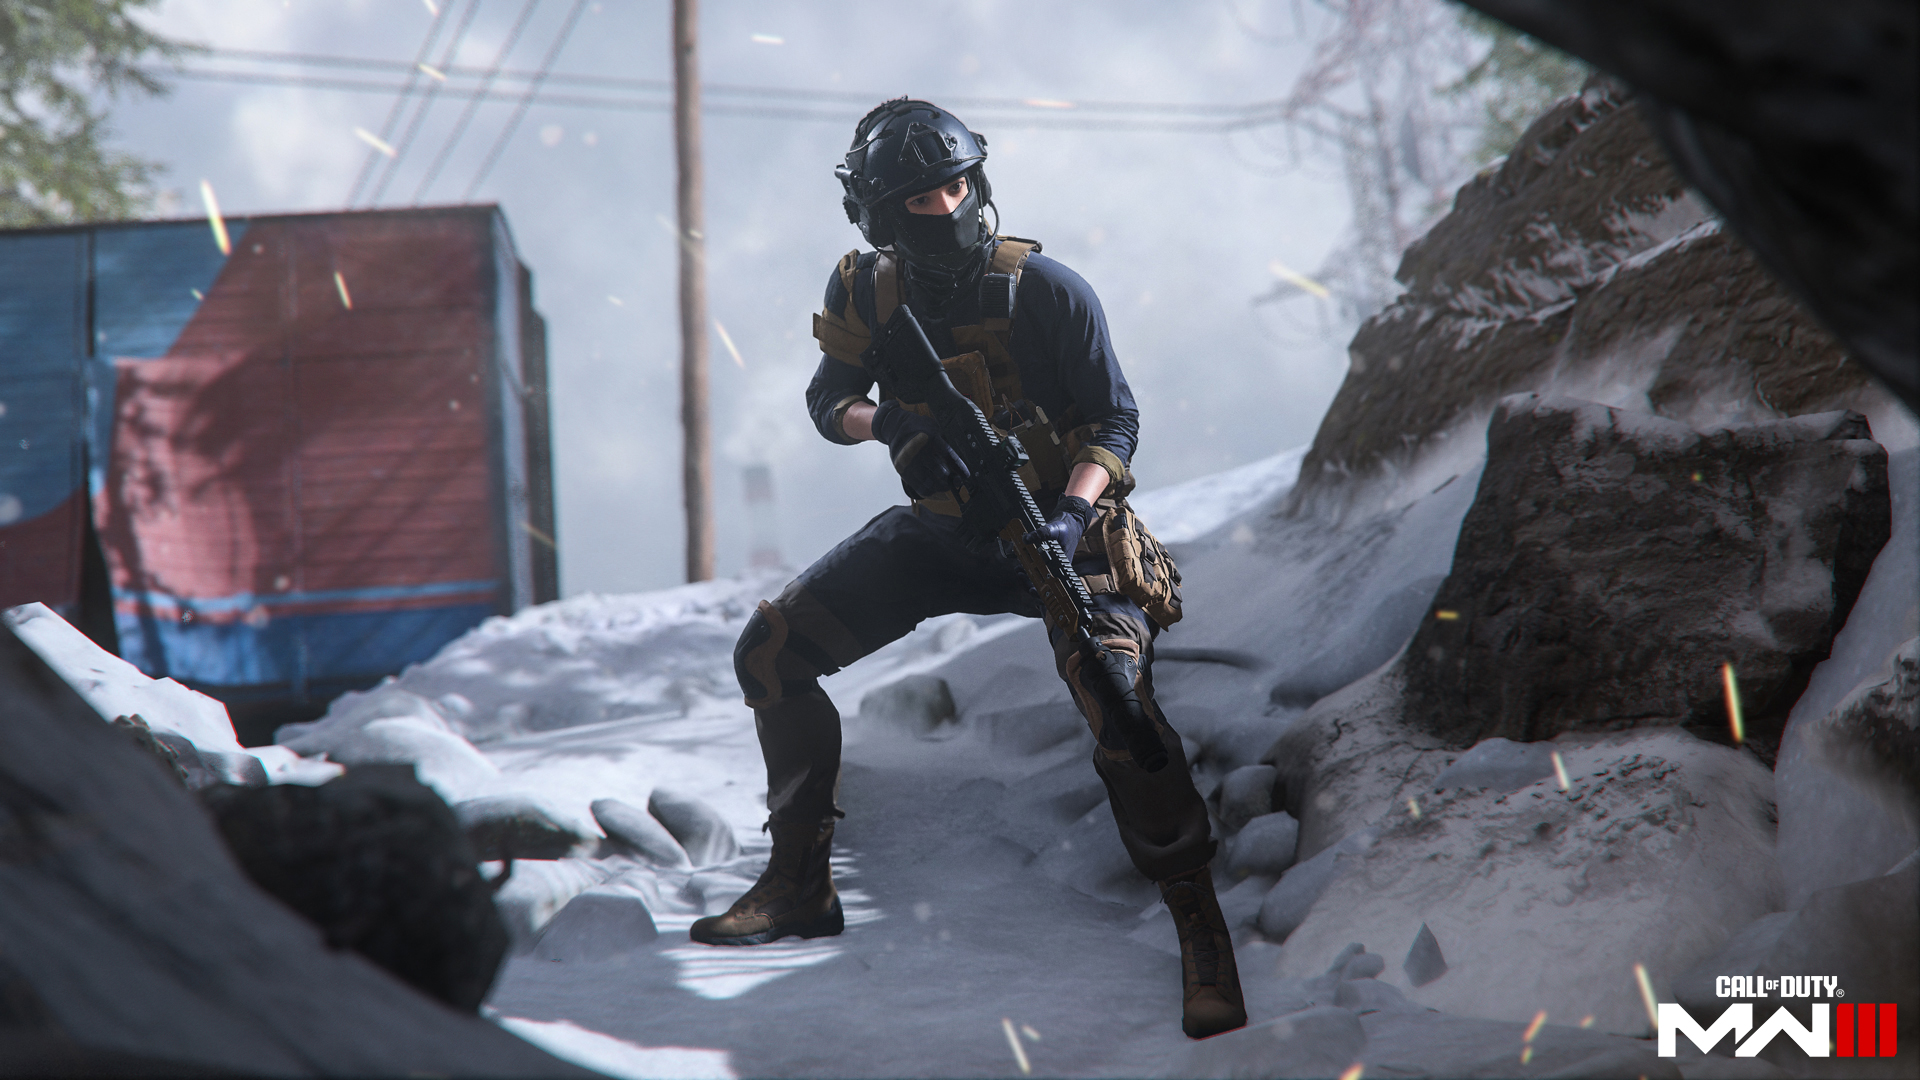
A Loadout is what an Operator uses in Multiplayer and other online game modes. It normally includes:
- Primary Weapon: Your main source of dealing damage.
- Secondary Weapon: A backup armament or a utility tool.
- Lethal Equipment: Limited-per-life items that harm enemies, usually in an explosive fashion.
- Tactical Equipment: Limited-per-life and reusable items that range from intel-gathering sensors, instant healing, and disorientation devices.
- Field Upgrade: Powerful utility items and abilities that normally run on a cooldown timer.
- Vest: Utility bonus that gives you an edge, specific to the type of Vest you have equipped.
- Gloves: Utility bonus that is focused on how your Operator uses their hands; this affects reload speed, ordnance distance, climbing speed, and so on.
- Boots: Utility bonus that is focused on how your Operator maneuvers using their feet; this affects movement speed, Tac-Sprint duration, footstep sounds, and so on.
- Gear: Miscellaneous utility bonuses that aren’t specific to any main type of bonus, giving you a vast variety of customization.
// INTEL CARD
- MWIII
- WZ
- WZM
Loadout Idea: Running Exploder
// MULTIPLAYER: PRE-GAME // WEAPONS AND LOADOUTS
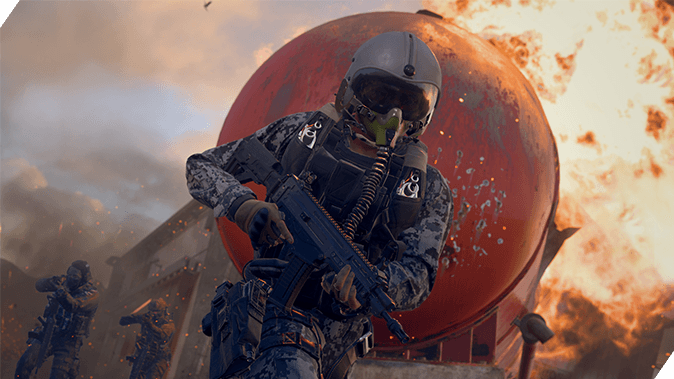
This Loadout is basic and is meant to give you what you need in any medium to short-range fight and will work well for most 6v6 Multiplayer Maps and Modes. The Running Exploder also works well in Ground War Modes, but it’s suggested to bring a Launcher instead of a Pistol.
· Vest: Demolition Vest
· Primary: SVA 545
· Secondary: Renetti
· Tactical: Stim
· Lethal: Sticky Grenade
· Field Upgrade: DDOS
· Gloves: Ordinance Gloves
· Boots: Climbing Boots
· Gear: Mission Control Comlink

At the beginning of your Modern Warfare III Multiplayer journey, you have access to preset Loadouts. These can be later inspiration for a custom multiplayer Loadout. If you’re a veteran player of the Call of Duty franchise, Vests, Gloves, Boots, and Gear may seem unfamiliar at first. In MWIII, Perks have been transformed into the Loadout features listed above.
As you dive deeper into the details of these Loadout features, you will find some familiar Perks; however, because of how Vests work in combination with Boots, Gloves, and Gear, there is a small shift that must be done when thinking about how to equip your Operator.
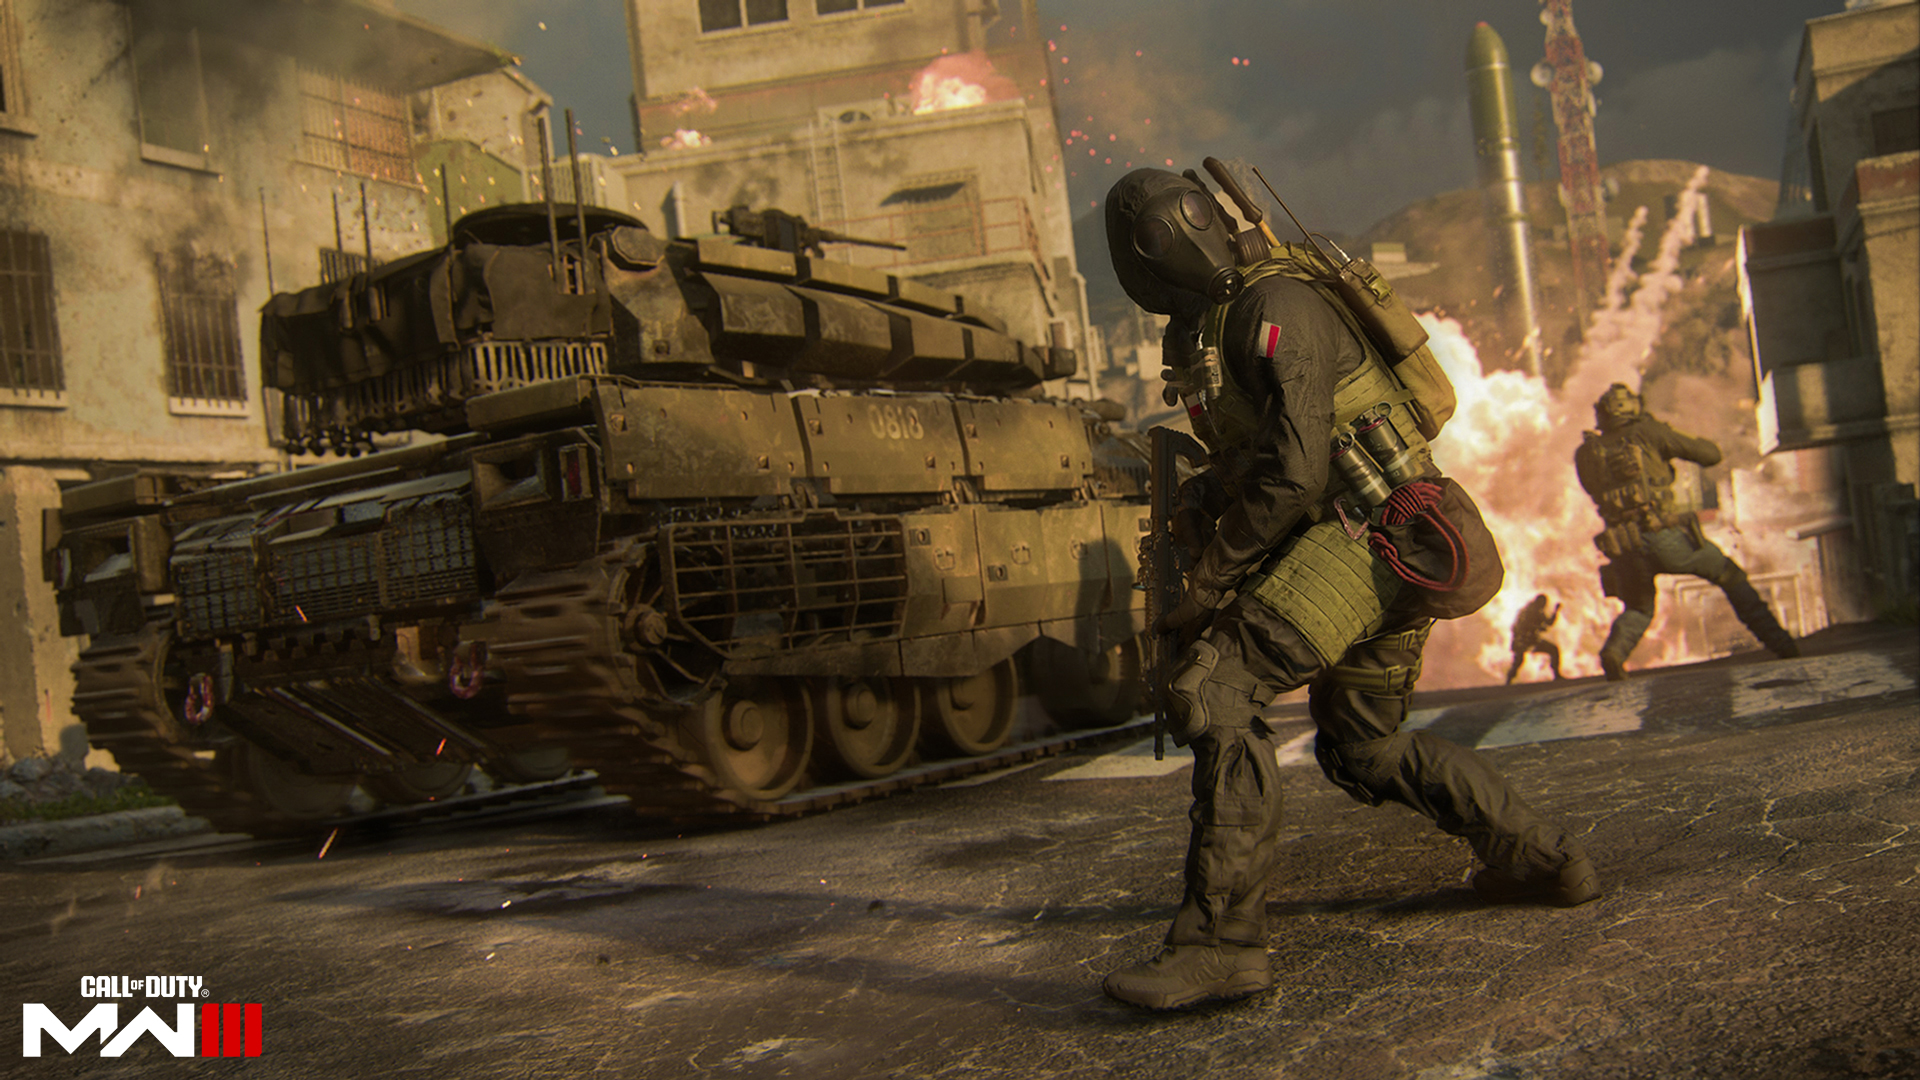
There may be a Perk that is key to your Loadout, and in MWIII there are several ways to activate that Perk. The amount of Lethal, Tactical, Boots, Gloves, and Gear slots that you have depends on which Vest you have equipped. This is how you can double up on having a Perk and why, if you have two items with the same Perk, the Vest will have a built-in consideration and will automatically replace the duplicated Perk with a different one.
For instance, if you have a Loadout with the Infantry Vest equipped but also have Running Sneakers equipped, you have now doubled up on the same Perk that “Increases Tac-Sprint duration and reduces refresh time.” In this case, the Infantry Vest will add the effects of Lightweight Boots instead of Running Sneakers, so you won’t accidently waste a slot. This is meant for situations where you need or want to make a change on the fly and may have forgotten to change or couldn’t change an item that may have a duplicate Perk.
You unlock the ability to edit a Custom Loadout in the Weapons menu by leveling up to Rank 4 (Private IV). As you level up through the Enlisted Ranks (1–55 normally), more weapons, Perks, Equipment, and Upgrades are unlocked.
Primary and Secondary Weapons
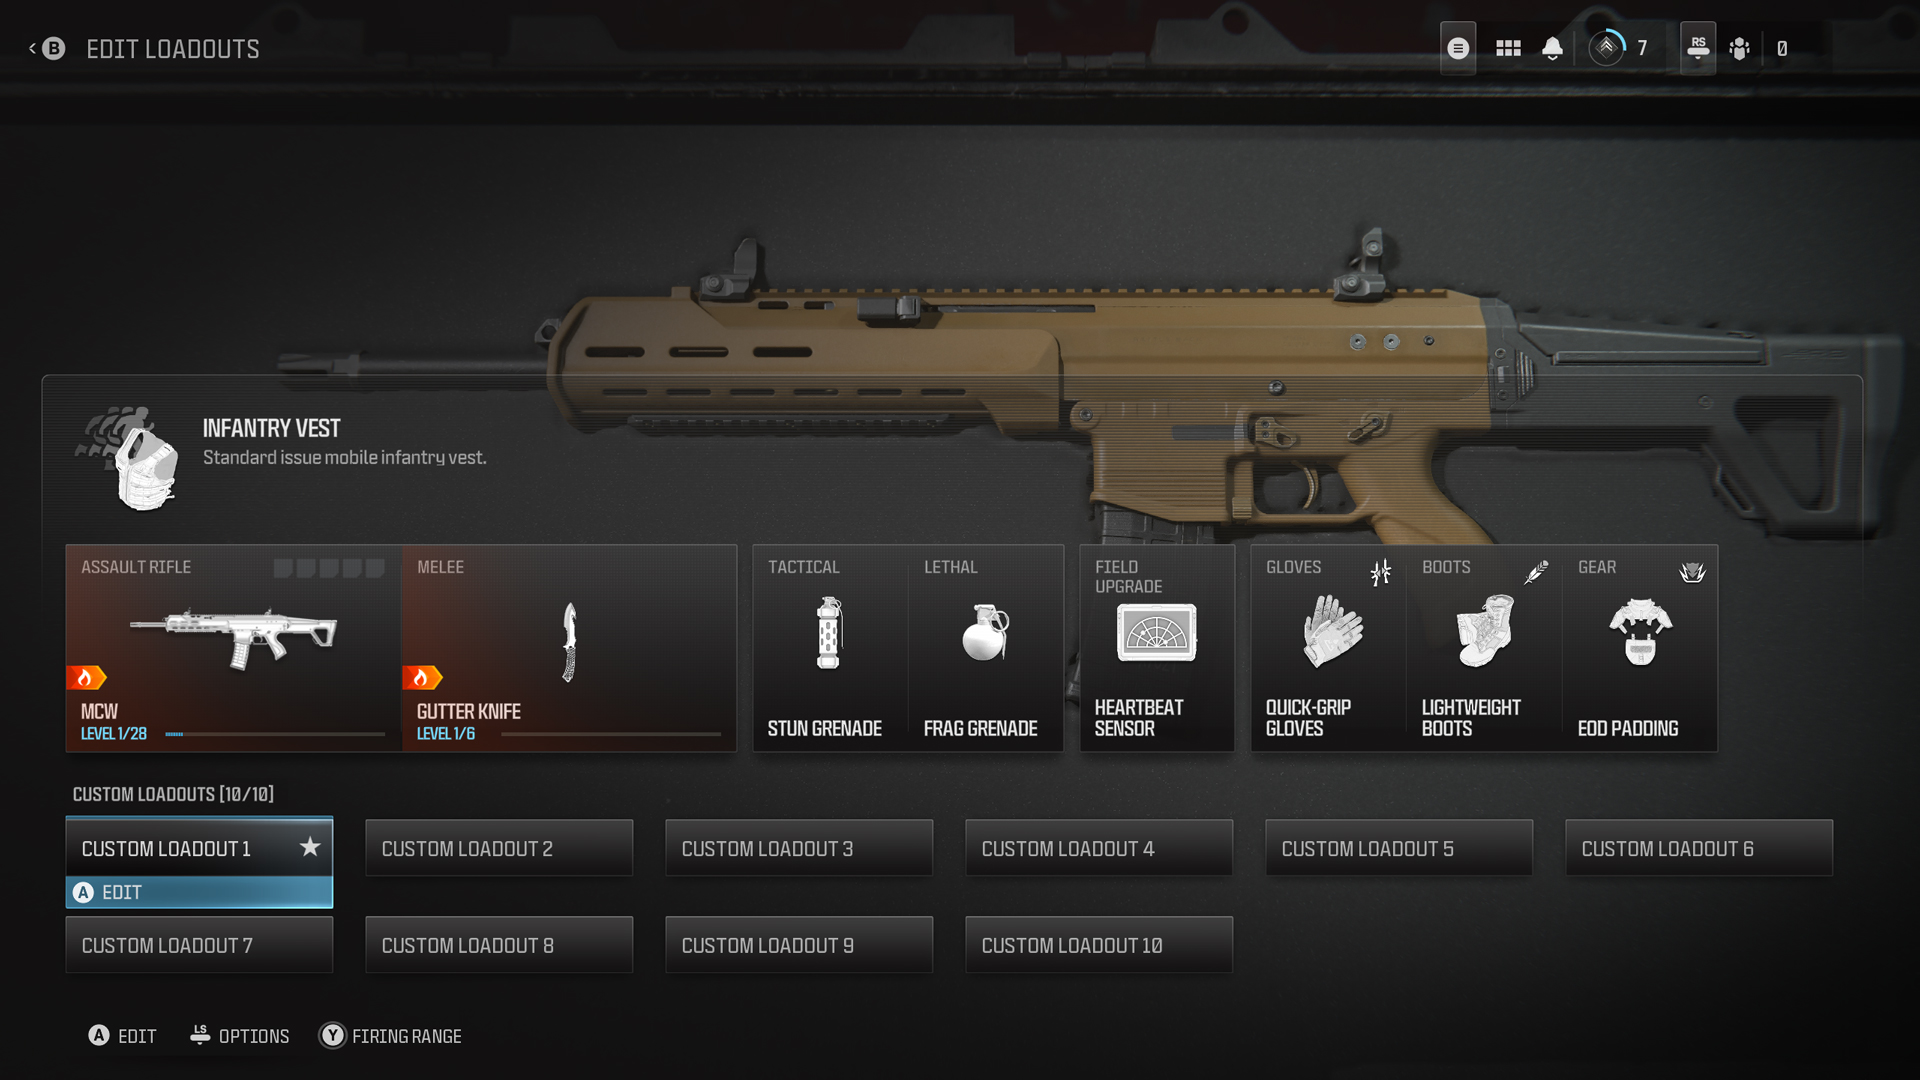
A Multiplayer Loadout is composed of two weapons. Usually, this is a Primary Weapon and a Secondary Weapon, although the Gunner Vest and Commando Vest allow you to have two Primaries on a Loadout.
As the name suggests, the Primary Weapon is usually the main method of dealing damage and often determines the role an Operator is best suited for in combat. A Secondary Weapon is useful for utility purposes — eliminating Killstreaks, one-shotting players with a swift blow, or something to quickly switch to when the Primary Weapon runs low or out of ammunition.
The following Intel Cards show how the weapon categories are broken up into Primary and Secondary Weapons. Each card details what each weapon is generally useful for.
// INTEL CARD
- MWIII
- WZ
- WZM
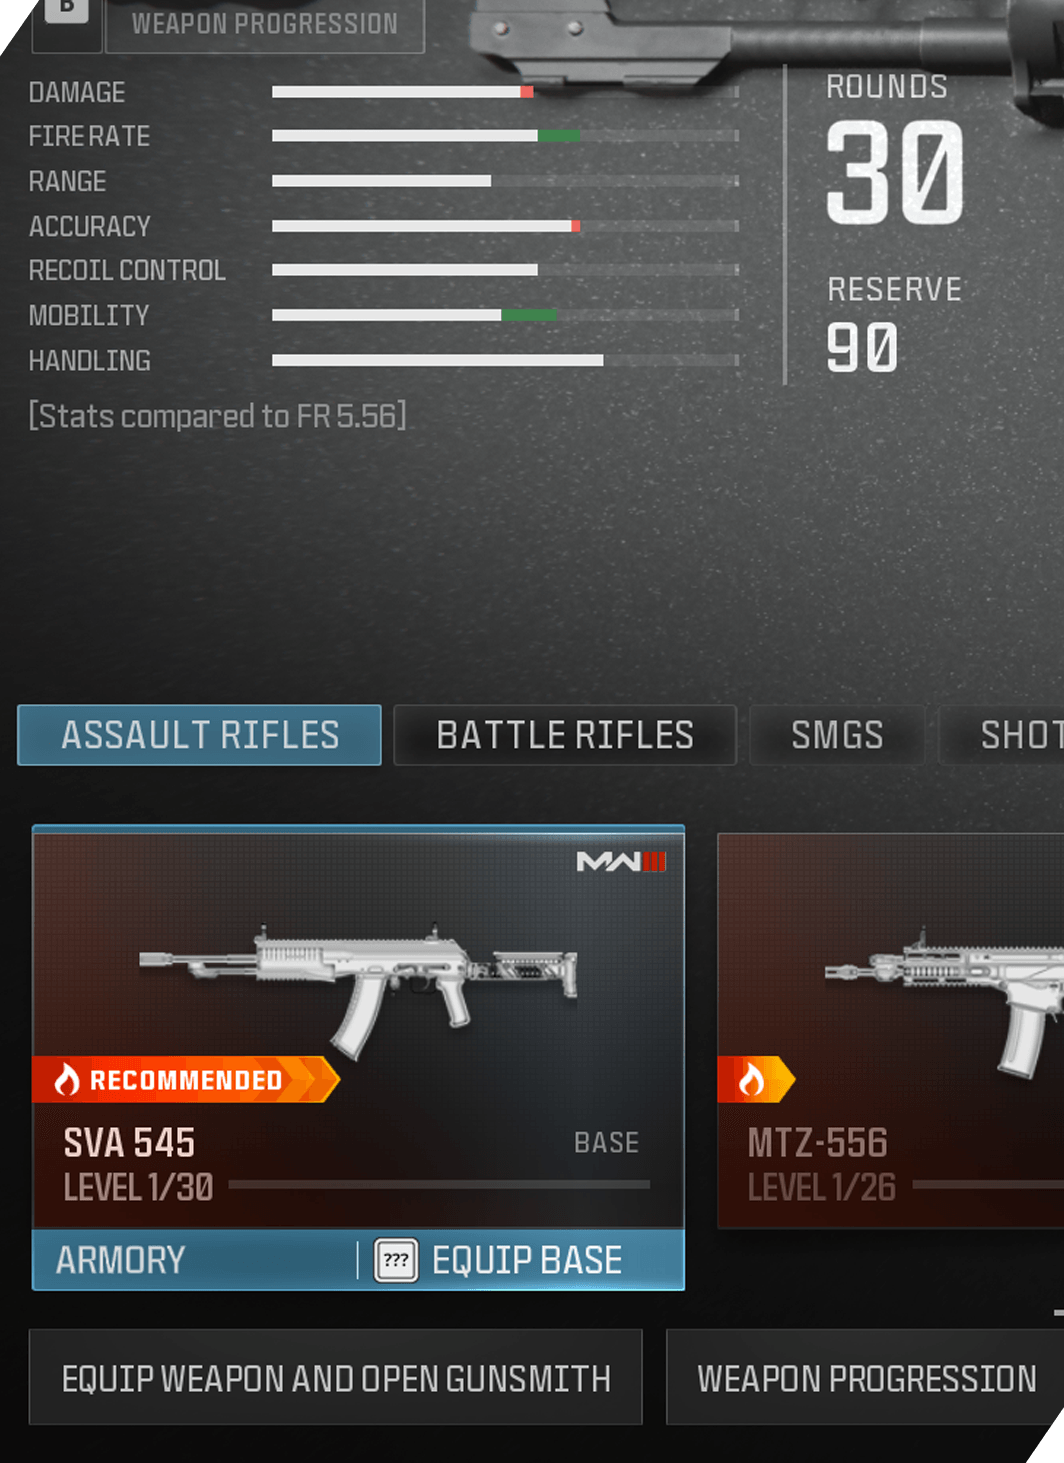
Primary Weapons
// MULTIPLAYER: PRE-GAME // WEAPONS AND LOADOUTS

· Assault Rifles: Best for medium-range engagements. Preferred action: aiming down sights (ADS) or Tac-Stance. Full-auto, usually. Average mobility. Often versatile due to attachment options.
· Battle Rifles: Best for medium- to long-range engagements. Preferred action: aiming down sights. Semi-auto or three-round burst, usually. Average mobility. High accuracy with high damage.
· Submachine Guns: Best for short-range engagements. Preferred action: aiming down sights, Tac-Stance, or hip-firing. Full-auto, usually. High mobility.
· Light Machine Guns: Best for medium- to long-range engagements. Preferred action: aiming down sights. Full-auto, usually. Low mobility. Mounting preferred.
· Shotguns: Best for extreme close-range engagements. Preferred action: Hip Fire, Tac-Stance, or aiming down sights. Variety of firing mechanisms. High mobility. Easiest weapon to spray.
· Marksman Rifles: Best for medium- to long-range engagements. Preferred action: aiming down sights. Semi-auto or bolt/lever action, usually. Above-average mobility. More aggressive play preferred.
· Sniper Rifles: Best for extreme long-range engagements. Preferred action: aiming down sights. Semi-auto or bolt/lever action, usually. Low mobility. More patient play preferred.
· Melee: Fisticuffs range. Usually nonprojectile. Preferred action: just the Riot Shield, a defensive tool that can be used offensively.
// INTEL CARD
- MWIII
- WZ
- WZM
Secondary Weapons
// MULTIPLAYER: PRE-GAME // WEAPONS AND LOADOUTS
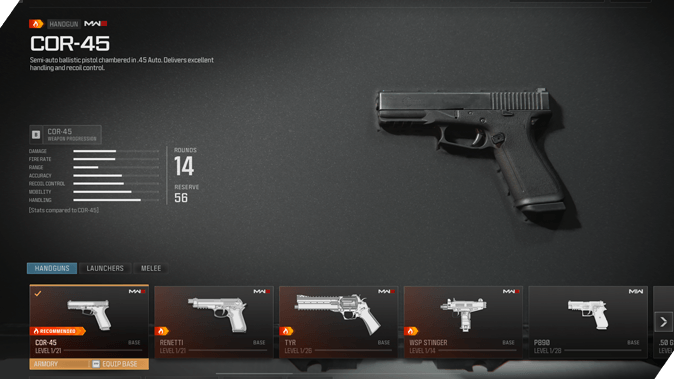
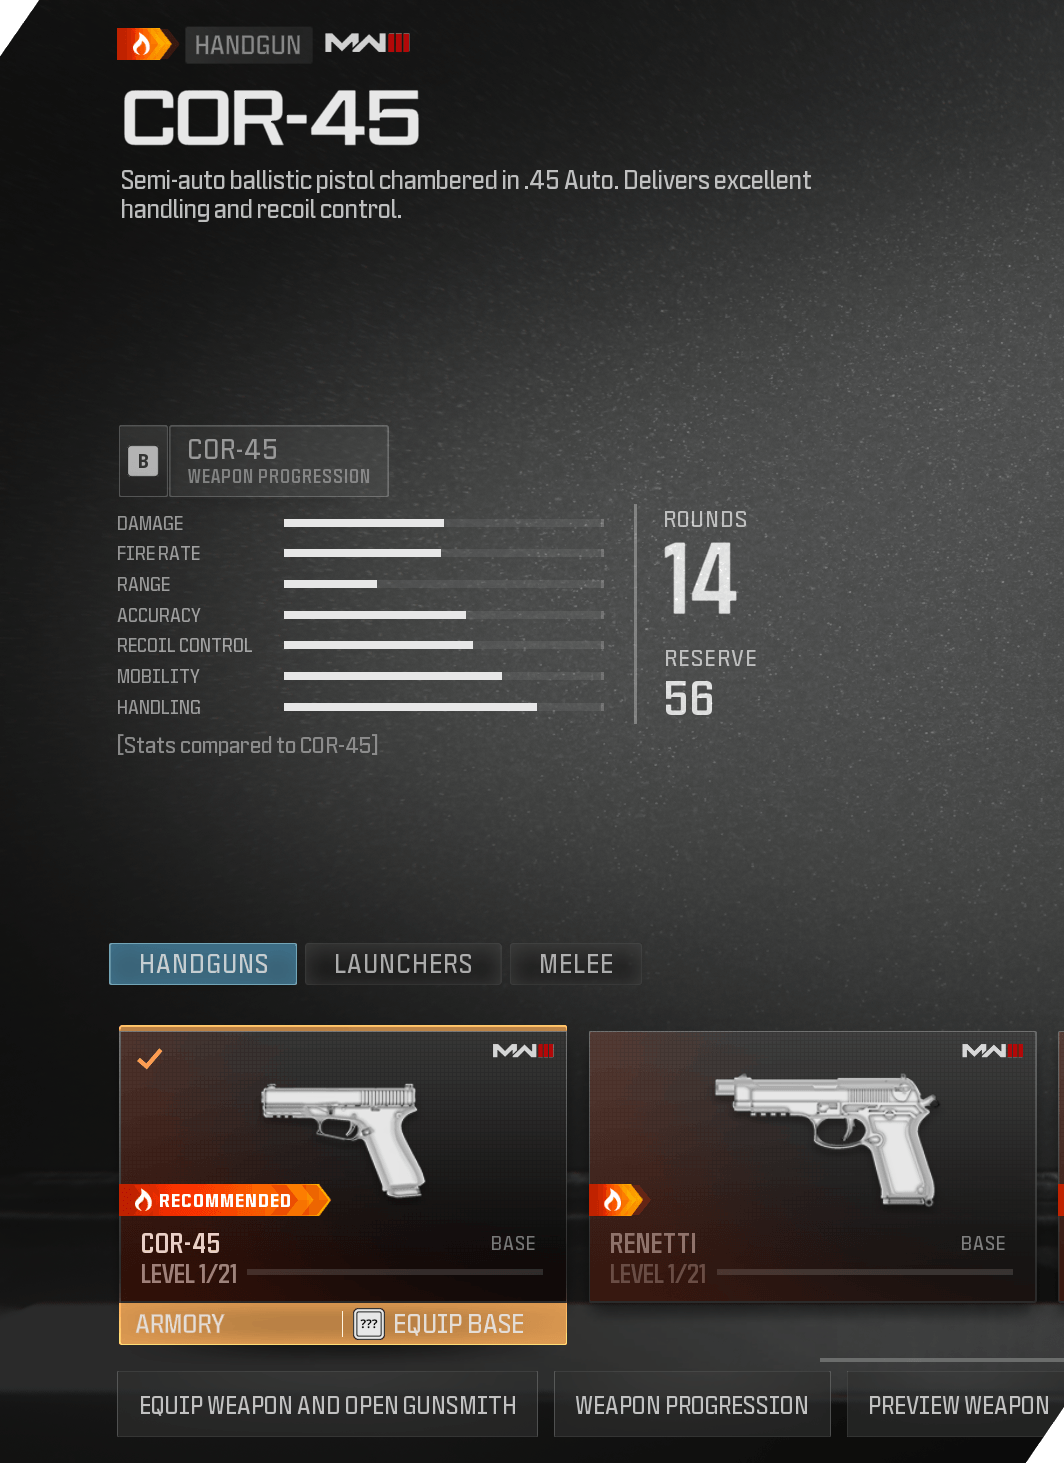
· Handguns: Best at close range. Preferred action: aiming down sights or hip-firing. Has a variety of firing mechanisms. Has the second fastest mobility. Fastest weapon to swap to.
· Launchers: Great at any range against technology or large groups. Preferred action: aiming down sights. Single-load, usually. Low mobility.
· Melee: Fisticuffs range. Usually nonprojectile. These weapons have the fastest mobility. Knives and other close-combat tools.
· Note: Outside of the Riot Shield, all Primary Weapons and the Handgun Secondary Weapon category can be modified in Gunsmith.
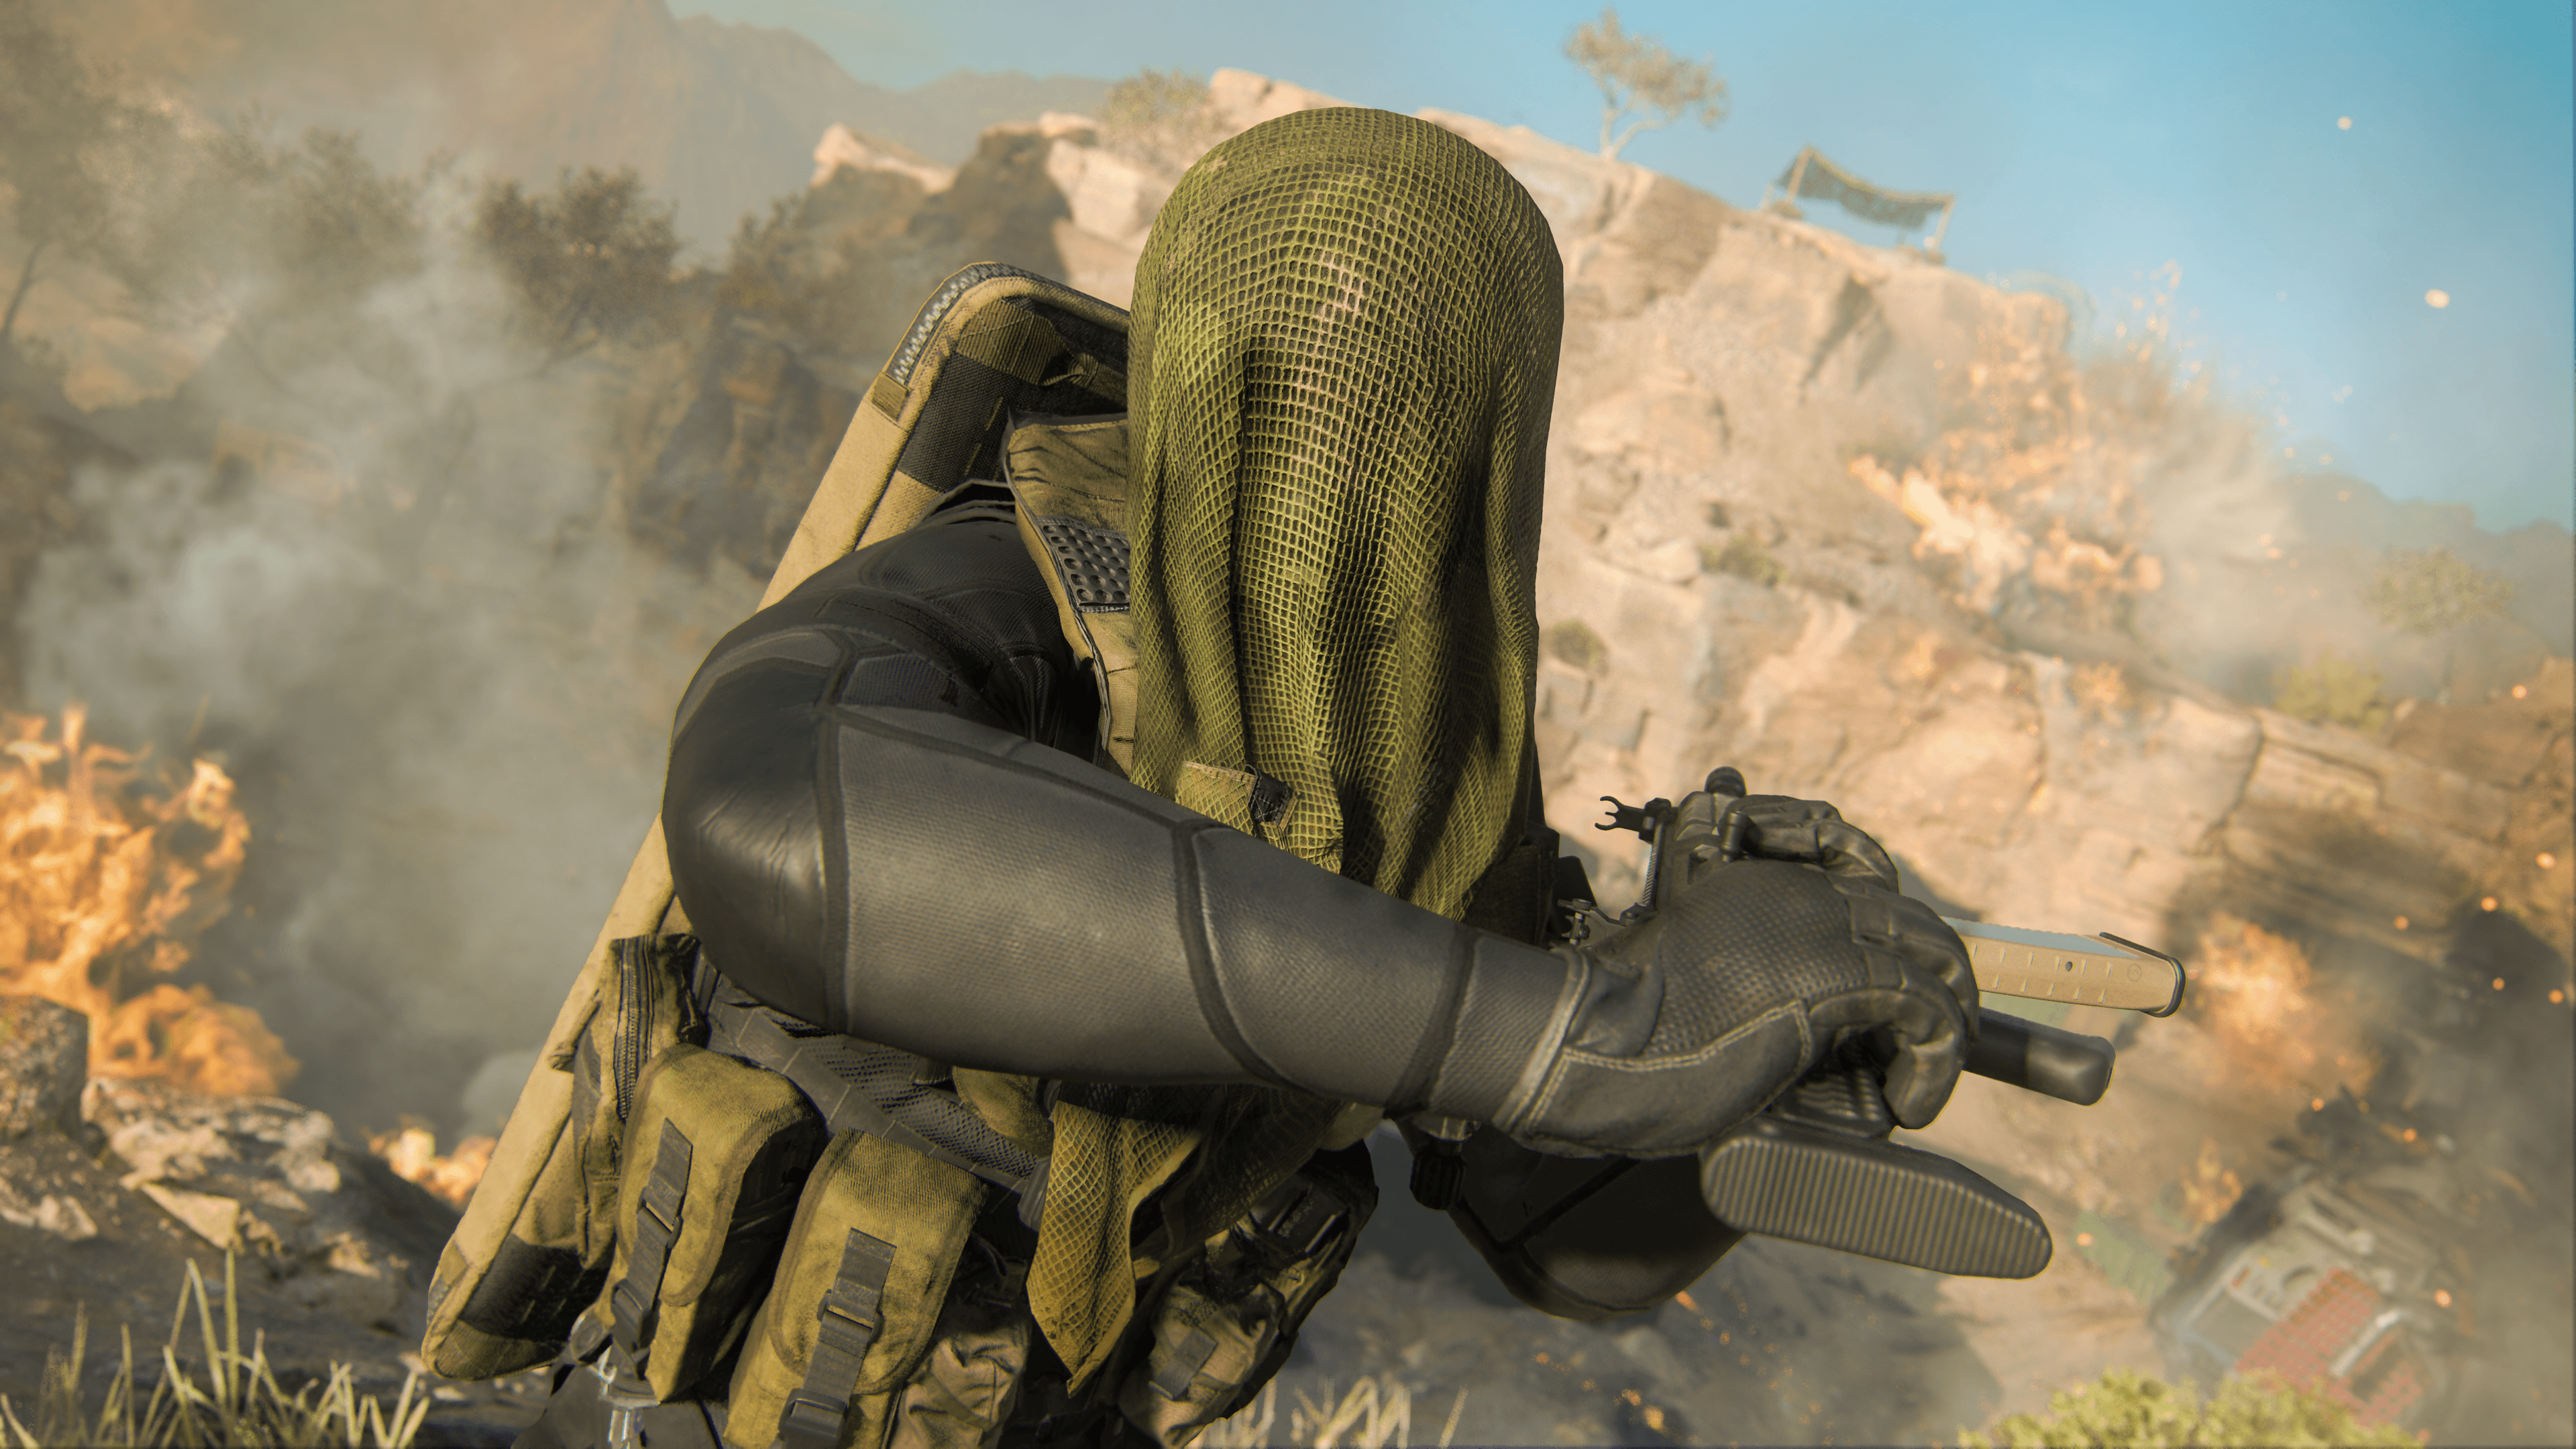
While we can make a case for firing every weapon in the game, what if you are uncomfortably close to an enemy? Like if you suddenly find yourself right behind an enemy after going around a corner.
Weapon bash melee attacks and combat knife attacks: That’s where melee comes into play; that controller command or keybind allows you to bash the enemy with your weapon. If the enemy is within range of your Operator, a melee attack will deal significant damage to them and temporarily disorient them.
Normally, melee attacks are not one-hit knockouts; you may have to bash the enemy multiple times to bring them down.
However, this all depends on an enemy’s health and armor levels; if an opponent has standard health and no armor, then certain weapons, such as a Combat Knife, and weapon attachments such as a Breacher Device, can bring them down in one hit. But in modes where Operators have more health or Armor — for example, in Call of Duty: WarzoneTM Battle Royale — they will most likely need multiple hits to down them.
Despite these caveats, melee attack is the fastest way to deal damage at extreme close ranges, becoming an essential part of an Operator’s toolkit. It’s also the most silent way of dealing damage; hitting an enemy with a melee attack will not appear on the enemy’s minimap, making it a viable choice for when stealth is preferred.
Finishing Moves
// INTEL CARD
- MWIII
- WZ
- WZM
Finishing Moves
// MULTIPLAYER: PRE-GAME // WEAPONS AND LOADOUTS

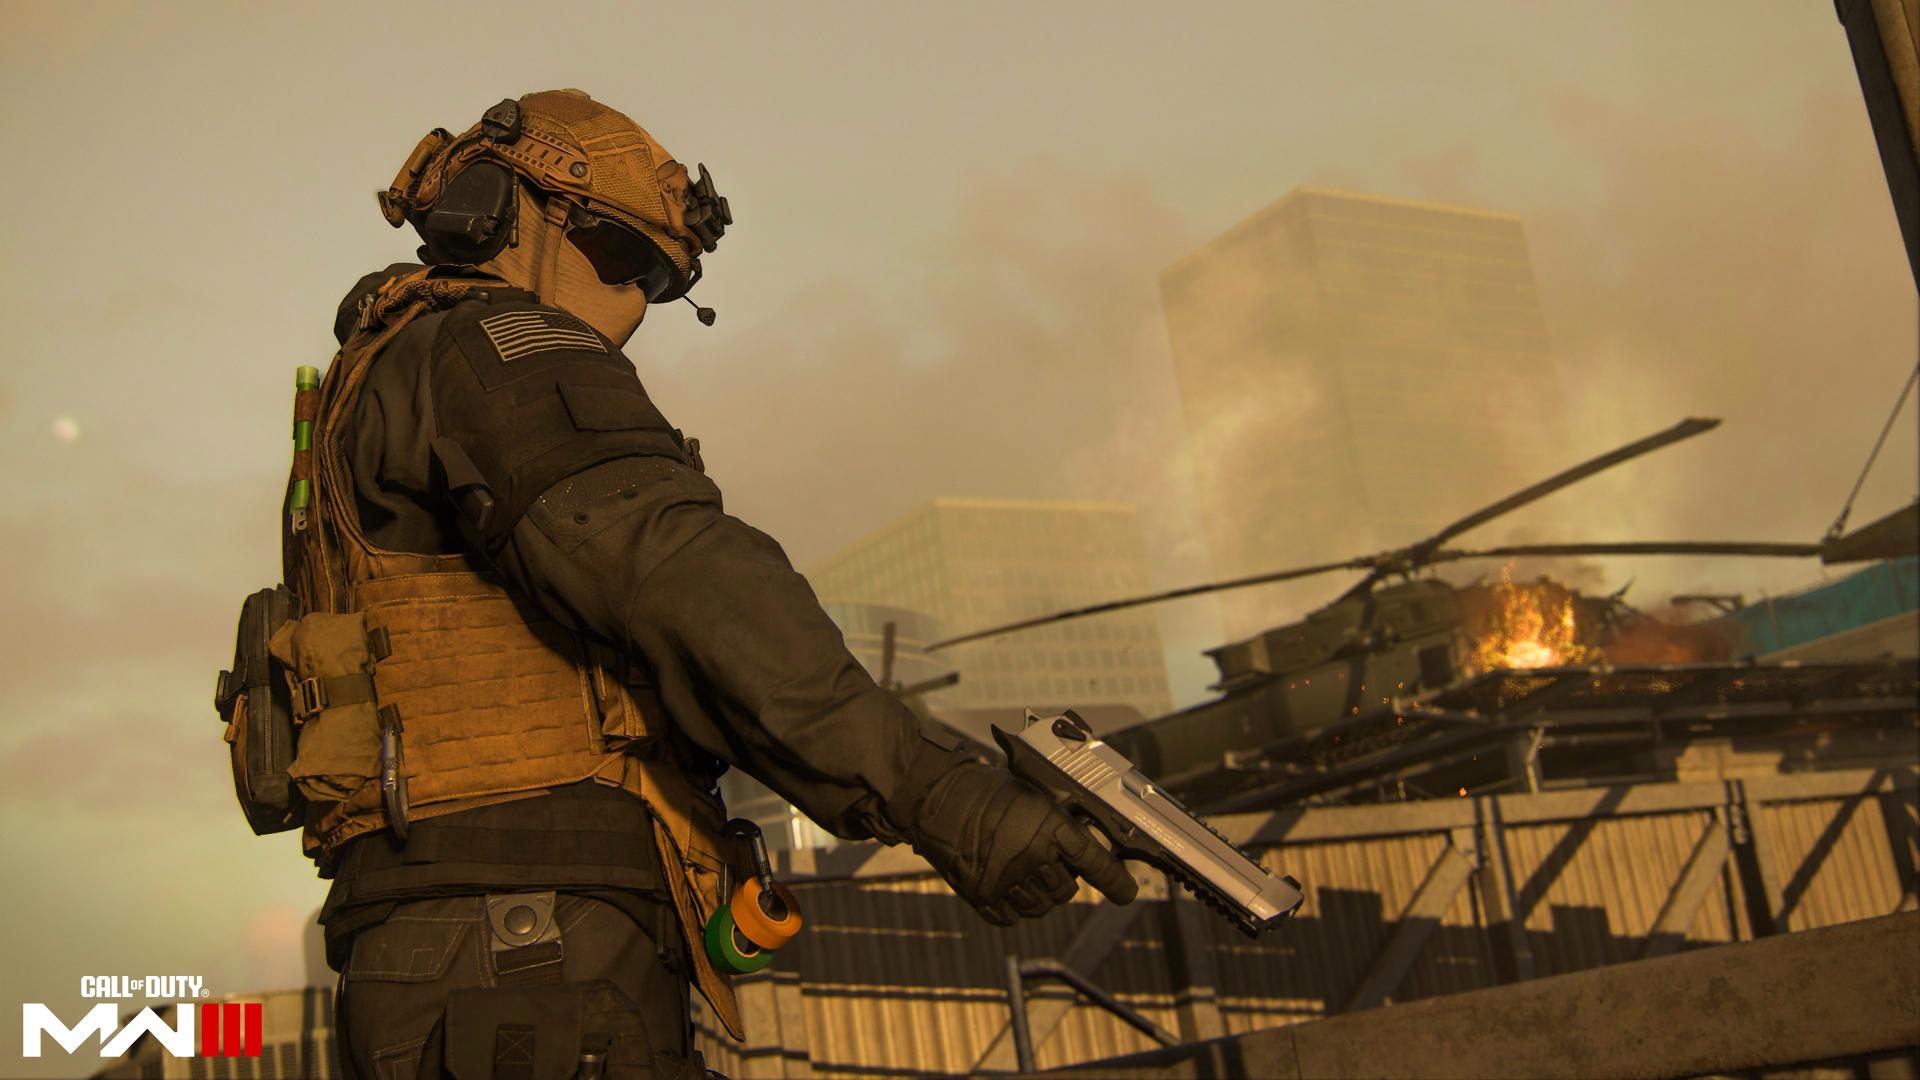
As simple as melee: In order to trigger a Finishing Move, approach an enemy from behind and hold the melee button. Finishing Moves will eliminate the enemy, even if they have a self-revive kit in modes where you can utilize them.
Keep up the pace: In most cases, shooting your enemy is the fastest way to eliminate them. If you’re behind them, you can unload your weapon into the head hitbox and take them down quickly. However, if you’re not confident in the situation or just want some style points, a Finishing Move is also efficient.
Don’t get caught: Finishing Moves are long animations of your Operator eliminating your target with style. Because of this, it also leaves your Operator vulnerable to enemy fire. Be sure you’re safe before pulling off a Finishing Move.
// INTEL CARD
- MWIII
- WZ
- WZM
Gunsmith
// MULTIPLAYER: PRE-GAME // WEAPONS AND LOADOUTS

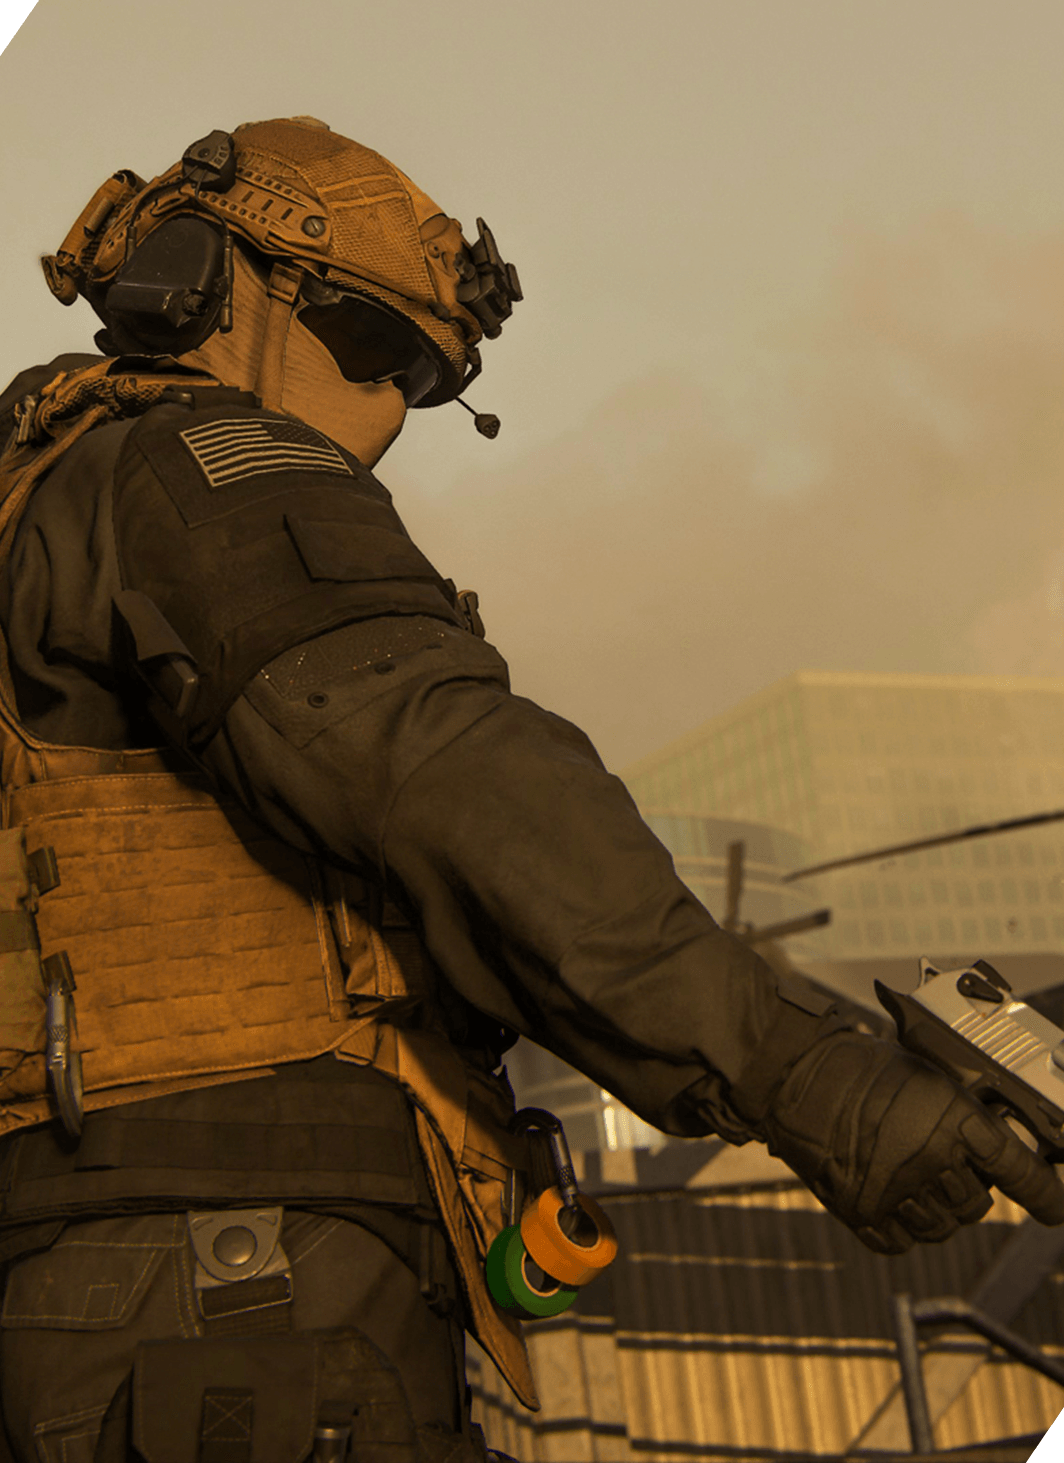
The best for you: Use the Gunsmith to attach components to your weapon to create an armament based on your playstyle. The “best” for one playstyle may be a very different build for another, even using the same weapon.
The perfect balance: Just because you have five slots for attachments doesn’t mean you need to use them all. Some of the negatives can outweigh the positives if there are too many parts.
Pack more bullets: Nervous about your aim? Add an extended magazine to your weapon. This way you have more ammo you can fire at your opponent before you need to reload.

Gunsmith in Modern Warfare III is an approachable, yet customizable weapon builder. Its goal is to make nearly every weapon in the game a true extension of your personal playstyle.
After accessing your weapon through the Custom Loadouts menu, you’ll be greeted with an interface that keeps you immersed as your Operator gets ready for the next mission. The Gunsmith shows the following around your chosen weapon.
Attachments
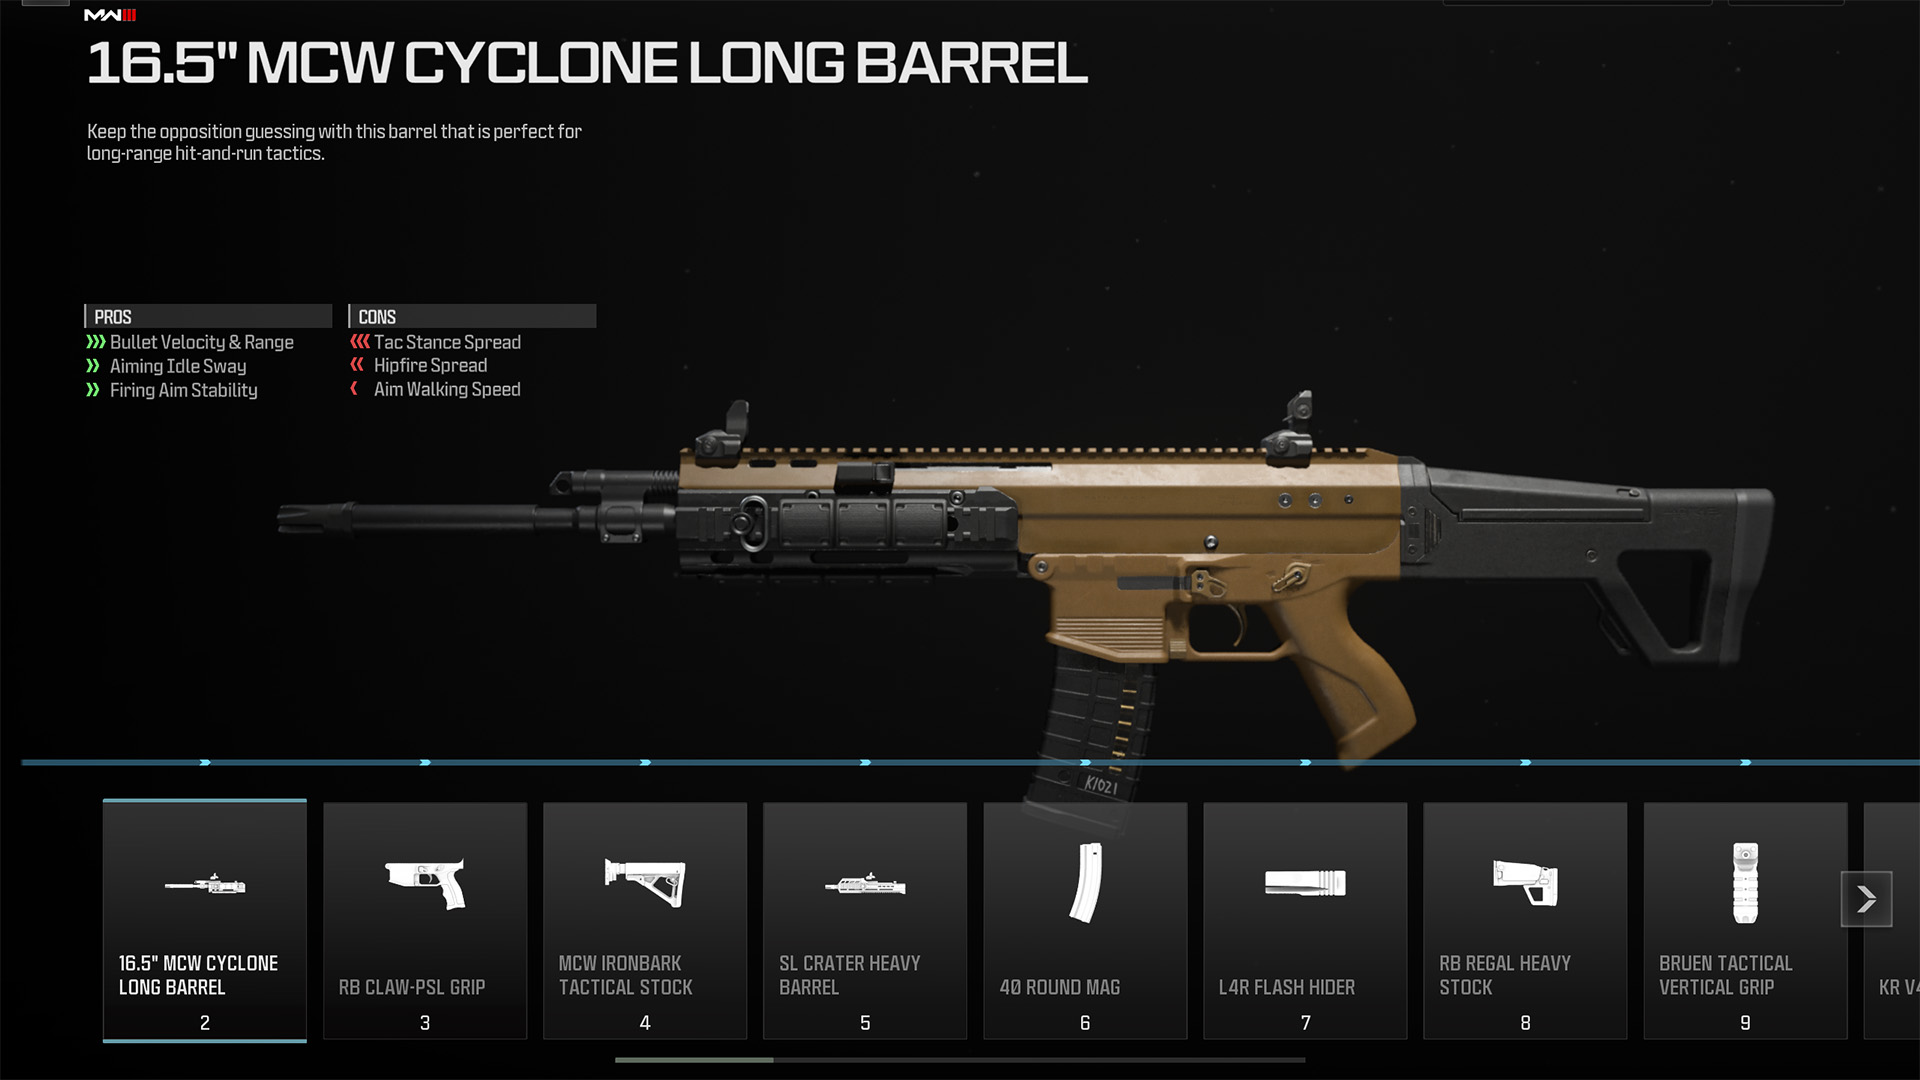
Using an Assault Rifle as an example, there are 10 different areas on the weapon you can augment up to five attachments from two different “pools” of augmentations:
Weapon Platform specific attachments: Only usable within a specific Weapon Platform:
· Receiver
· Barrel
· Magazine
· Stock
· Rear Grip
· Aftermarket Parts
Universal attachments: Can be used across all Weapon Platforms:
· Muzzle
· Underbarrel
· Ammunition
· Laser
· Optic
Weapons can use a mix of Weapon Platform specific attachments and universal attachments. With the addition of Aftermarket Parts, the customization is wider than ever.
// INTEL CARD
- MWIII
- WZ
- WZM
Loadout Idea: All Out Assault
// MULTIPLAYER: PRE-GAME // WEAPONS AND LOADOUTS

Assault Rifles work with almost every Loadout, but why not build something that helps something like the MCW excel and being extremely useful in pretty much any situation? This All Out Assault Loadout Idea is good to use on an 6v6 Map and with some modifications to Optics, it can be just as good on Ground War maps as well.
· Vest: Infantry Vest
· Primary: MCW
· Secondary: Tyr
· Tactical: Scatter Mine
· Lethal: Breacher Drone
· Field Upgrade: Munitions Box
· Gloves: Assault Gloves
· Boots: Lightweight Boots
· Gear: L/R Detector
// INTEL CARD
- MWIII
- WZ
- WZM
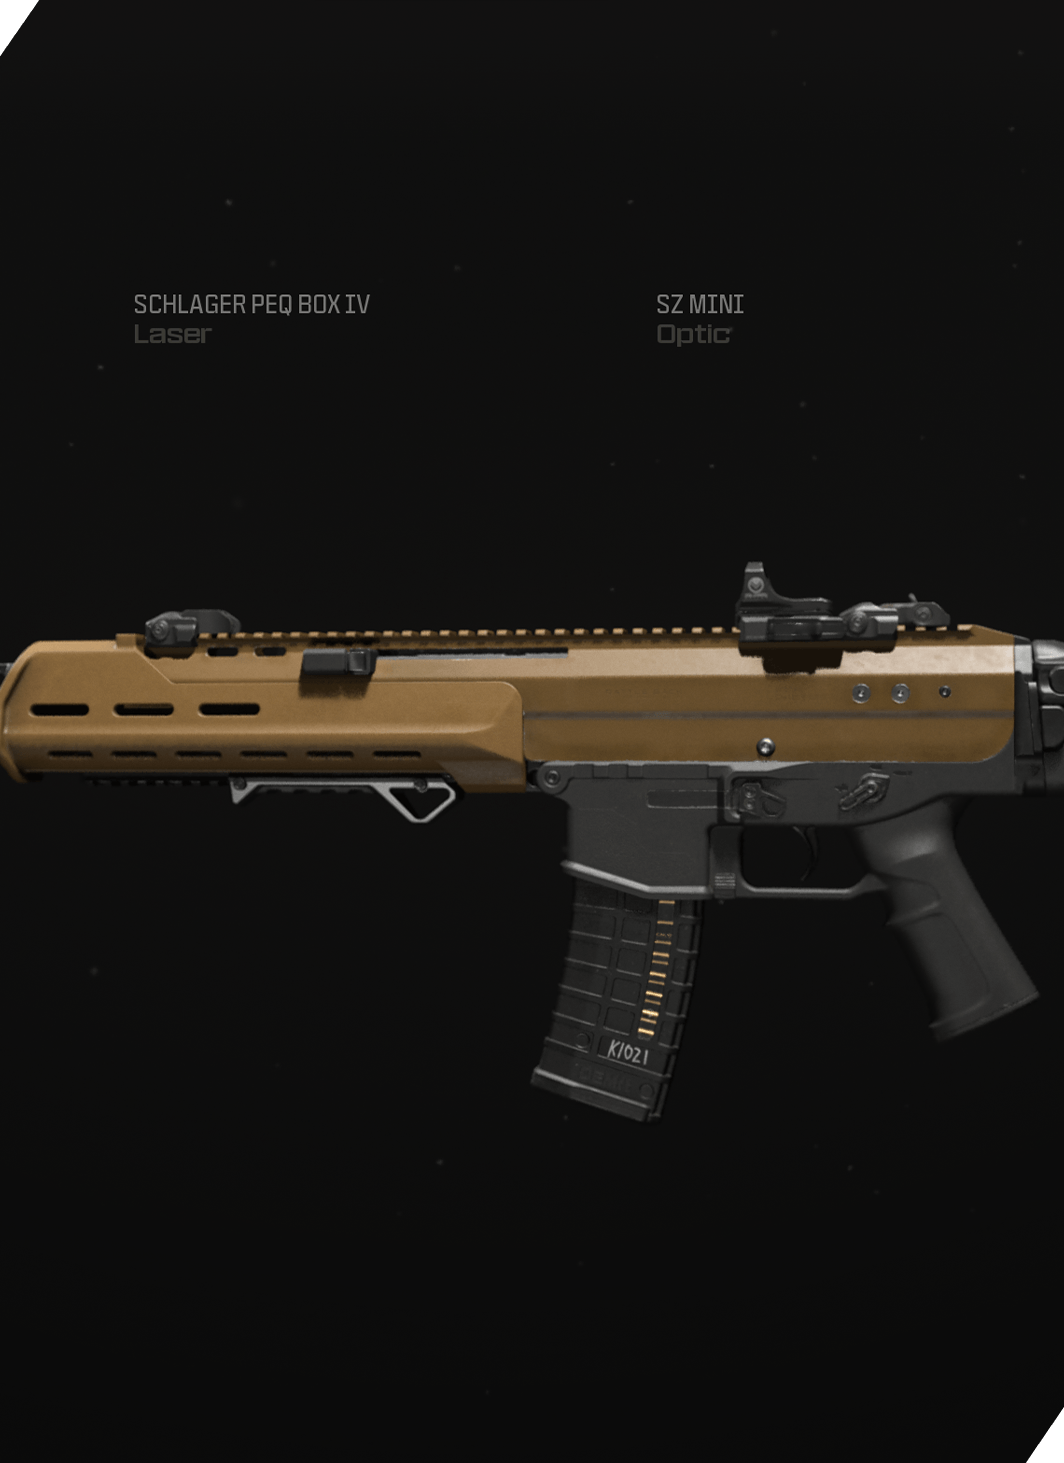
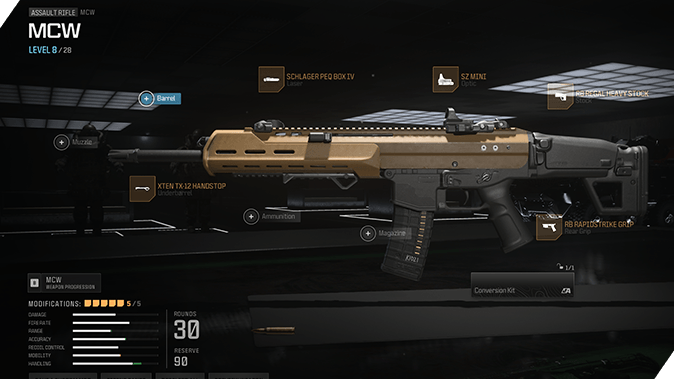
MCW Attachment Setup
// MULTIPLAYER: PRE-GAME // WEAPONS AND LOADOUTS

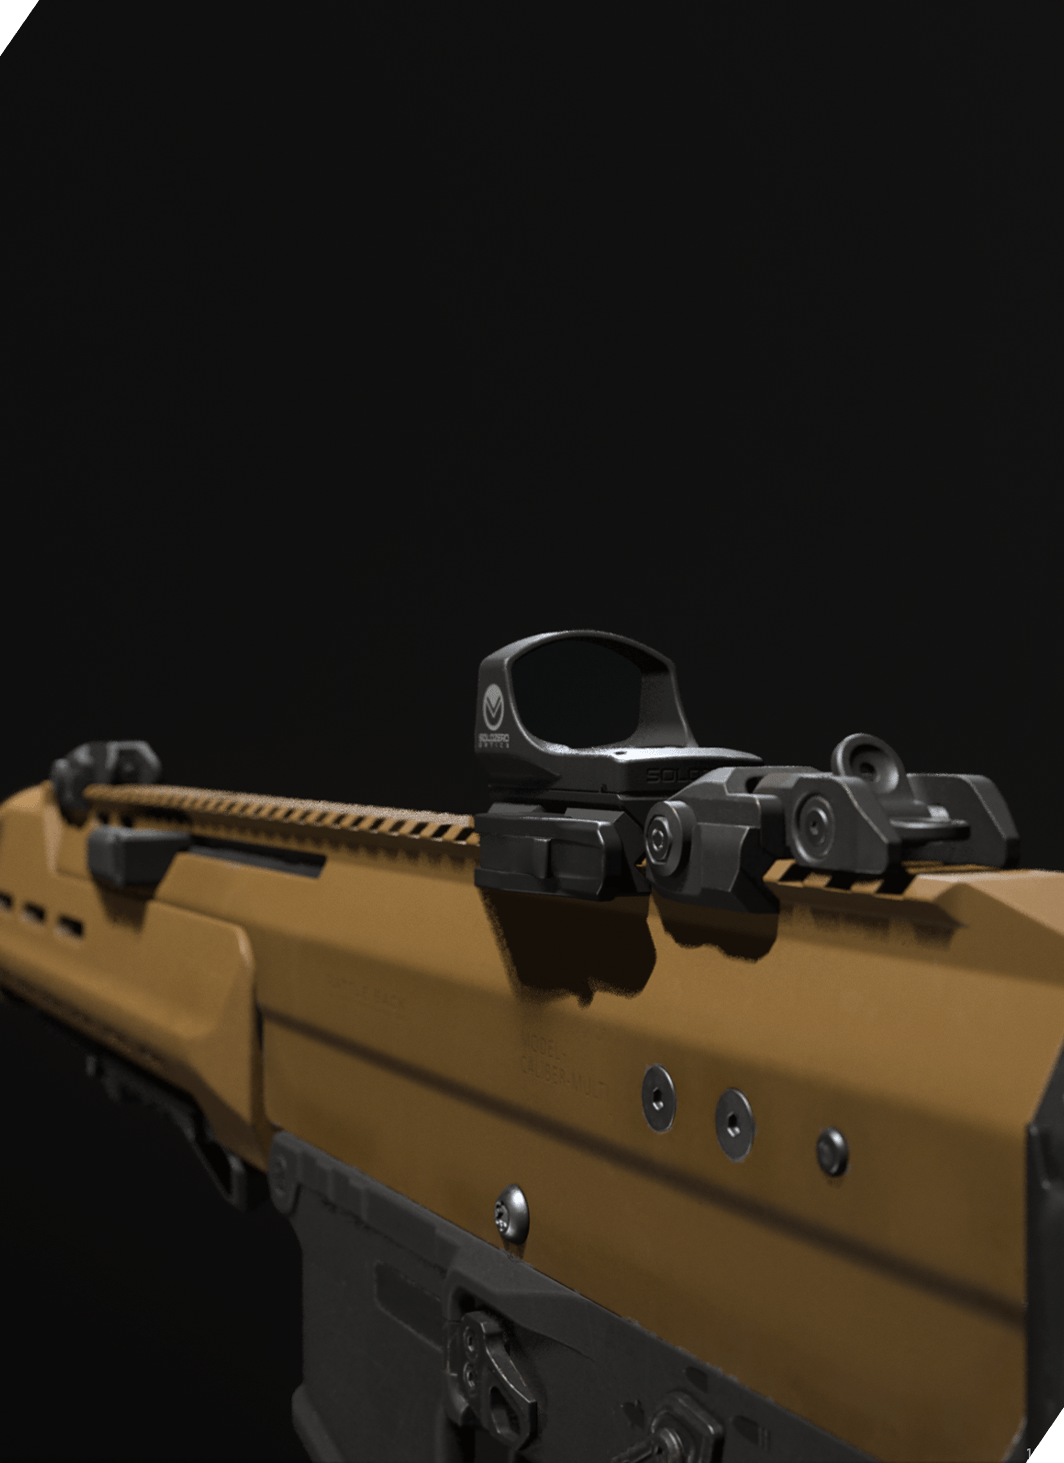
This setup of the MCW is meant to heavily increase Tac-Stance accuracy while not compromising for ADS speed.
· Optic: SZ Mini (or Forge Tac Delta 4)
· Stock: RB Regal Heavy Stock
· Rear Grip: RB Rapidstrike Grip
· Underbarrel: XTEN TX-12 Handstop
· Laser: Schlager PEQ Box IV
Modifications
This indicates how many of the five augmentations you’ve added. It’s up to you how many you add (up to the five allowed). Note that some weapons may have fewer or more than five attachment slots. Also note that you may need to level up your weapon before all attachments become available.
Weapon Stats
// INTEL CARD
- MWIII
- WZ
- WZM
Weapon Stats
// MULTIPLAYER: PRE-GAME // WEAPONS AND LOADOUTS
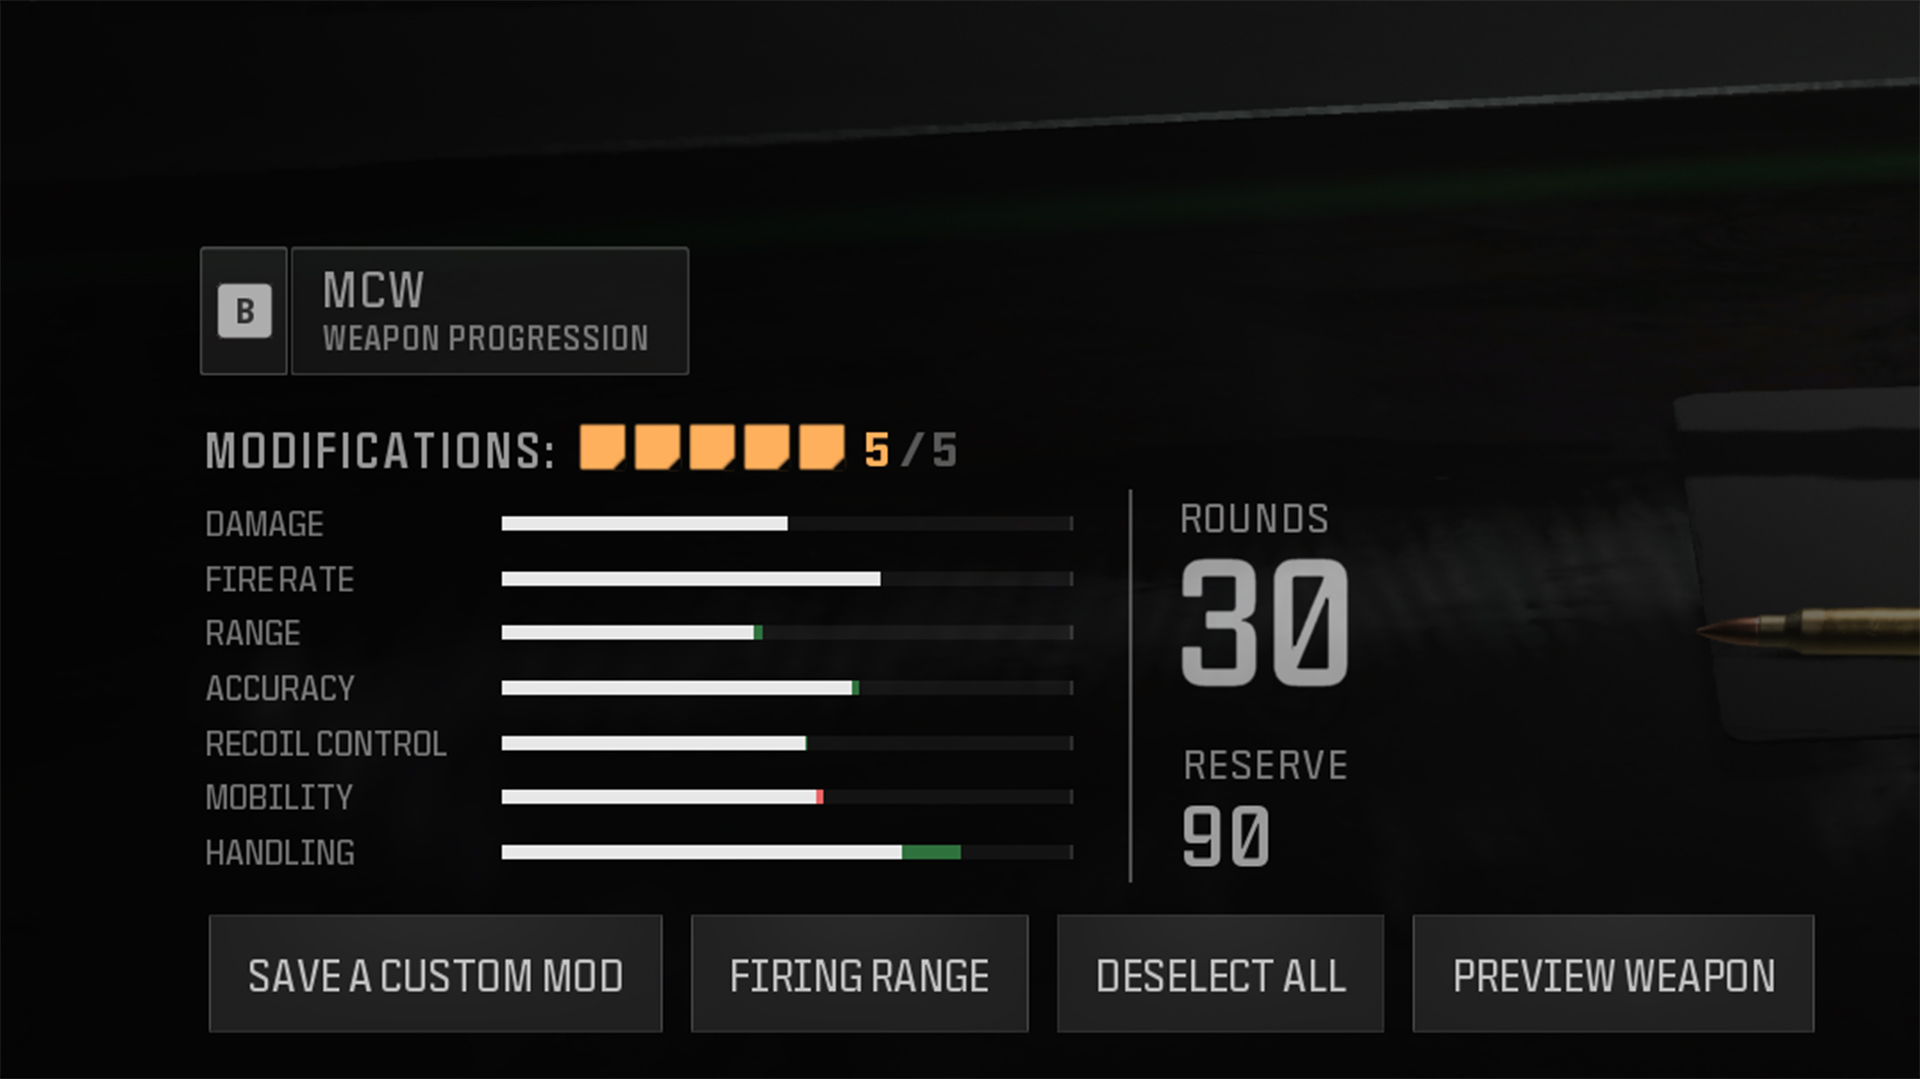
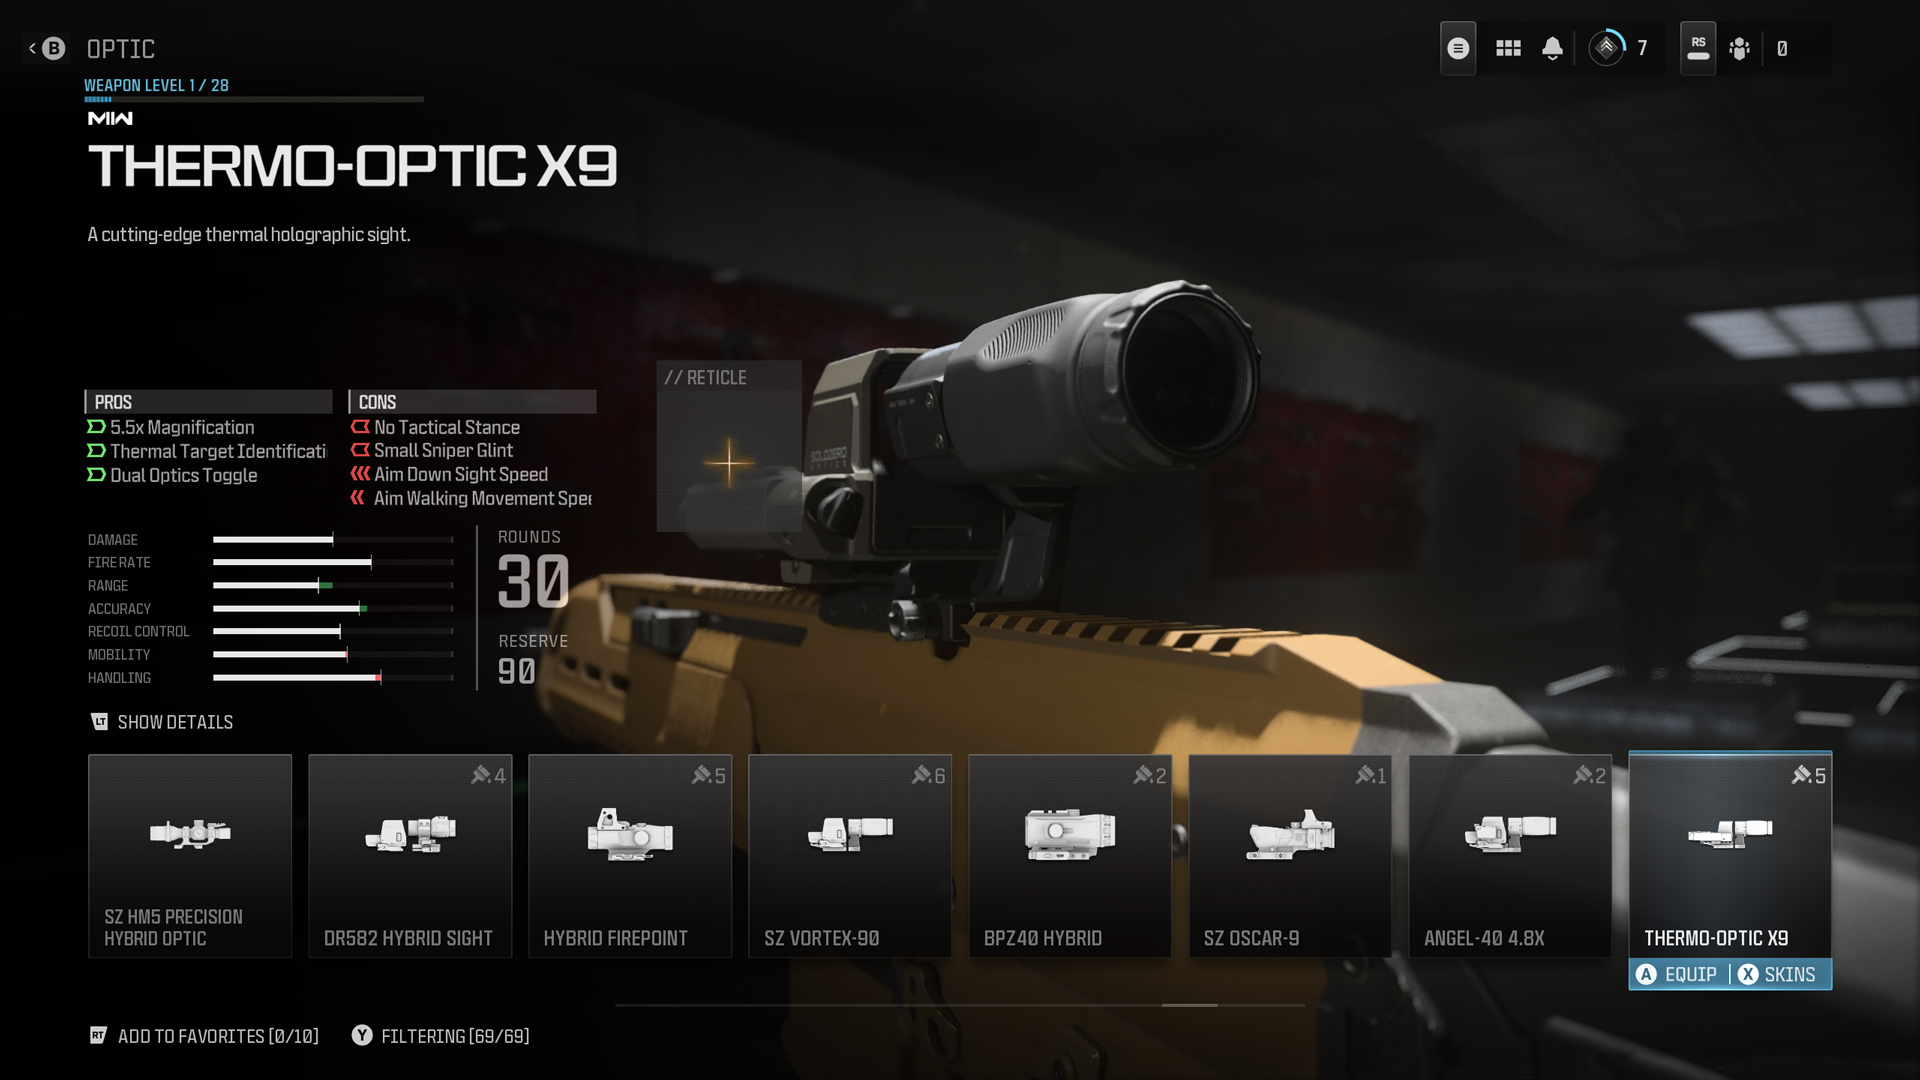
Simple to read: Weapon stats are shown in a bar chart as well as a numeric breakdown of the weapon, including what has been attached to the weapon. Use this as a general idea of how the weapon will perform.
Numbers don’t always translate to feel: The numbers on the chart are good at indicating how effective a weapon is in each category; however, until you play with the weapon, you may not know truly how it shoots.
Descriptions are king: The bar chart breaks down general stats, but read the descriptions of the attachments so you know how the attachment affects the weapon’s handling.
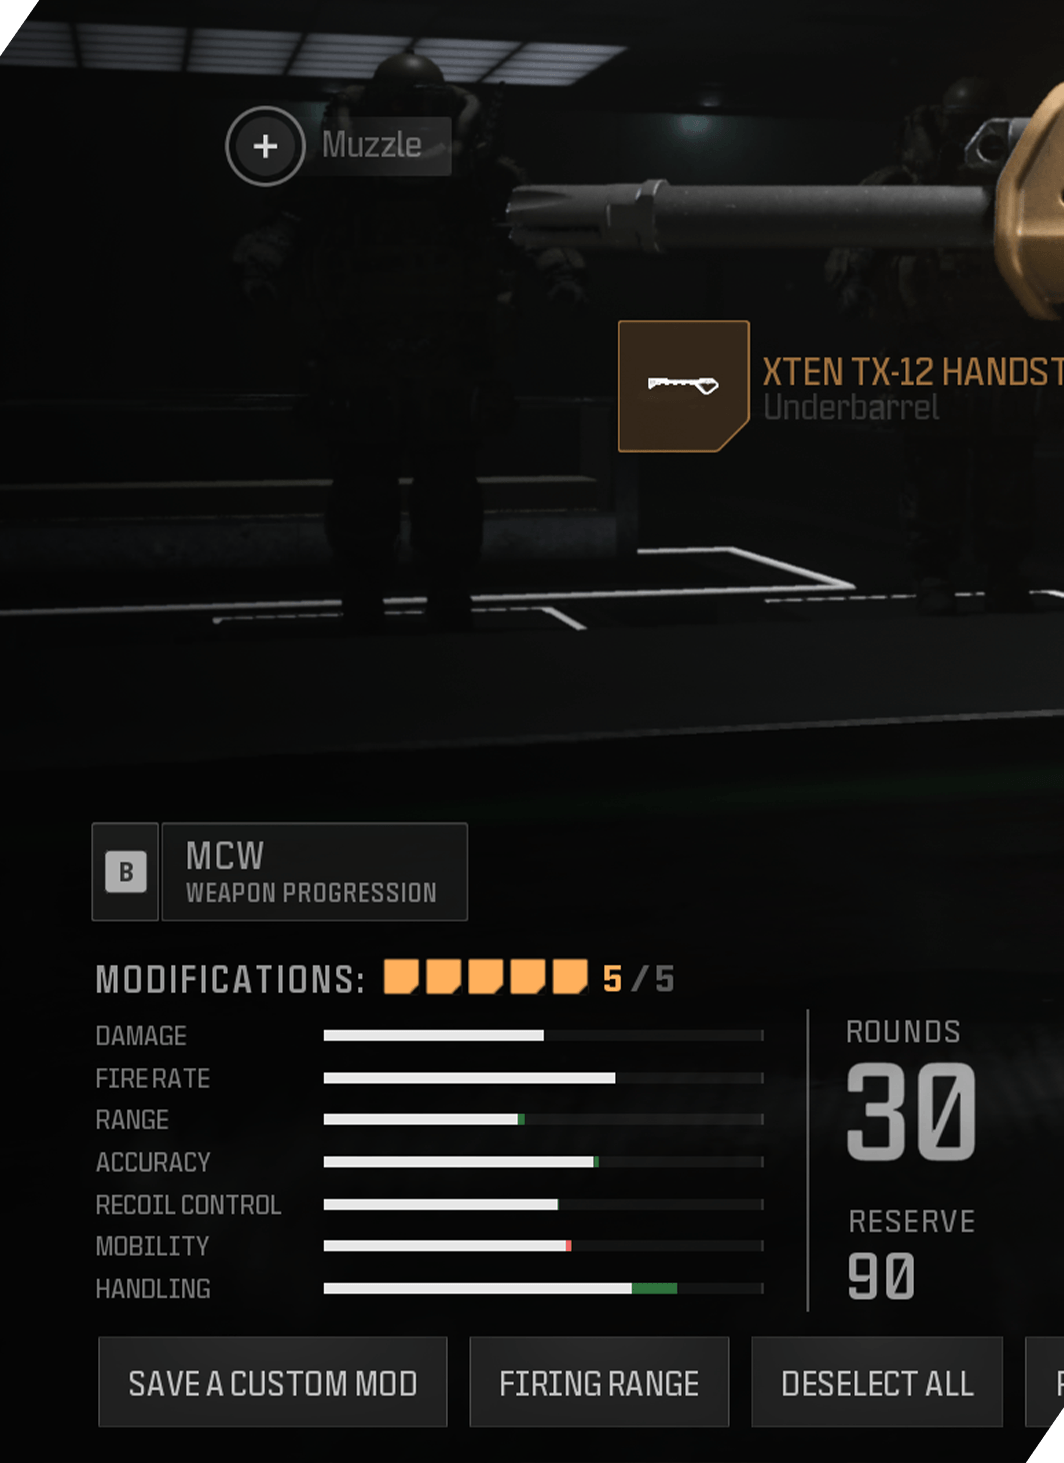
Weapon stats: A bar chart displays the following statistics, which are essential to evaluate when choosing your weapon:
· Damage: The damage an enemy takes when hit by the weapon.
· Fire Rate: How rapidly the weapon can shoot.
· Range: How far the weapon can fire before accuracy and bullet velocity tails off.
· Accuracy: How accurate the weapon is both when aimed from the hip and when aiming down sights.
· Recoil Control: How much recoil the weapon has, as well as the maximum amount of hip-fire spread.
· Mobility: How deftly you can move with your feet while holding the weapon.
· Handling: How swiftly you can move with the weapon, including reloading and aiming down sights.
Weapon Platforms (also known as “Weapon Families”) are a collection of specific weapons that share a full pool of attachments. Weapon Platforms streamline progression and customization in an authentic way, allowing you to swap between multiple playstyles seamlessly on select weapons.
Although some Weapon Platforms still contain one weapon, more modern platforms like the MTZ can have multiple weapons. During your standard progression journey, you will unlock three receivers for the MTZ platform: the MTZ-556, MTZ-762, and the MTZ Interceptor.
In Modern Warfare III, each Gunsmith attachment is unlocked only once. Take the Assault Stock attachment, for instance. This attachment is available for both the AMR9 SMG (at Level 8) and the Riveter Shotgun (at Level 12). If your AMR9 is already progressed to 8+, the Assault Stock will be available on the Riveter immediately, and vice versa.
Speaking of attachments, these fall into two buckets when it comes to progression and customization: Weapon class–specific attachments and universal attachments.
// INTEL CARD
- MWIII
- WZ
- WZM
Loadout Idea: Self-Sufficient Sniper
// MULTIPLAYER: PRE-GAME // WEAPONS AND LOADOUTS

Playing the Sniper role is simple when your job is just to eliminate enemy Operators uncontested. The Self-Sufficient Sniper Loadout can turn you into a one-person army in support of the entire team.
· Vest: CCT COMMS Vest
· Primary: KV Inhibitor
· Secondary: Renetti (JAK Ferocity Carbine Kit)
· Field Upgrade: COMM Scrambler
· Gloves: Marksman Gloves
· Boots: Climbing Boots
· Gear: Threat Identification System
· Gear: Ghost T/C Camo

Weapon Class–Specific Attachments
Barrels, magazines, stocks, and rear grips are the attachments specifically designed to their weapon class and can be used on many platforms within the same class. Modern Warfare III is designed to encourage you to use the weapons you are most comfortable with to unlock the majority of attachments available. The attachments in the categories above were made for specific platforms, hence their names, but will fit on other weapons as specified in Gunsmith.
Universal Attachments
Muzzles, underbarrels, ammunition, lasers, and optics can be used across all weapons that are able to equip them. Once these attachments are unlocked as part of a Weapon Platform’s progression, you can use them across ANY weapon in the game.
Tip: Attaching a 1x sight does not penalize the weapon’s ADS speed, so even though you are adding another attachment to your weapon, equip 1x sights or iron sights to your preference.
// INTEL CARD
- MWIII
- WZ
- WZM
Aftermarket Parts
// MULTIPLAYER: PRE-GAME // WEAPONS AND LOADOUTS

Effective and efficient: Instead of building an entirely different weapon for a map that a specific gun, such as the MCW Assault Rifle, isn’t quite built for, try installing the Aftermarket Part. Give the same weapon and attachment combination a different effective purpose to keep you combat efficient.
Challenge focused: Utilize weapons with Aftermarket Part capabilities, especially if you are attempting to complete challenges and level up. It’s much easier to swap one piece of a weapon rather than switch to a weapon class that you aren’t focused on progressing.
Potentially large changes: Aftermarket Parts, while meant to create convenience and efficiency, also often change a weapon in a bigger way than most attachments. Be aware of this when installing an AMP and this tool can become your greatest asset.
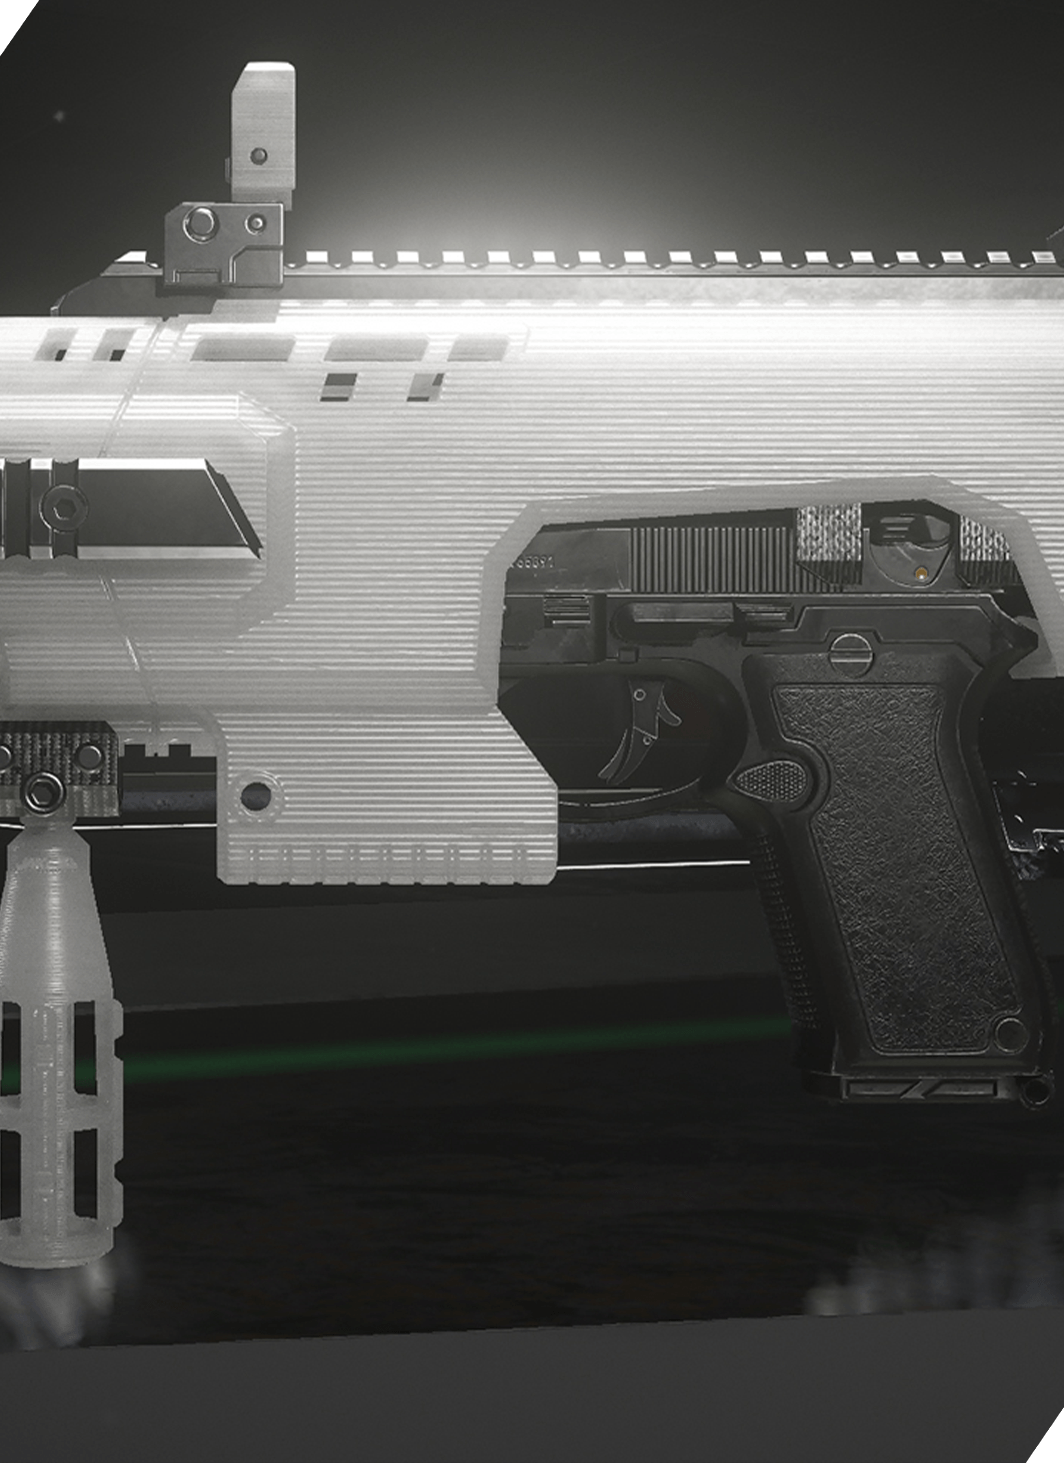
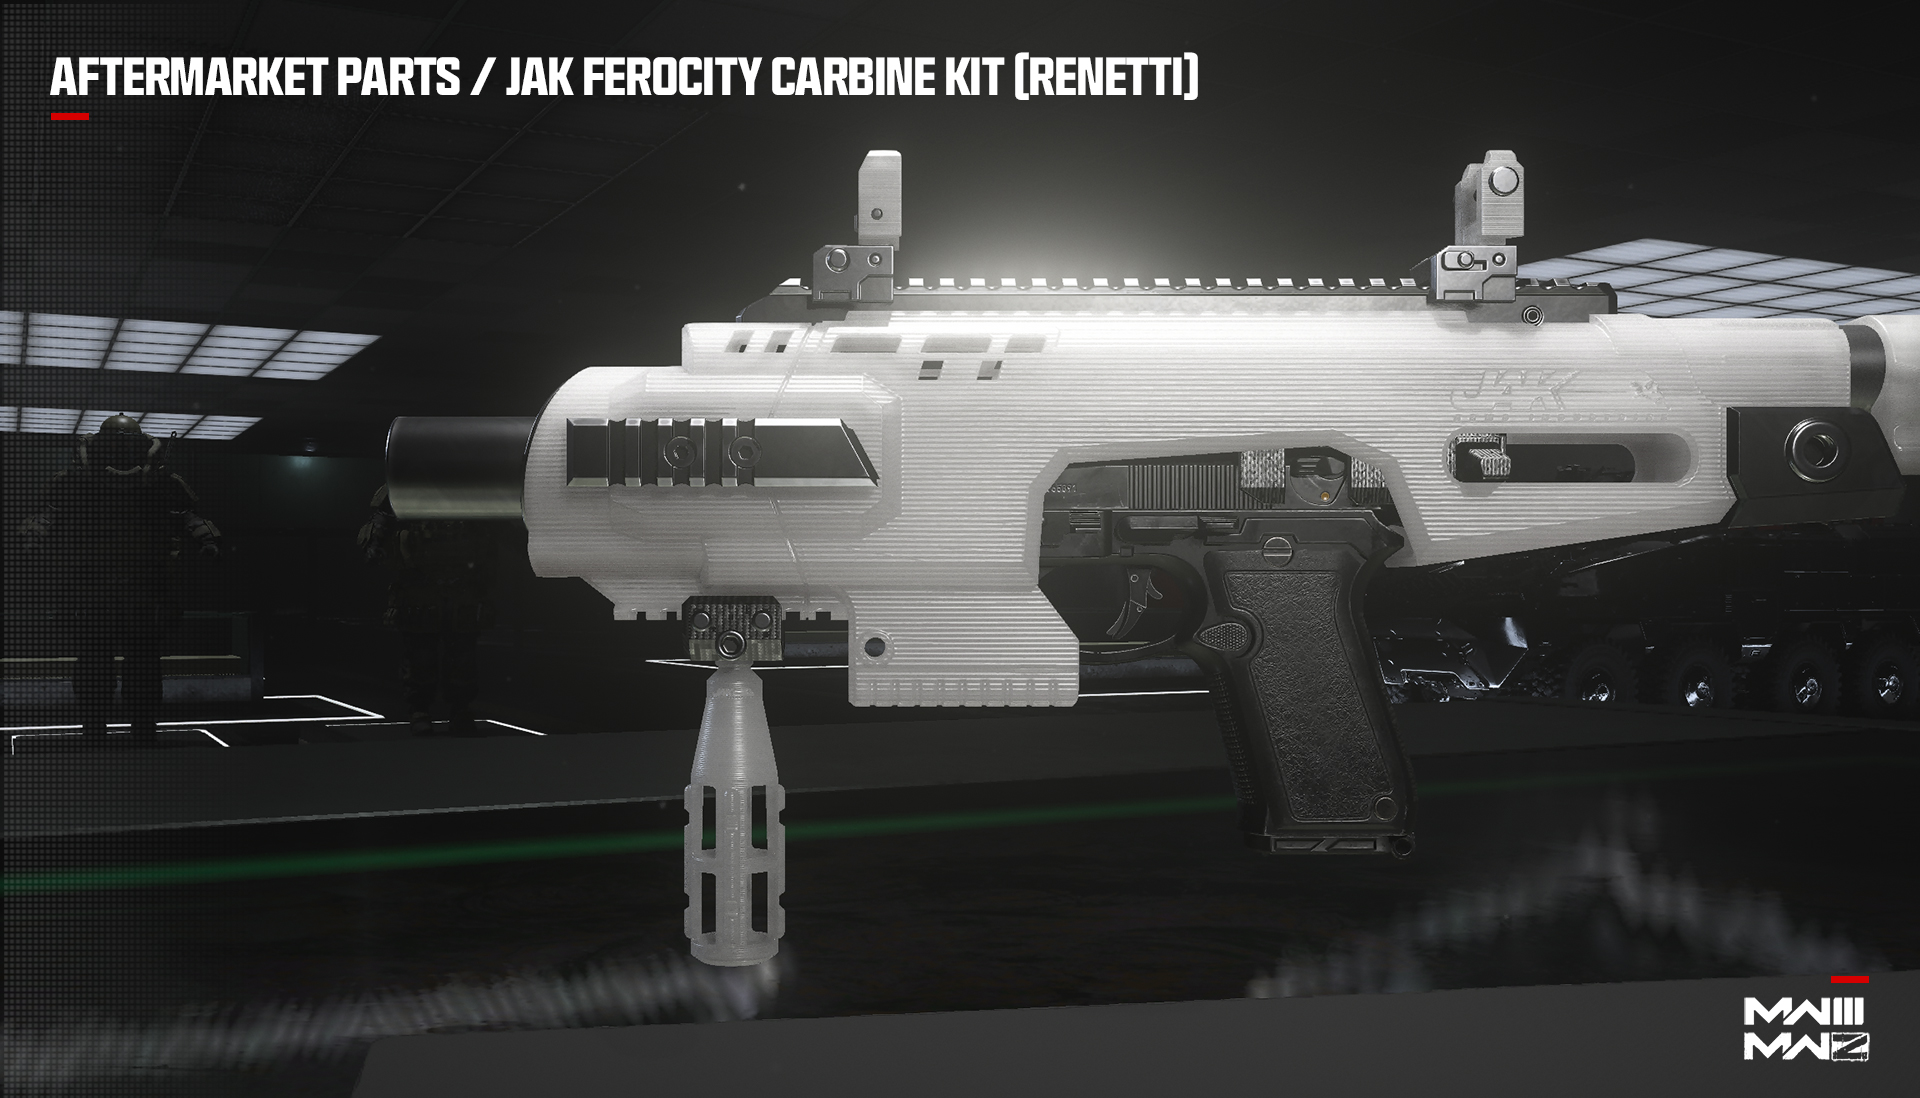
Aftermarket Parts may sound a little confusing, so let’s take the following example to explain how they work:
Take the MCW Assault Rifle as seen in the image above. In its stock configuration, the weapon fires a .556 caliber round. However, with the addition of the Aftermarket Part you can unlock for the weapon, you can convert the MCW to fire 300BLK rounds instead.
Why is this a good idea?
The option of converting a weapon with an Aftermarket Part has the following advantages: You can swap one attachment to create essentially a different weapon, but with the same attachment setup.
For example, you can switch an Assault Rifle that is optimal at midrange accuracy and convert it to one with short-range prowess.
In the case of the MCW, you can use this weapon in virtually every mode in the game on any map and be an effective member of your team. With the addition of the Aftermarket Part Conversion Kit, you can turn your .556 MCW Assault Rifle into a more effective weapon at closer range. You can tell this is meant for a shorter range because it has a higher rate of fire, higher mobility and handling, and of course the increased damage at close range.
Aftermarket Parts offer additional advantages once you’ve created a weapon with such an attachment: Playing on one of Modern Warfare III’s smaller maps while attempting to complete challenges with the MCW, you no longer have switch to a different weapon or one you haven’t set up to be optimal to your playstyle, when attempting to be effective during a match.
This is the general rule of thumb on how to best utilize Aftermarket Parts. Like almost every feature of Gunsmith, there is usually a trade-off to using an attachment. This is the case for Aftermarket Parts as well. The difference between most attachments and Aftermarket Parts is that you can really transform a weapon’s usage to an incredible degree, rather than making minor adjustments; this makes Gunsmith an even more robust tool for customization.
The following Aftermarket Parts are available immediately at launch, and each one has a designated unlock challenge. These challenges can be expected to show up as Weekly Challenges and Armory Challenges.
Note: For Aftermarket Parts unlocked via a Weekly Challenge, once that week expires, the Aftermarket Parts moves into the Armory Challenges section for a new (and always-available) unlock Challenge.
JAK Raven Kit (MCW – AR)
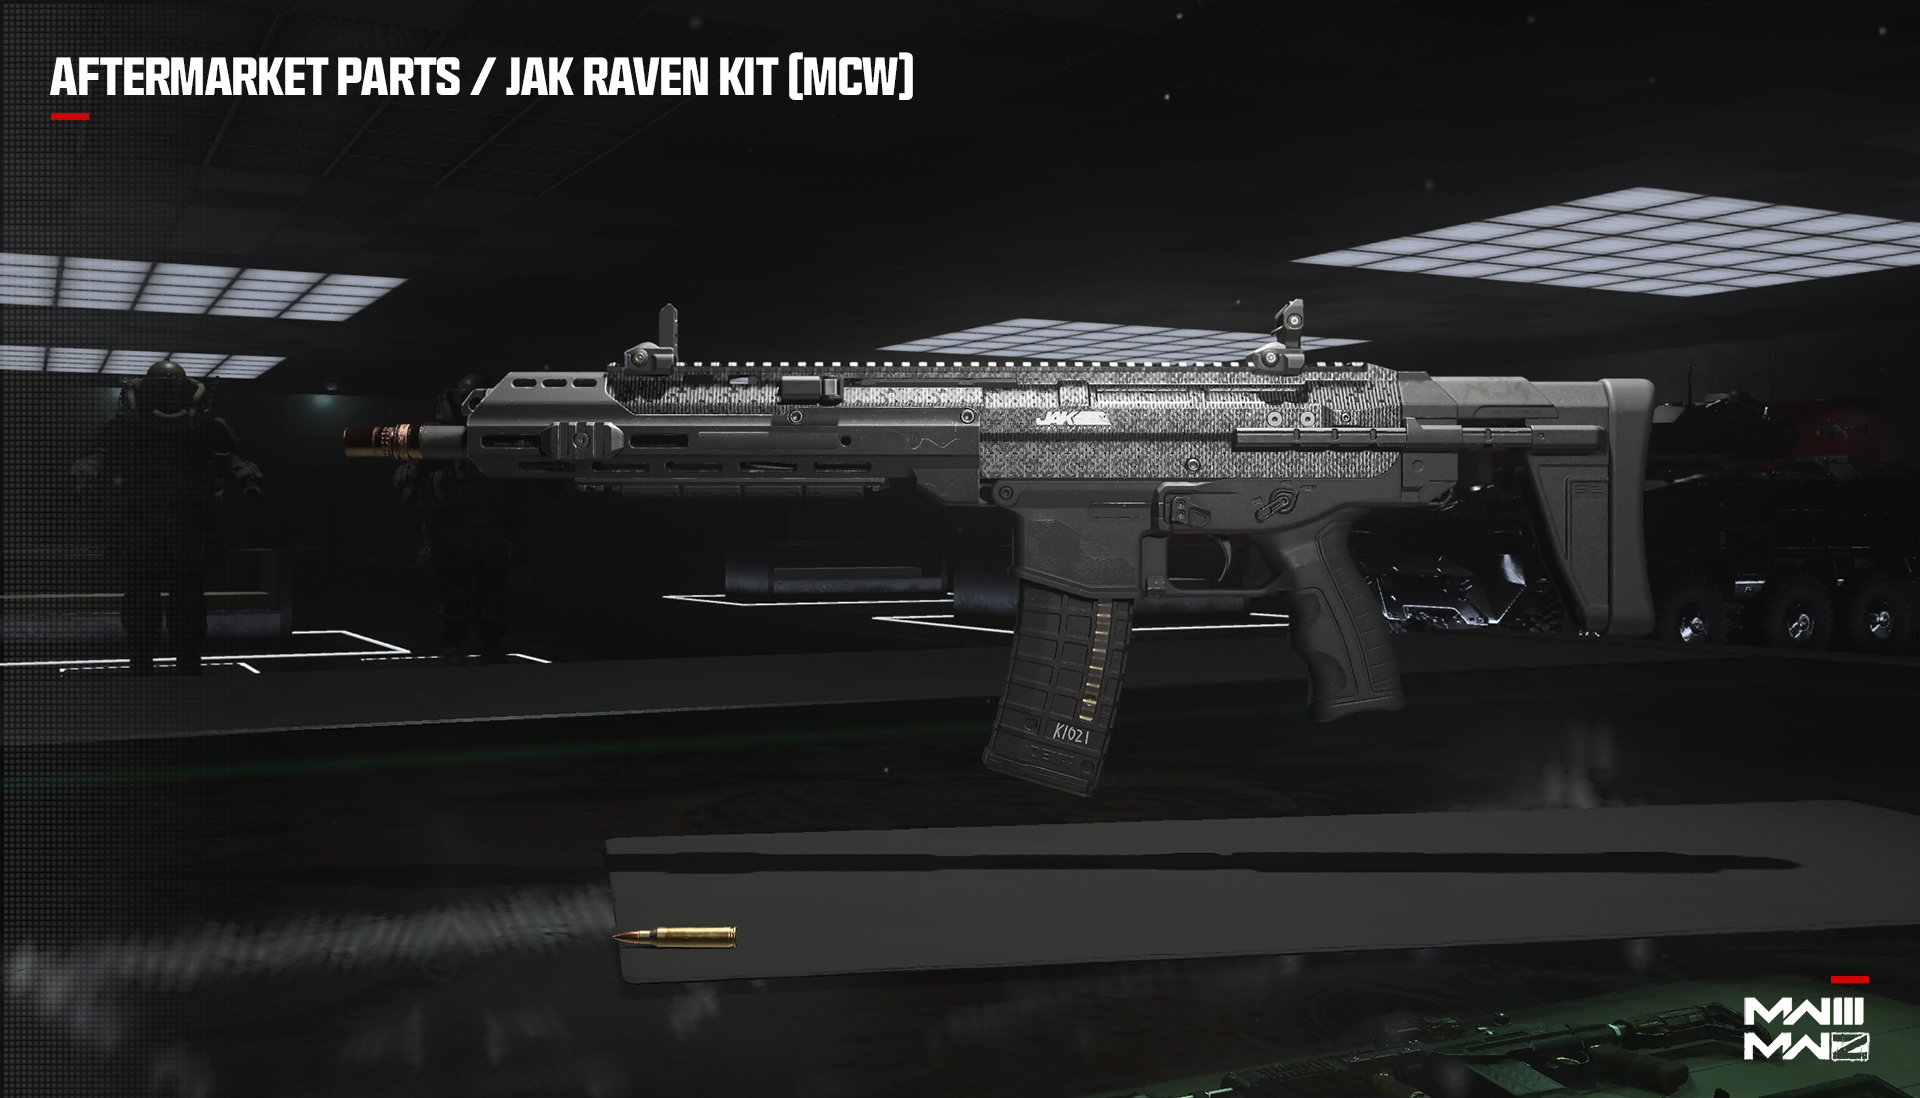
Versatile and modular, this .300 conversion of the MCW can be adapted to hit hard in nearly every combat scenario. This Kit is unlockable in the first weekly challenge post-launch.
JAK Heretic Carbine Kit (MTZ-762 – BR)
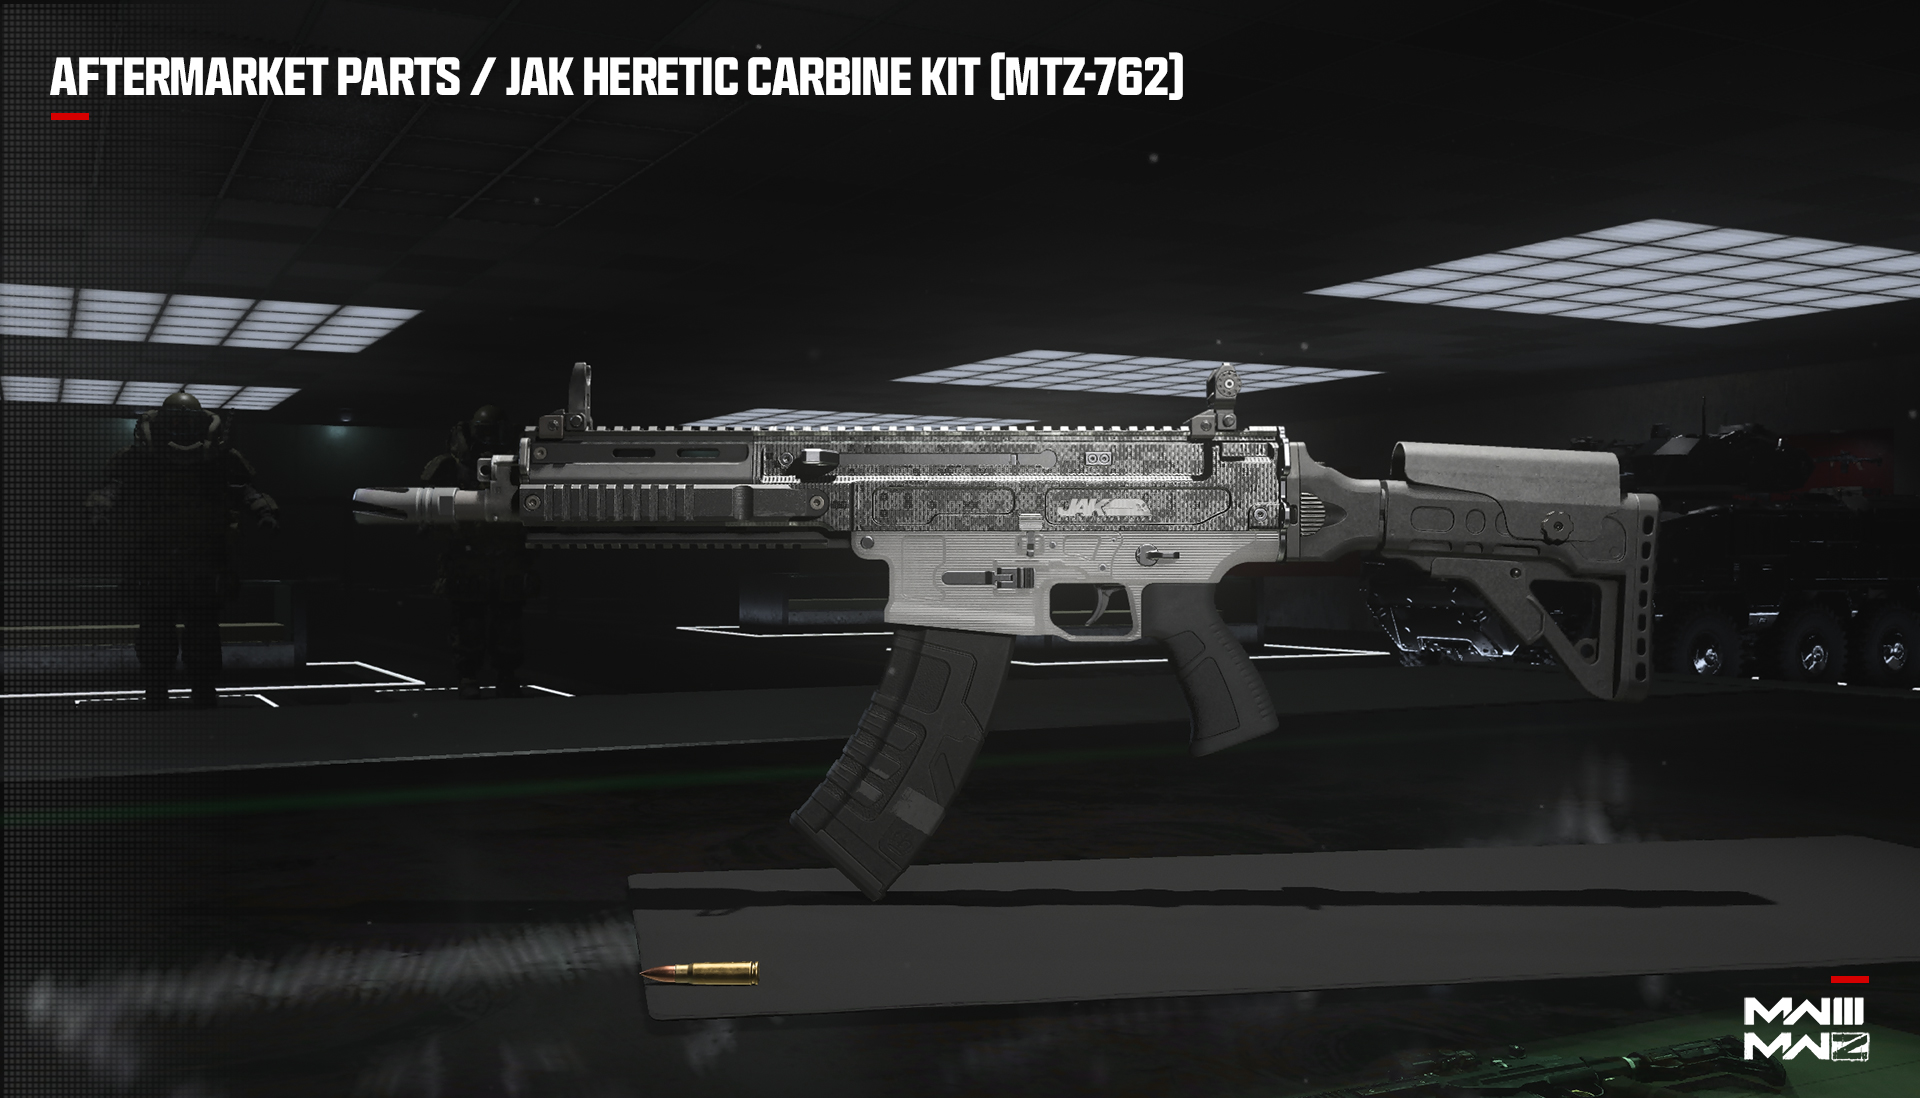
This powerful, 7.62 AR was crafted to deliver exceptional damage with moderate recoil.
Broodmother .45 Kit (WSP-9 – SMG)
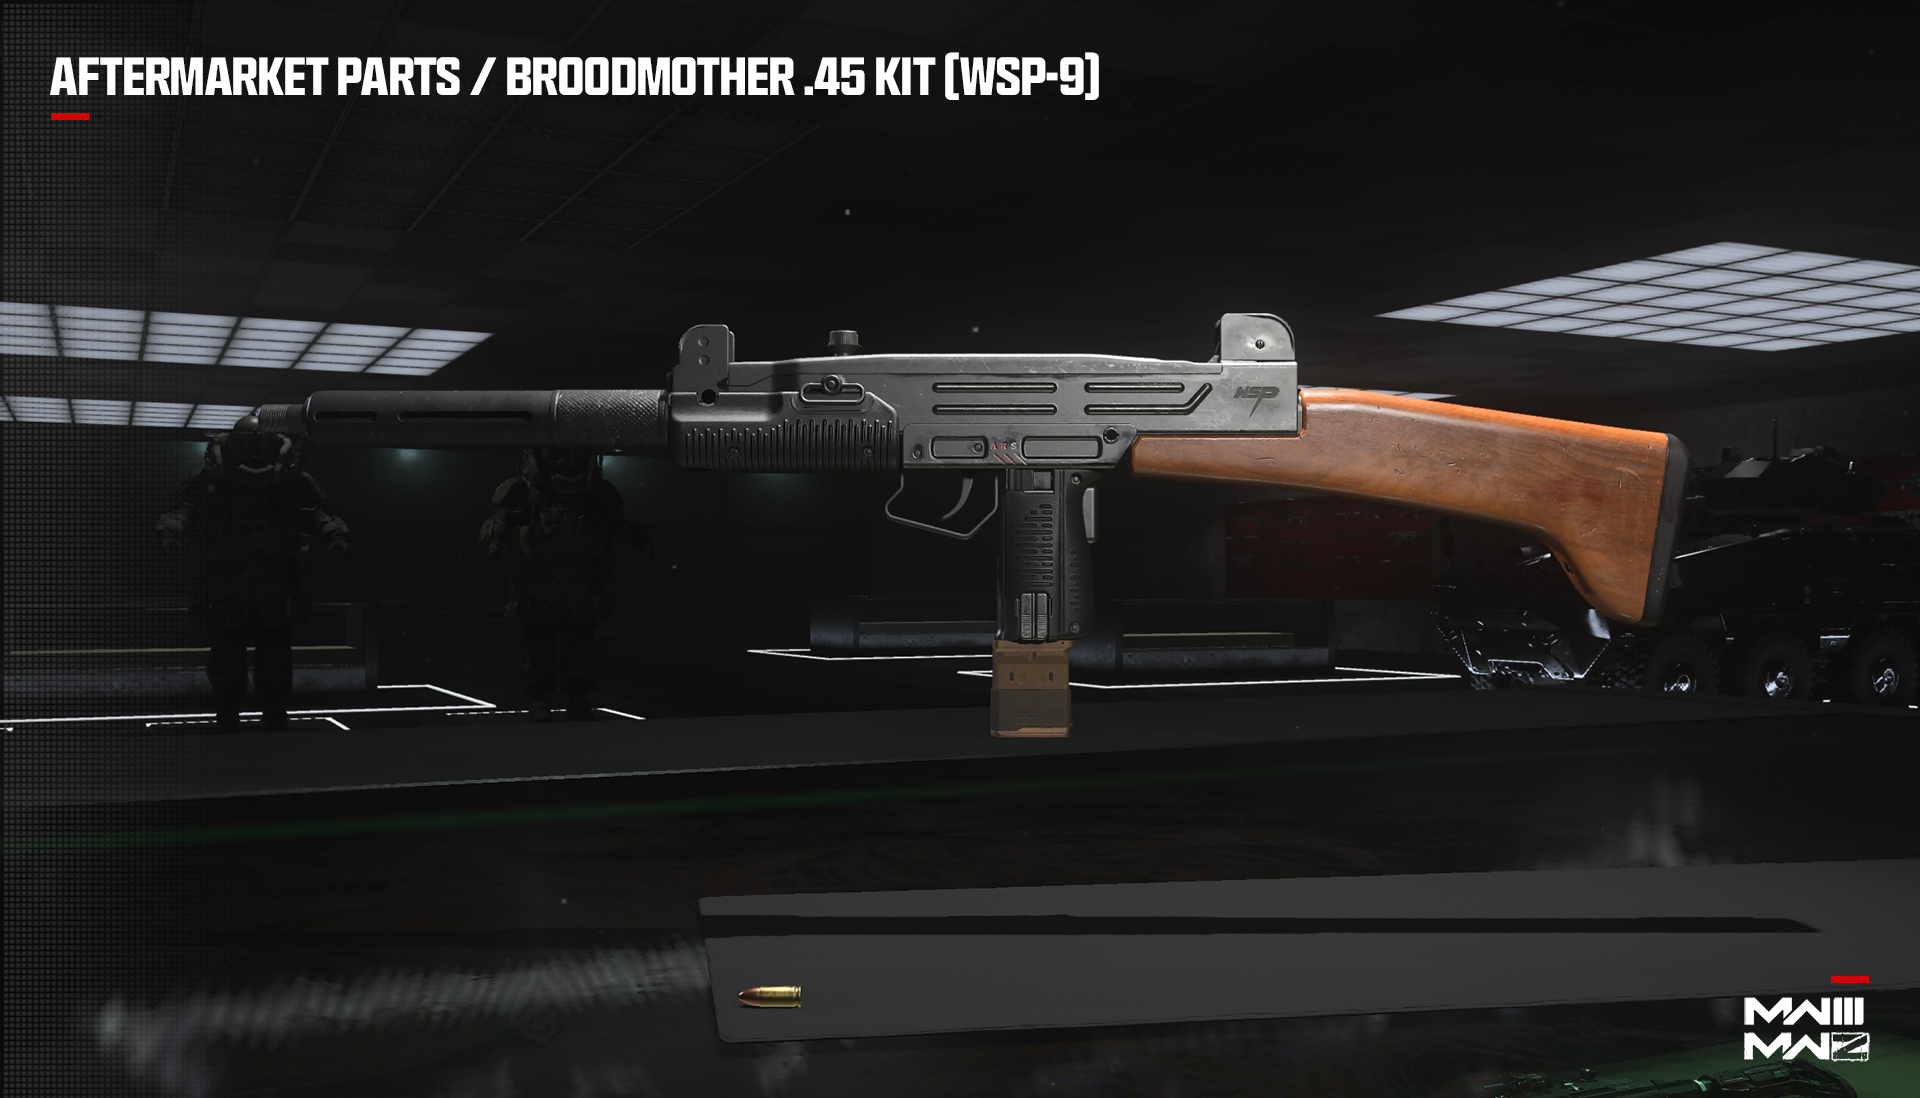
A high-damage conversion kit that rides the line between SMG and AR with hard-hitting .45 Auto rounds.
JAK Annihilator Bullpup Kit (Pulemyot 762 – LMG)
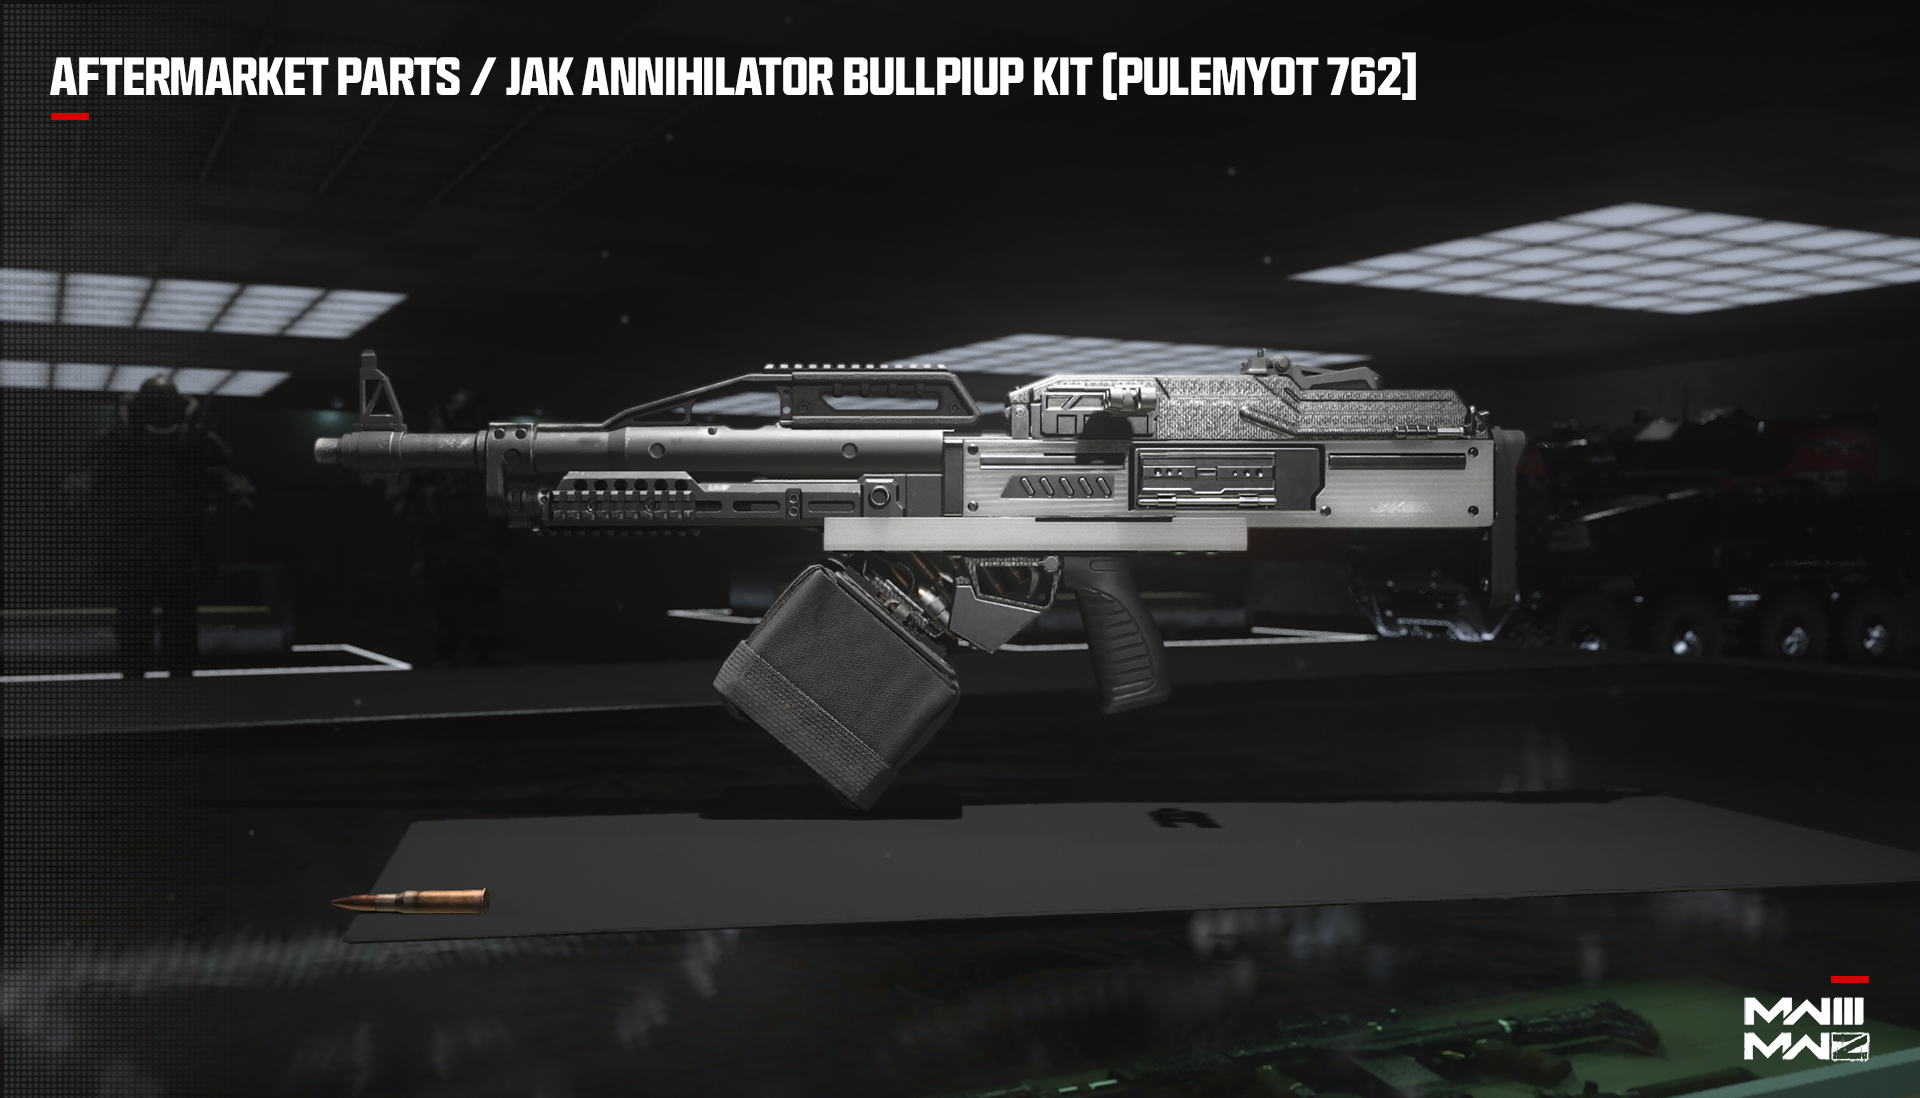
A modified, bullpup LMG that provides superior maneuverability while still delivering heavy and consistent fire.
XRK IP-V2 Conversion Barrel (COR-45 – Handgun)
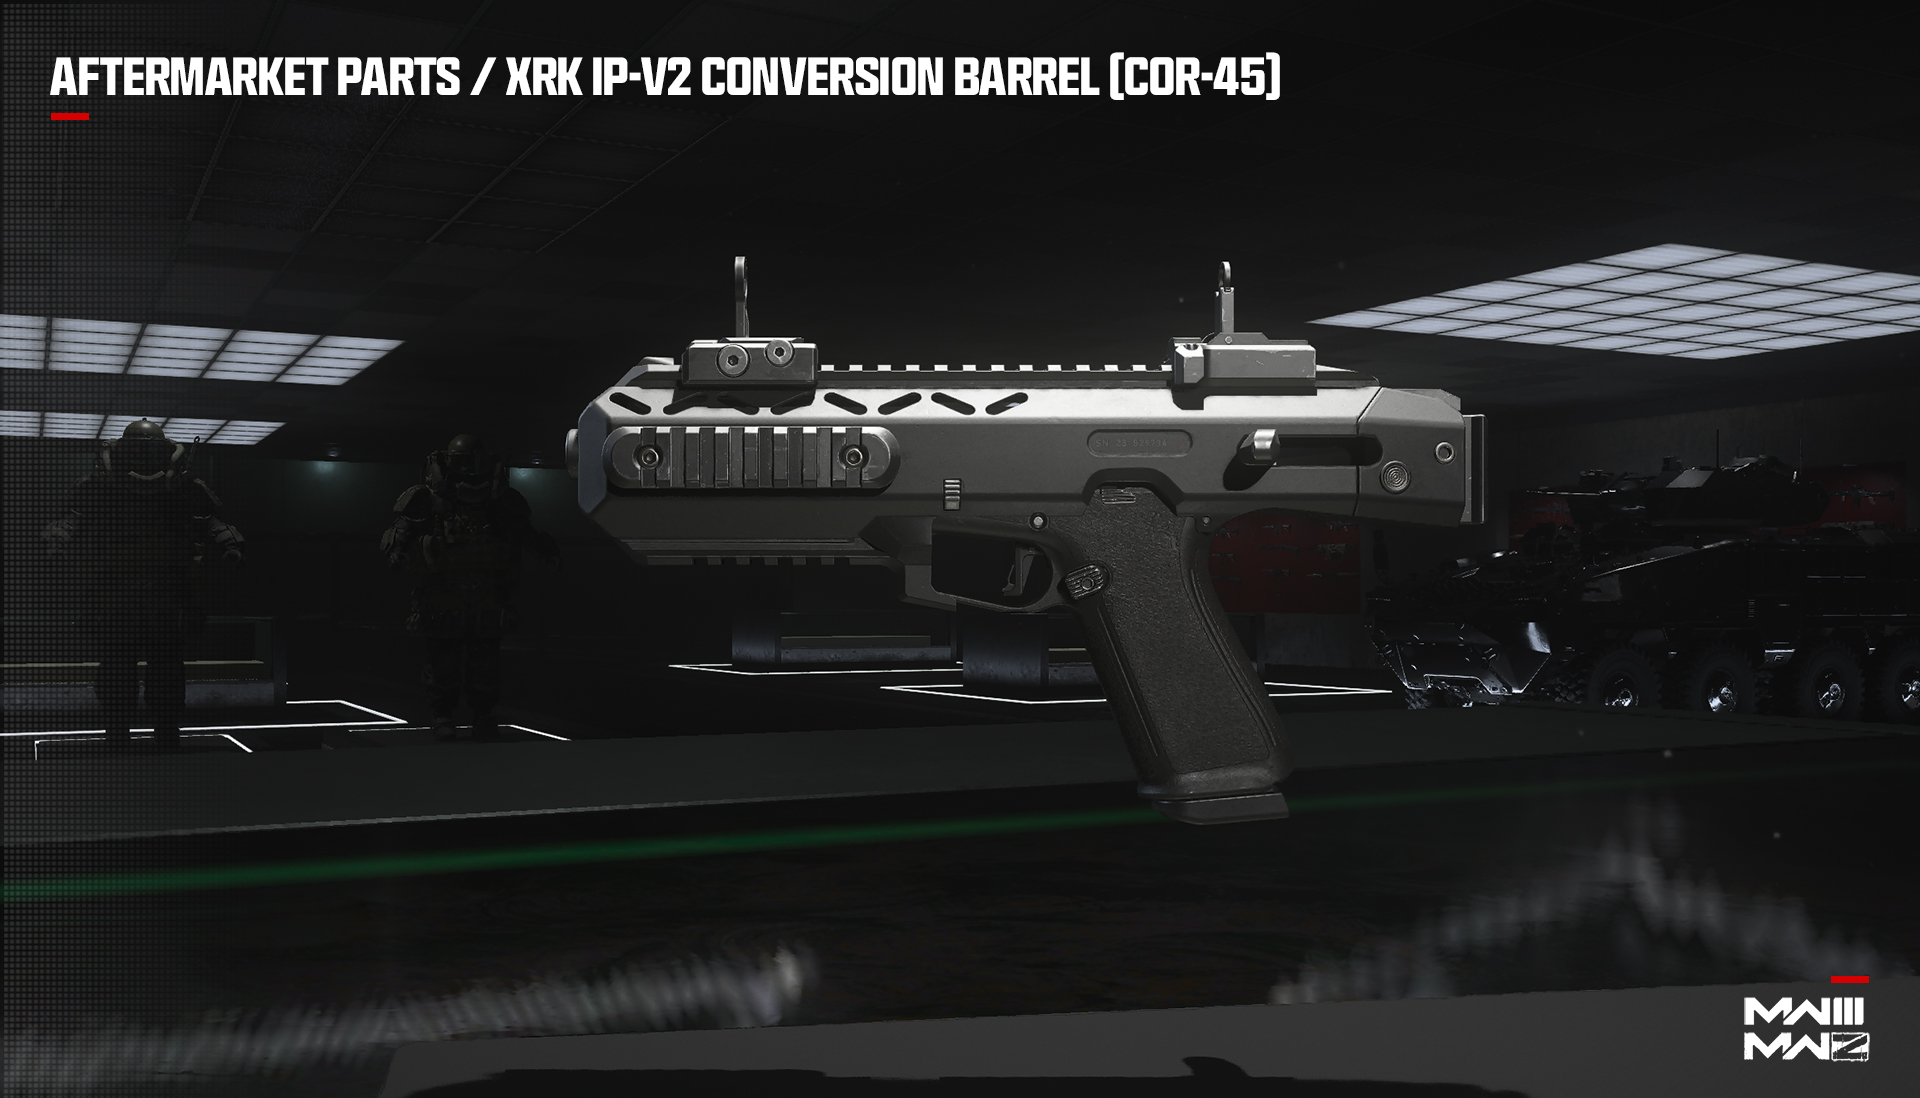
This carbine conversion kit for the COR-45 allows for optics and underbarrel attachments. It also introduces binary fire which effectively doubles the fire rate.
JAK Ferocity Carbine Kit (Renetti – Handgun)

This heavy carbine kit converts the Renetti pistol into a compact and maneuverable SMG. Allows for optics, stocks, and underbarrel attachments.

Weapon Progression: The Progression screen shows exactly what attachments (or Aftermarket Parts if they are available) are unlocked, and when. Explore the Gunsmith menu to view and understand where you can unlock these “universal” attachments.
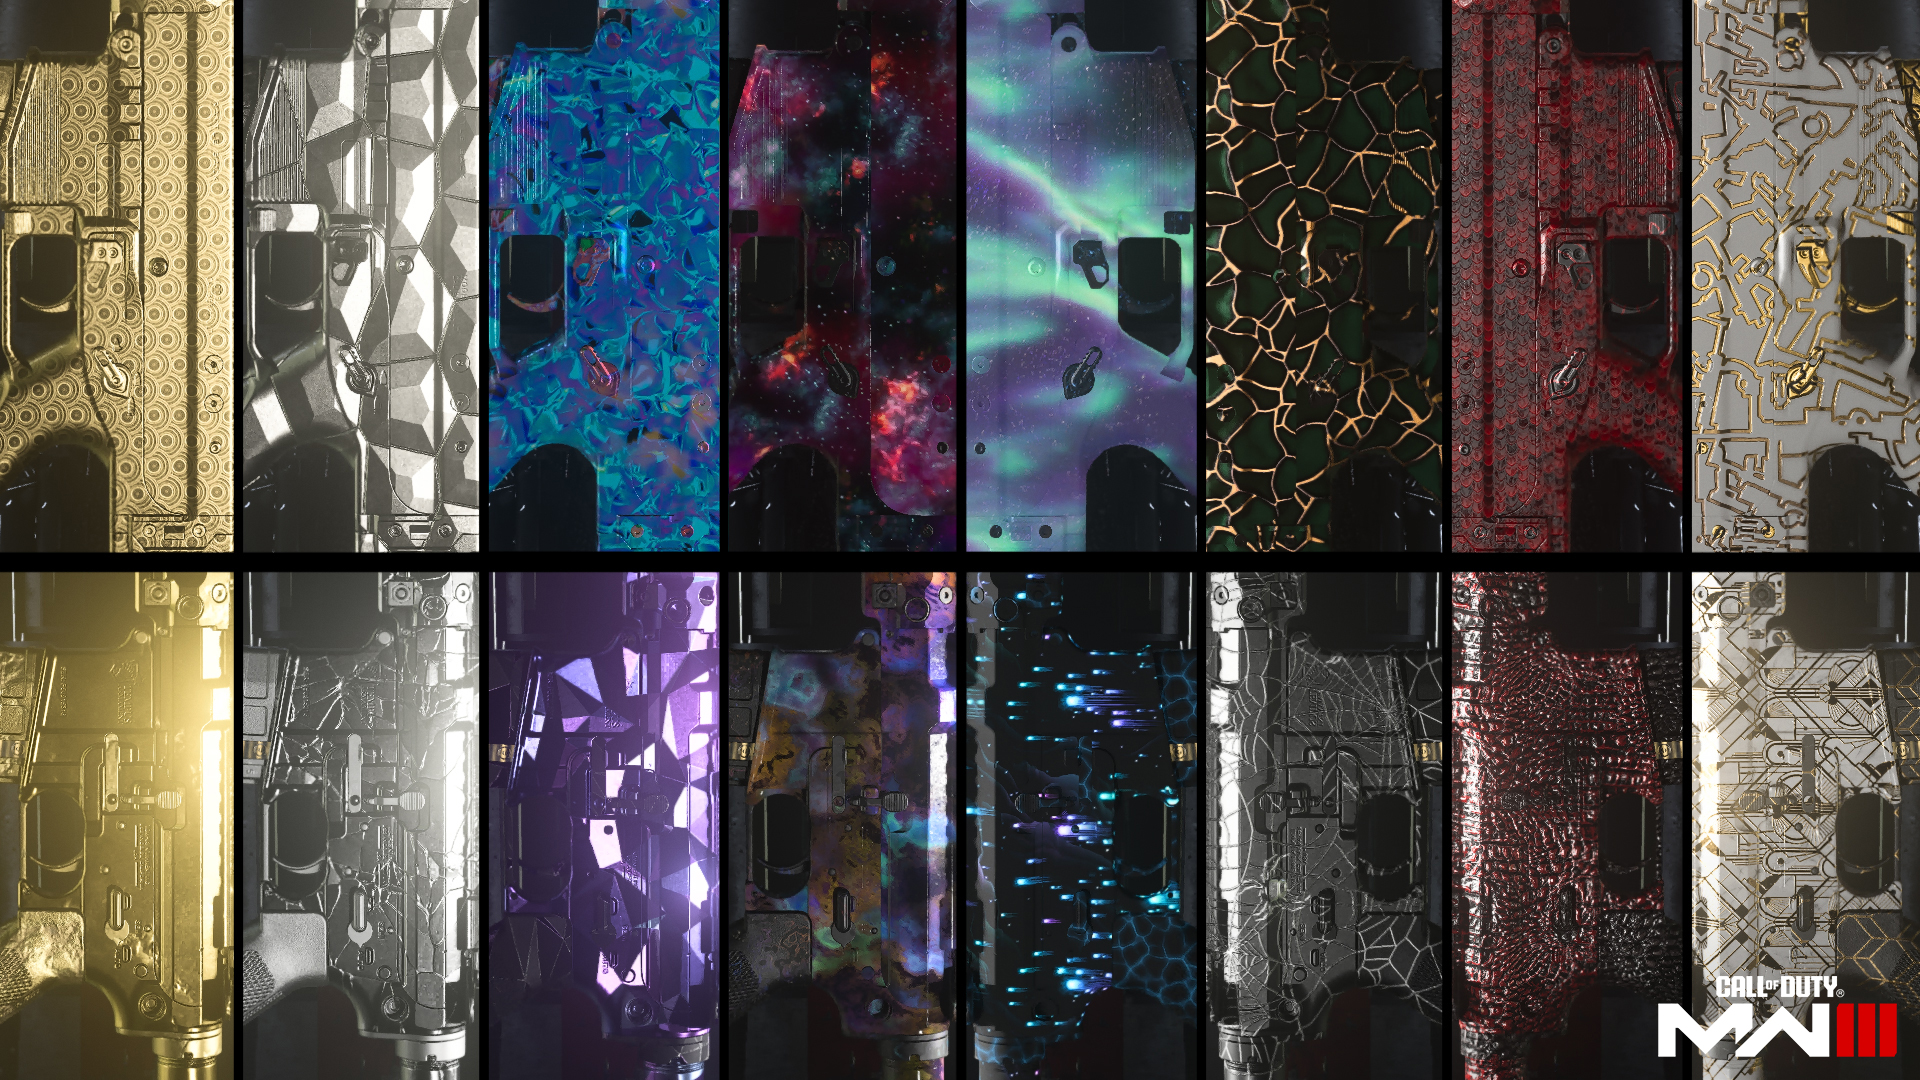
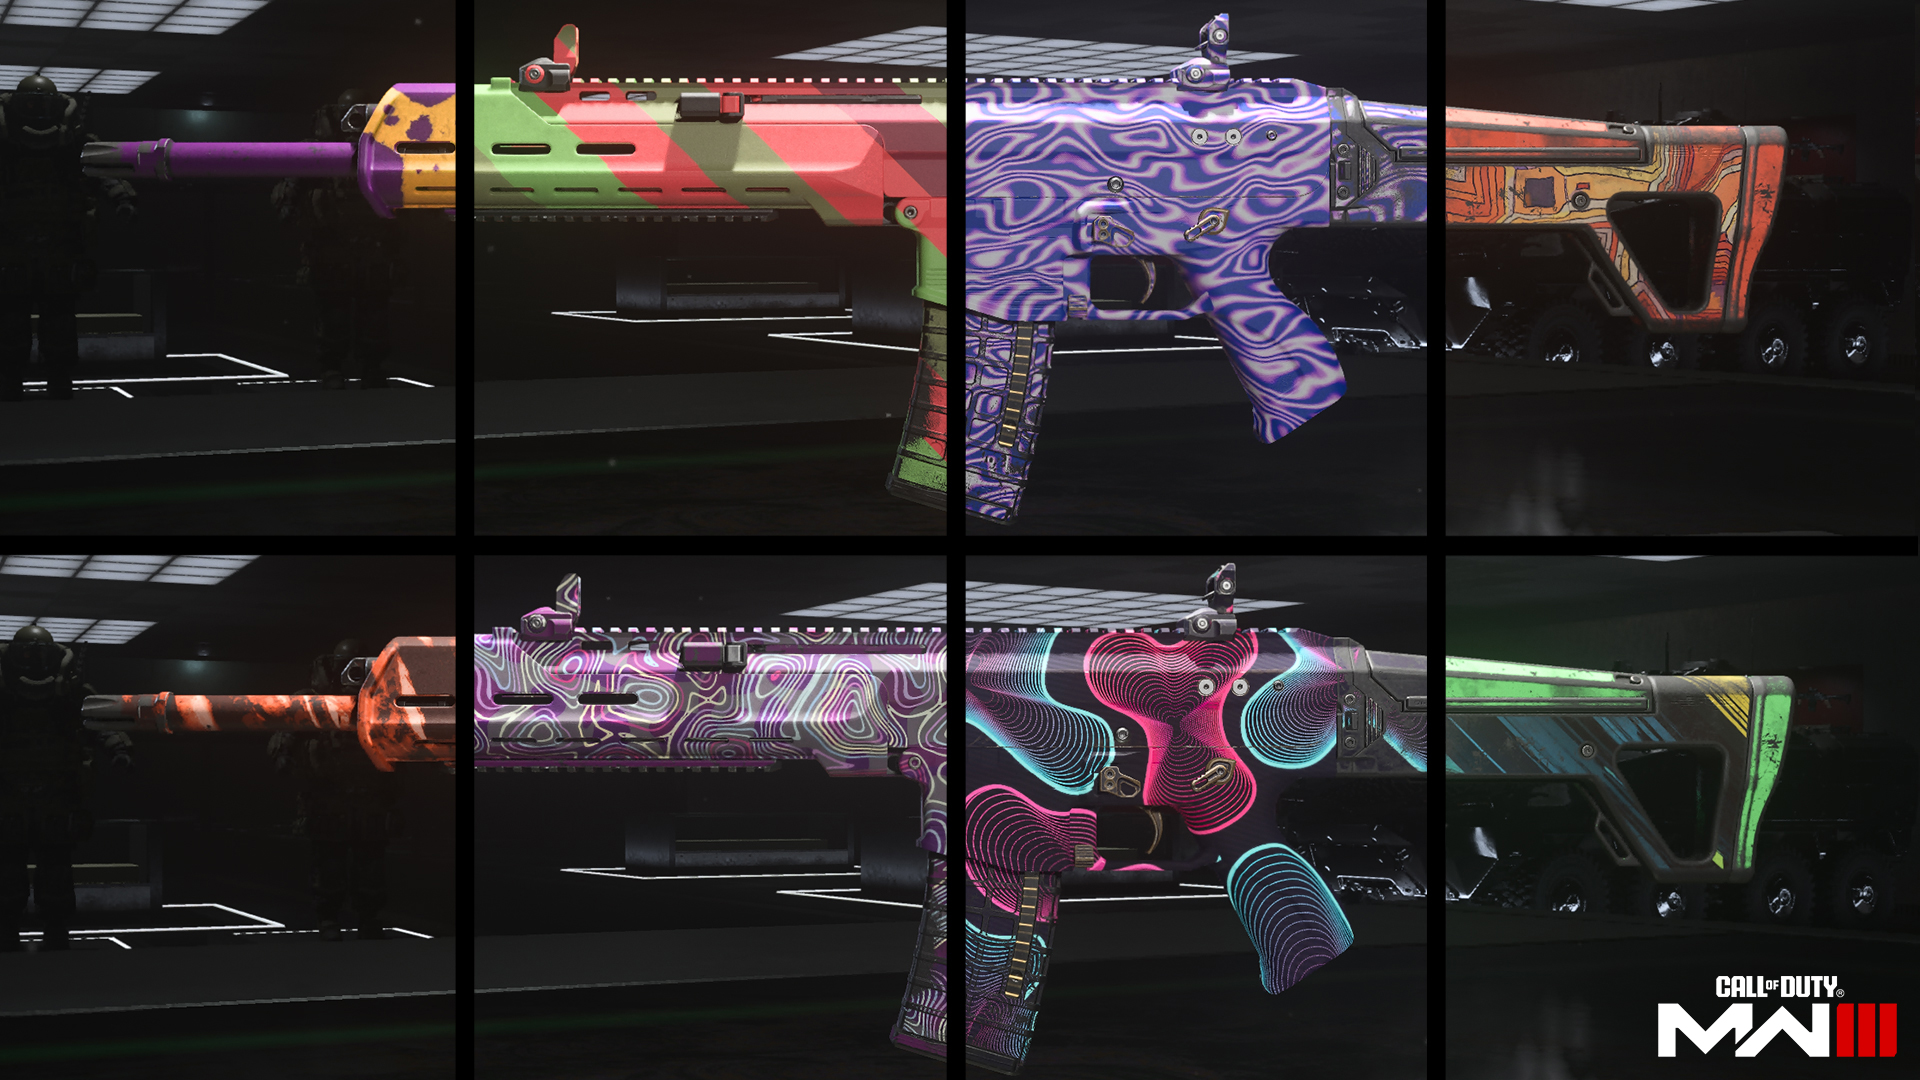
Want to spruce up a weapon beyond its base coat? In the
Customization menu, you can add some, or all, of the following
onto a weapon:
Charm: A small trinket that hangs off the weapon’s side.
Sticker: A design that can be attached to specific parts of a
weapon.
Reticle: When an Optic attachment is used, its “red dot” or
equivalent can be changed.
Camouflage: AKA Camos – this is a fresh coat of paint that
covers the weapon. Look for Camouflages to be unlocked via
progression and within the in-game Store.
Note: Duplicate effects do not stack.
// INTEL CARD
- MWIII
- WZ
- WZM
Infantry Vest (Level 4)
// MULTIPLAYER: PRE-GAME // WEAPONS AND LOADOUTS

An all-around Vest, the Infantry Vest is great for new players and those who just want a little bit of everything. Sacrifice very little in order to have a tool for every general situation. Build a Loadout around this Vest to be viable in every Multiplayer mode even if it doesn’t have a particular specialization.
· Increases Tac-Sprint duration and reduces refresh time.
· If equipped with Running Sneakers, it gains the effects of Lightweight Boots.
Available Slots
· Primary Weapon
· Secondary Weapon
· Tactical
· Lethal
· Field Upgrade
· Gloves
· Boots
· Gear
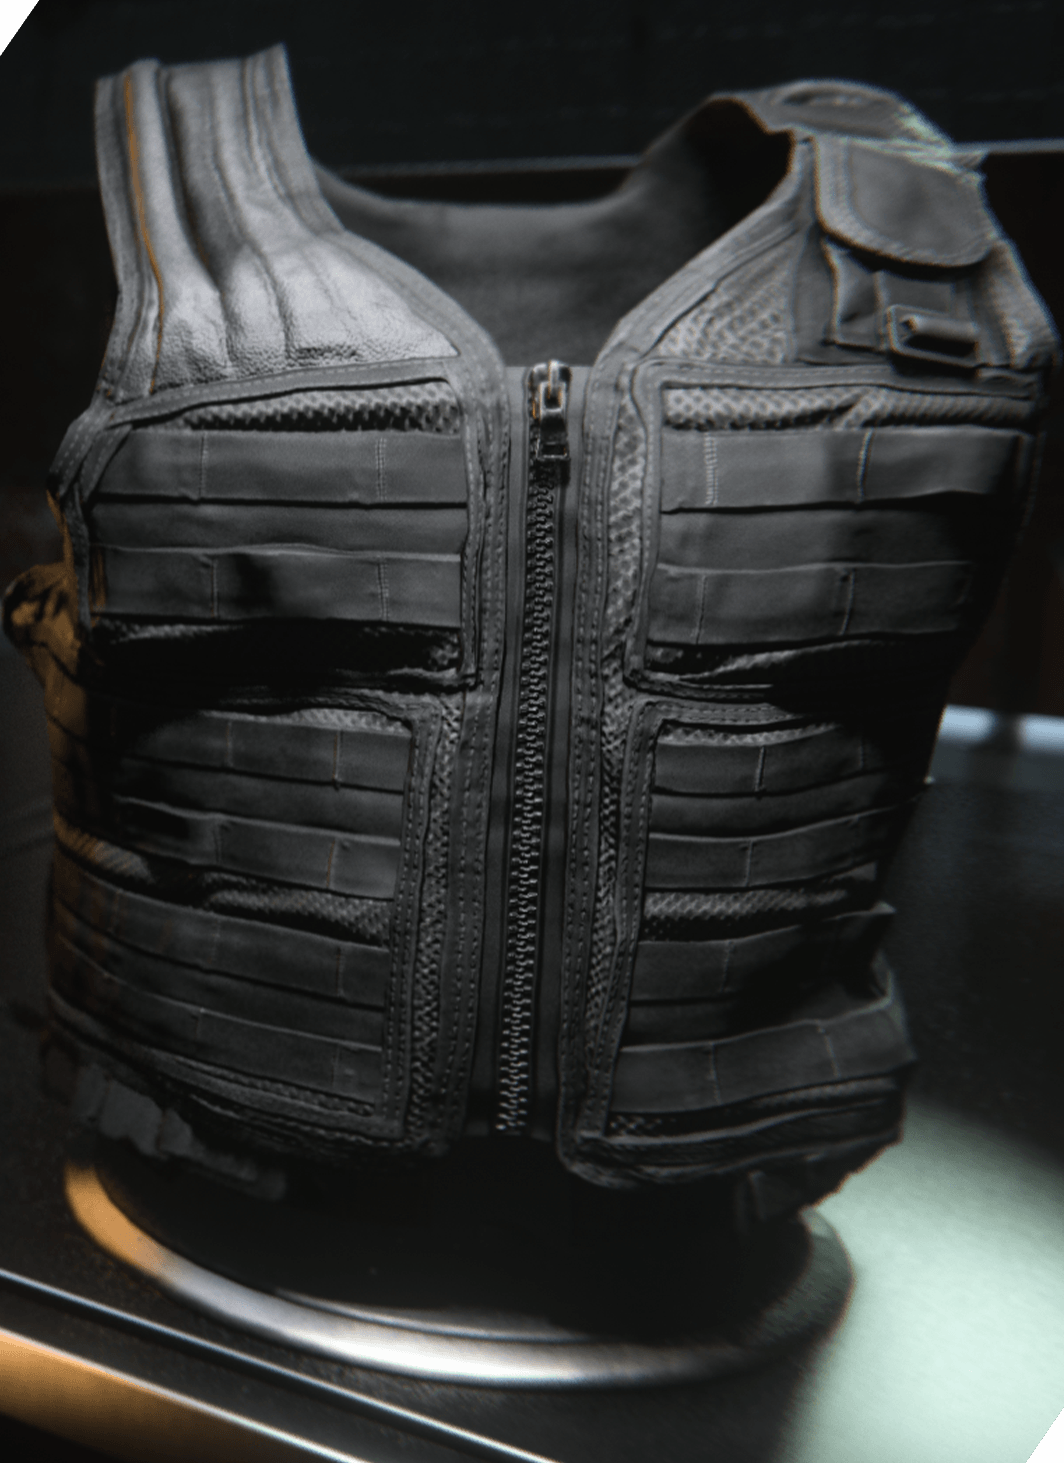
Unlocked at Player Level 4, the same time as Custom Loadouts, the Infantry Vest is the ultimate well-rounded Vest good for any occasion. This Vest is a great start to gaining the knowledge needed to perfect your Loadouts. Equipped with one of each slot (Tactical, Lethal, Field Equipment, Gloves, Boots, and Gear), it is great for the beginning of your leveling journey, and it allows you to test out something from every part of a Loadout.
// INTEL CARD
- MWIII
- WZ
- WZM
Engineer Vest (Level 10)
// MULTIPLAYER: PRE-GAME // WEAPONS AND LOADOUTS

The Engineer Vest is built to help you become the ultimate multitool and helping your team become victorious. Because of the features listed below, there is one goal in mind when wearing this Vest — become the neutralizer to your opponent’s equipment and the ultimate equalizer.
· Spot enemy equipment, Field Upgrades, and Killstreaks through walls. Aiming down sights highlights them for the team.
· Faster Field Upgrade recharge.
Available Slots
· Primary Weapon
· Secondary Weapon
· Tactical (2 Uses)
· Field Equipment
· Gloves
· Boots
· Gear
· Gear
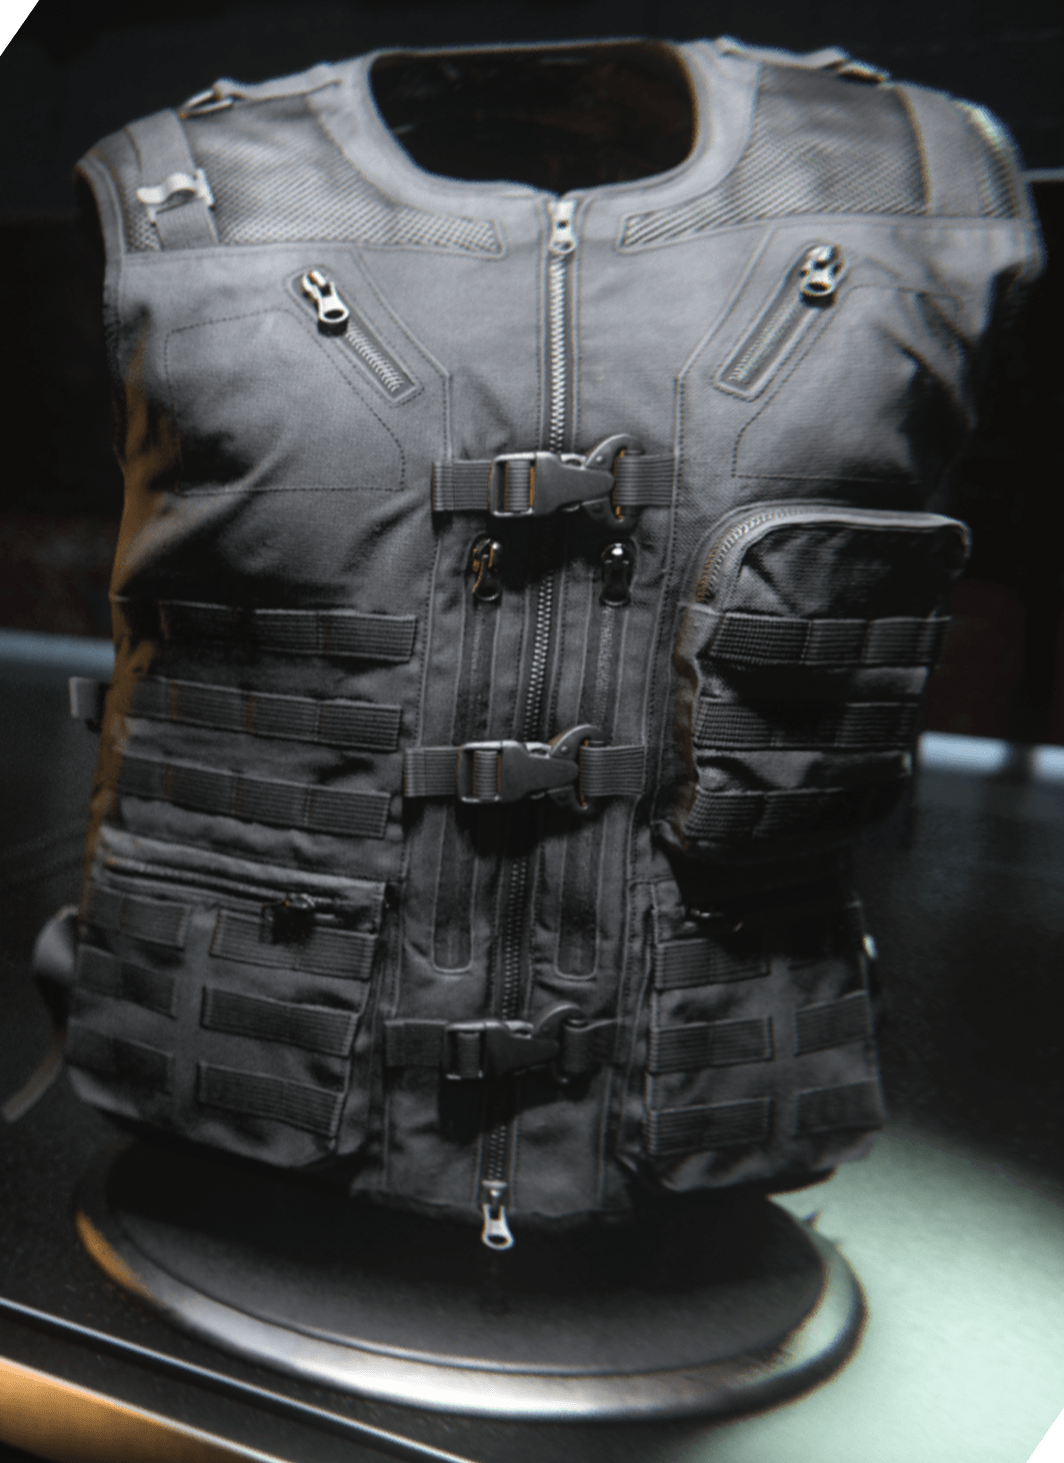
The Engineer Vest equips your Operator with all the proverbial tools you need to gather information and give it to your teammates. Being able to equip two uses of Tactical equipment items, such as the Shock Stick, allows you to spot enemy equipment, as well as neutralize it without having to second-guess yourself.
// INTEL CARD
- MWIII
- WZ
- WZM
Gunner Vest (Level 20)
// MULTIPLAYER: PRE-GAME // WEAPONS AND LOADOUTS
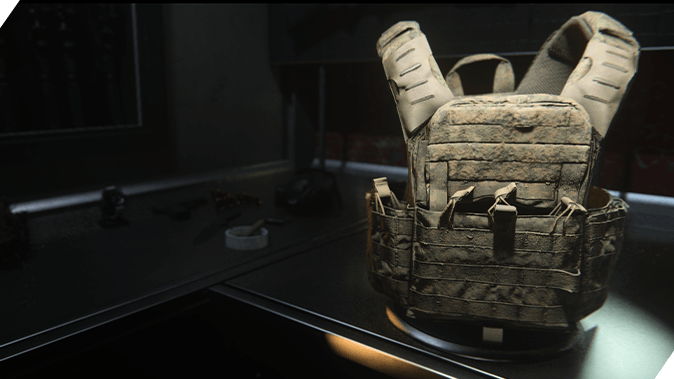
The Gunner Vest is the first Vest that you can unlock that allows you to equip more than one Primary Weapon. If your goal is to become a heavy weapon in any situation, this is the Vest for you.
· Deploy with max ammo.
· Improved reload speed.
· If equipped with Mag Holster, gain the effects of Mission Comlink.
Available Slots
· Primary Weapon
· Primary Weapon
· Tactical
· Lethal
· Field Equipment
· Gloves
· Gear
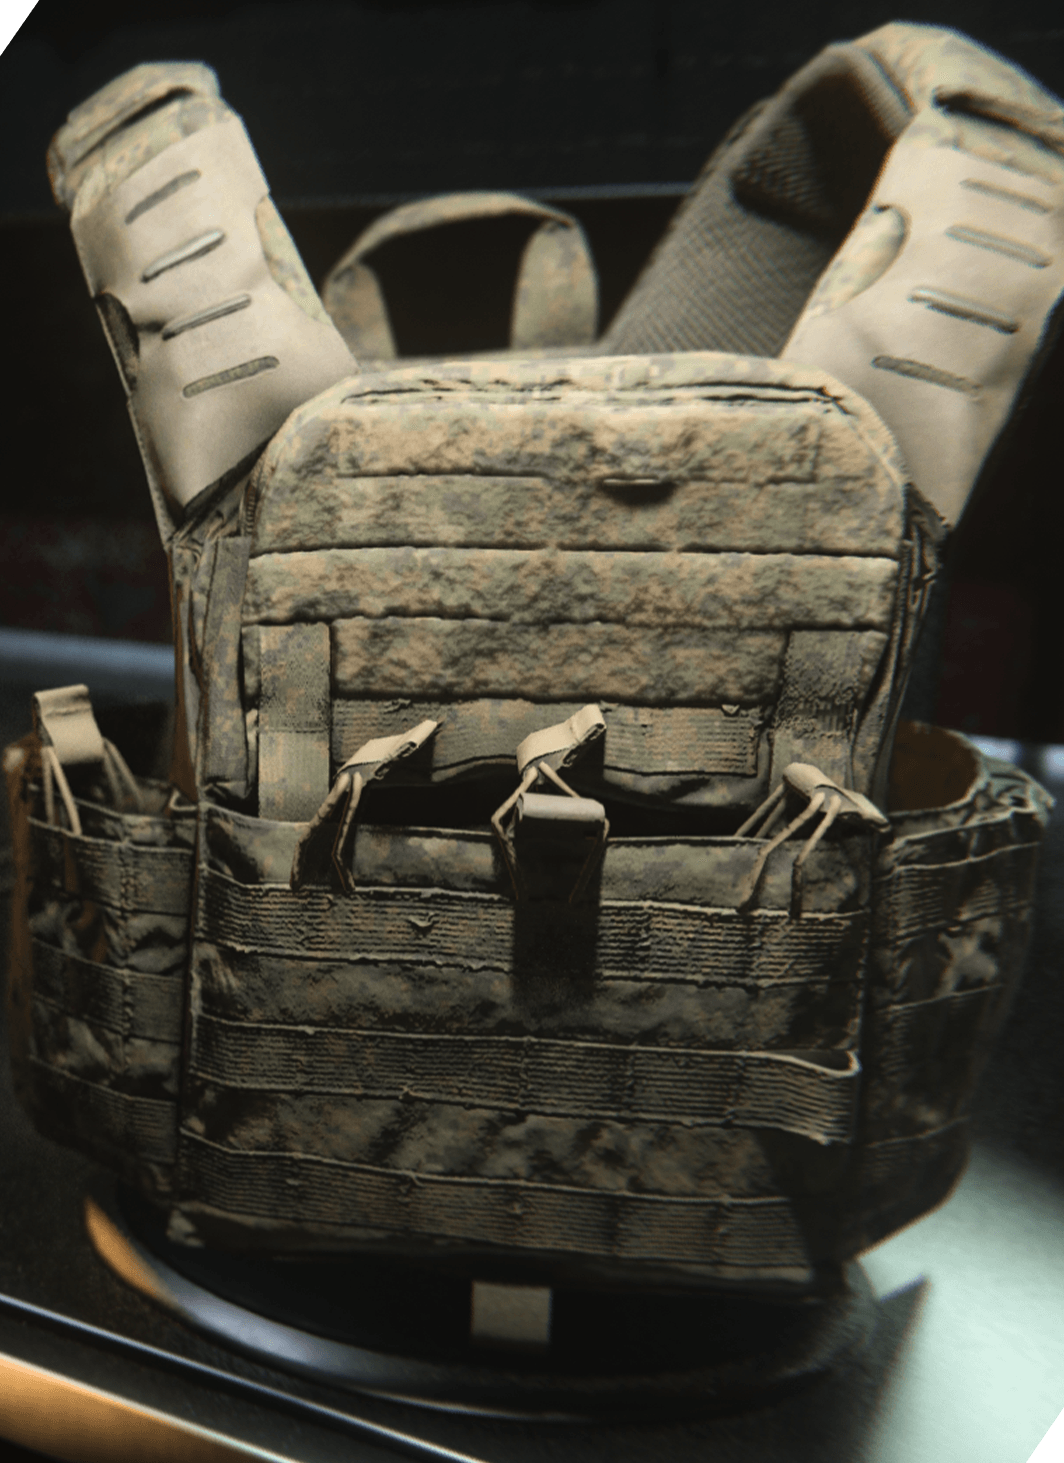
The Gunner Vest is a great for modes like Ground War and War purely because of the amount of ammunition one tends to spend in these modes. This Vest isn’t the greatest for running and gunning, but it is a good one for heavy gun spray players. Running Light Machine Guns and laying down cover fire for your teammates is extremely useful, and the Gunner Vest gives you the power to do this with good effect.
// INTEL CARD
- MWIII
- WZ
- WZM
Demolition Vest (Level 30)
// MULTIPLAYER: PRE-GAME // WEAPONS AND LOADOUTS

Grant your Operator the ability to throw equipment more often via the Demolition Vest. With the Demolition Vest, you no longer have to look for resupply caches to refill throwable equipment. With the bonuses listed below, you can supply explosive support to your teammates effectively and often.
· Resupply Lethal and Tactical equipment every 25 seconds.
Available Slots
· Primary Weapon
· Secondary Weapon
· Tactical
· Lethal (2 Uses)
· Field Equipment
· Gloves
· Boots
· Gear
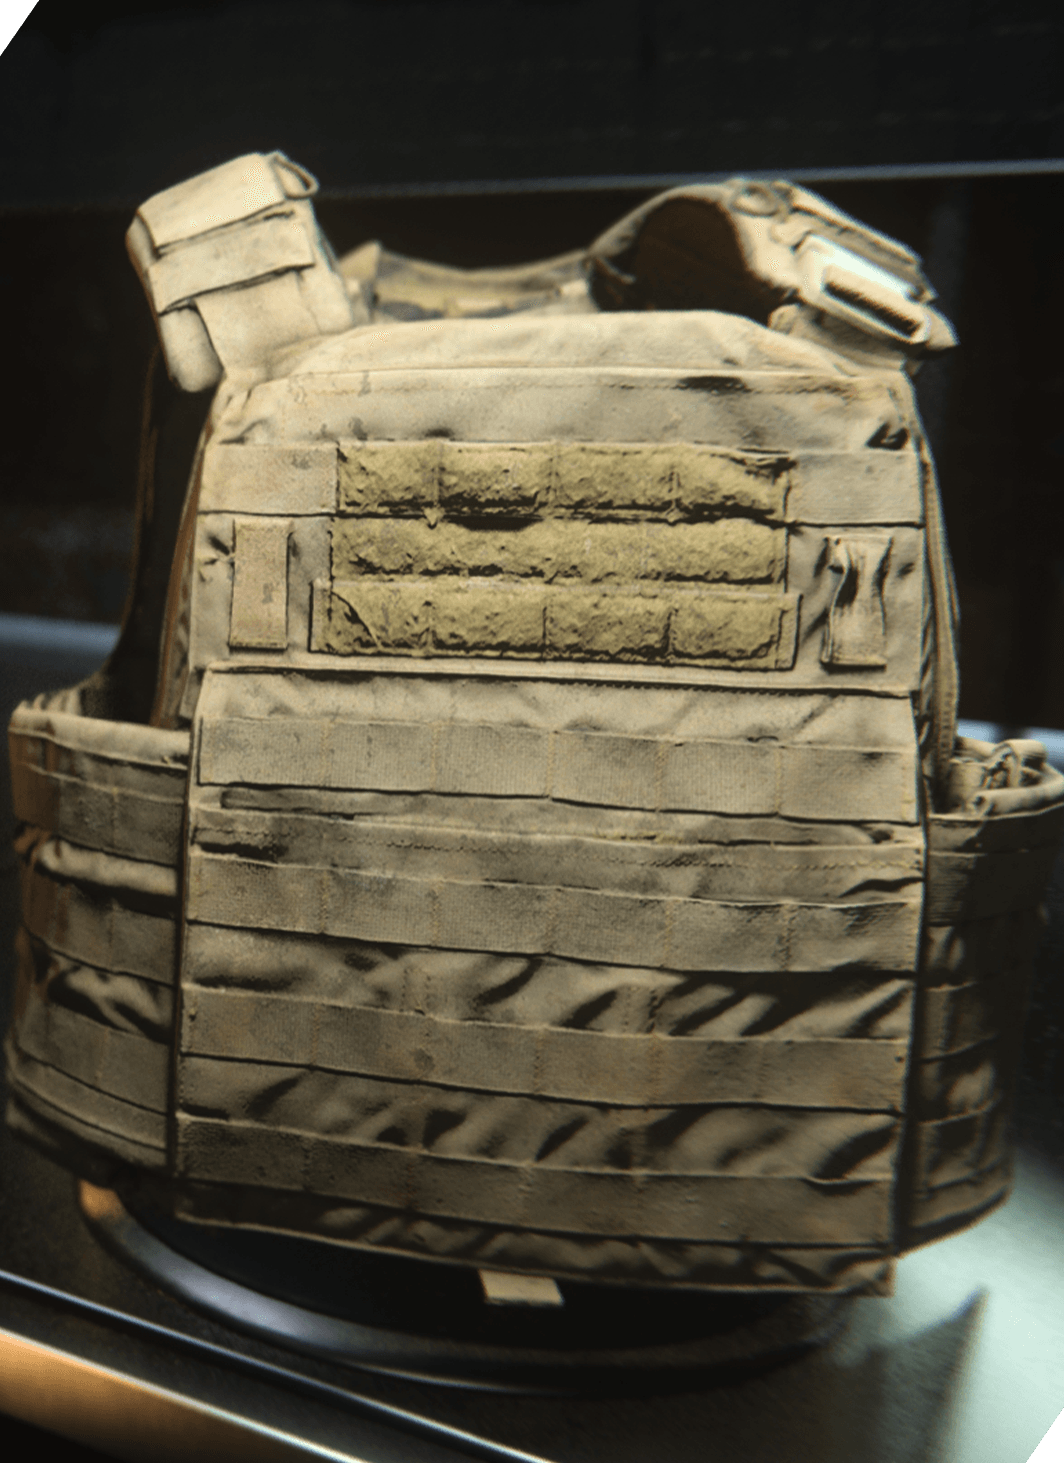
For players who enjoy throwing things, maybe even more than shooting enemies, the Demolition Vest is the vest for you. Not only do you get immediate access to two uses of your Lethal equipment, but the resupply Perk that you receive from this Vest is an incredible boon for keeping your opponents at bay. There are hard limits to how many placeable equipment items you can have on the map at once, but as soon as one is triggered or you don’t mind losing one, place another as soon as you want.
// INTEL CARD
- MWIII
- WZ
- WZM
CCT Comms Vest (Level 40)
// MULTIPLAYER: PRE-GAME // WEAPONS AND LOADOUTS
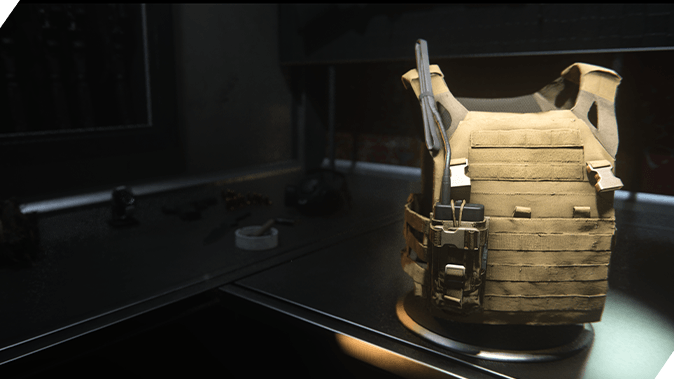
The CCT Comms Vest gives you the power to effectively provide useful information to your team as long as you stay active on the battlefield. This Vest unlocks later in your Player Level journey, so you will be experienced enough to efficiently use the bonuses on the Vest by the time you get it.
· Increases duration enemies stay on radar and zooms out radar for you and nearby allies.
· Enemies you eliminate drop intel packs, which generate a radar ping for you and nearby allies when collected.
· If equipped with Data Jacker, gain the effects of Mission Comlink.
Available Slots
· Primary Weapon
· Secondary Weapon
· Field Equipment
· Gloves
· Boots
· Gear
· Gear
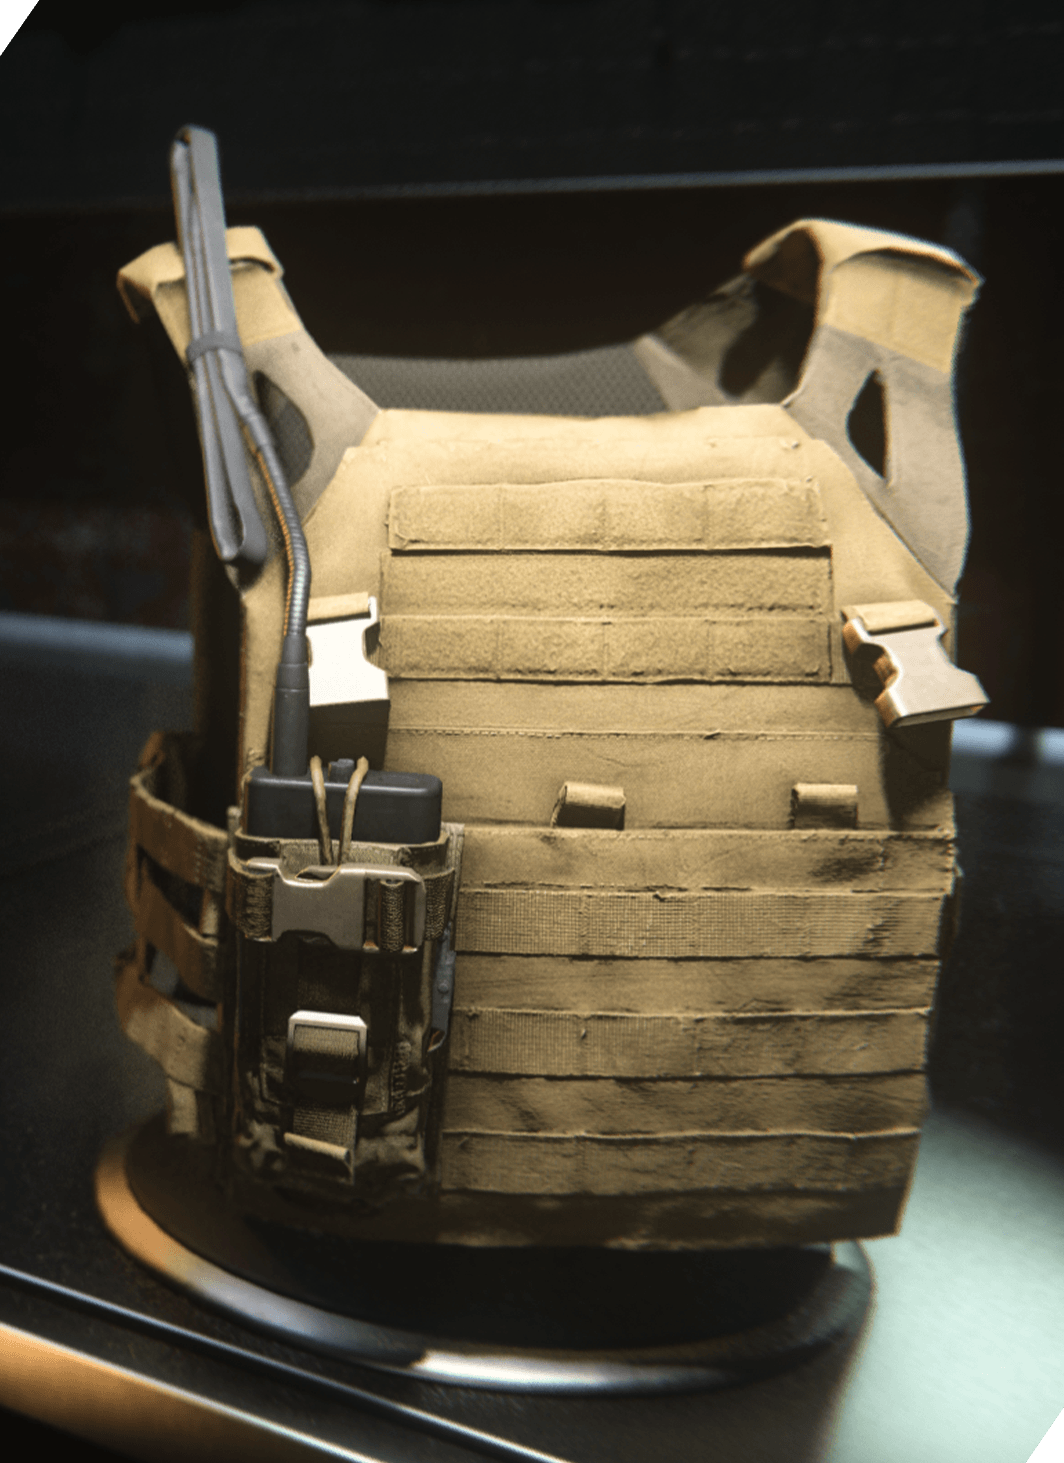
Teamwork is the key to victory in Call of Duty, and the CCT Comms Vest gives you a number of tools to help your squad. You do lose the ability to use Tactical or Lethal Equipment, but as long as you’re still getting eliminations, your team will be fed more information than they know what to do with. The ability to reveal enemy locations on the minimap even when a UAV is not active gives your team an advantage more often over the enemy team. Equipping Mission Control Comlink will give you the opportunity to constantly reveal enemies on the minimap.
// INTEL CARD
- MWIII
- WZ
- WZM
Commando Vest (Level 50)
// MULTIPLAYER: PRE-GAME // WEAPONS AND LOADOUTS
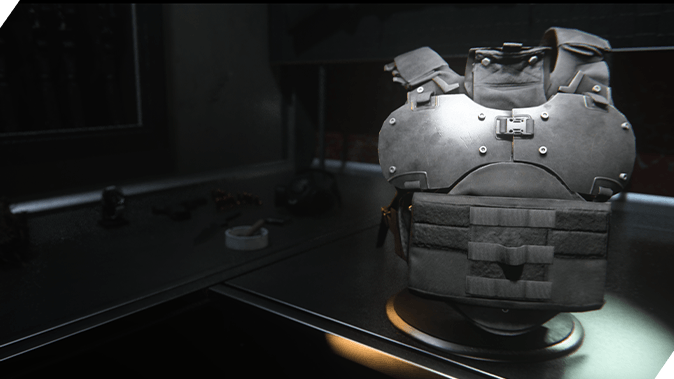
The Commando Vest doesn’t quite make your Operator a super soldier, but it does get pretty close. With the freedom to equip one of everything (except Field Equipment), including two Primary Weapons or even two Secondary Weapons, your role while this Vest is equipped is to run at your enemies locked and loaded.
· Increased weapon swap speed.
· Reload while sprinting.
· If equipped with Quick-Grip Gloves or Commando Gloves, gain the effects of Marksman Gloves.
Available Slots
· Primary/Secondary Weapon
· Primary/Secondary Weapon
· Tactical
· Lethal
· Gloves
· Boots
· Gear

The Commando Vest is very well-rounded. Like the Infantry Vest, it does have one of each type of slot. However, outside of the Perks contained in the Vest, the difference is that you have the option to carry any combination of Primary and Secondary Weapons. This means you can equip, say, two secondaries or a Secondary in your first slot and a Primary in your second slot. This allows you to spawn and immediately run at incredible speeds to the zone or objective you plan to operate near before anyone else can. This is also useful for running a melee-only build while keeping your options open where melee may not be viable.
Equipment
Equipment refers to Lethal Equipment (limited-per-life items that harm enemies, usually in an explosive fashion) and Tactical Equipment (limited-per-life and reusable items that range from intel-gathering sensors, instant healing, and disorientation devices).
// INTEL CARD
- MWIII
- WZ
- WZM
Loadout Idea: Tactical Sweeper
// MULTIPLAYER: PRE-GAME // WEAPONS AND LOADOUTS

The Tactical Sweeper is a Loadout meant for close-ranged combat and for those that are a bit over running full speed into enemy equipment. This Loadout is for moving fast, so use it wisely and get behind the enemy before they even know you’re close.
· Vest: Engineer Vest
· Primary: Striker
· Secondary: WSP Stinger
· Tactical: Decoy Grenade
· Field Upgrade: A.C.S.
· Gloves: Scavenger Gloves
· Boots: Running Sneakers
· Gear: Mag Holster
· Gear: Signal Jammer
// INTEL CARD
- MWIII
- WZ
- WZM
Striker Attachment Setup
// MULTIPLAYER: PRE-GAME // WEAPONS AND LOADOUTS

Striker
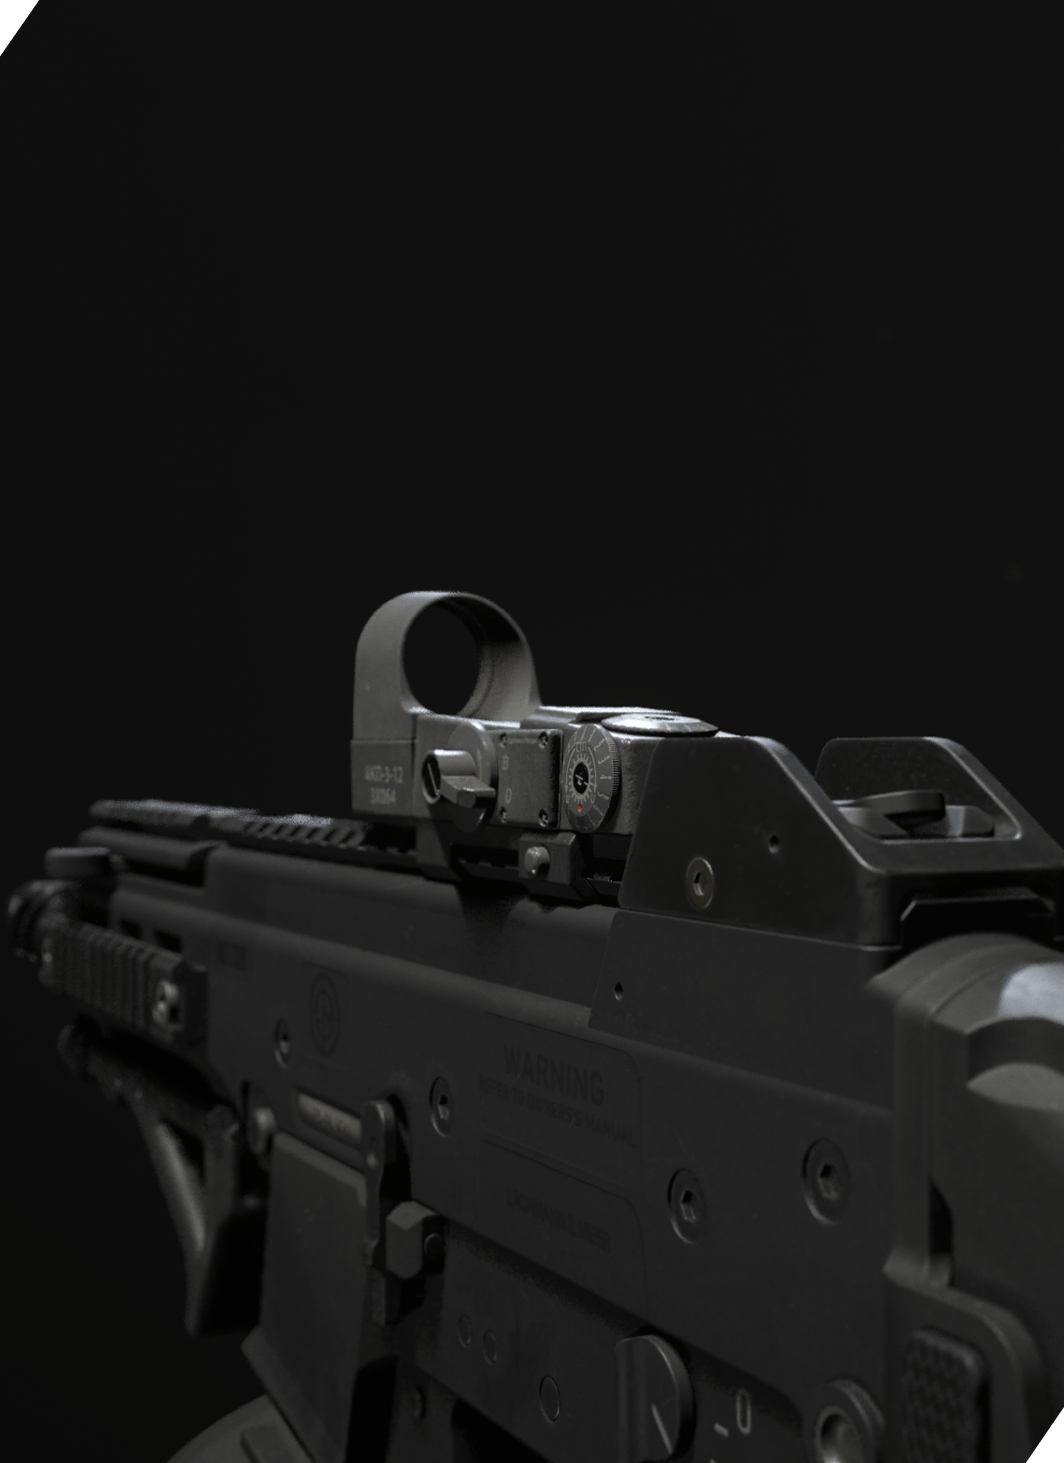
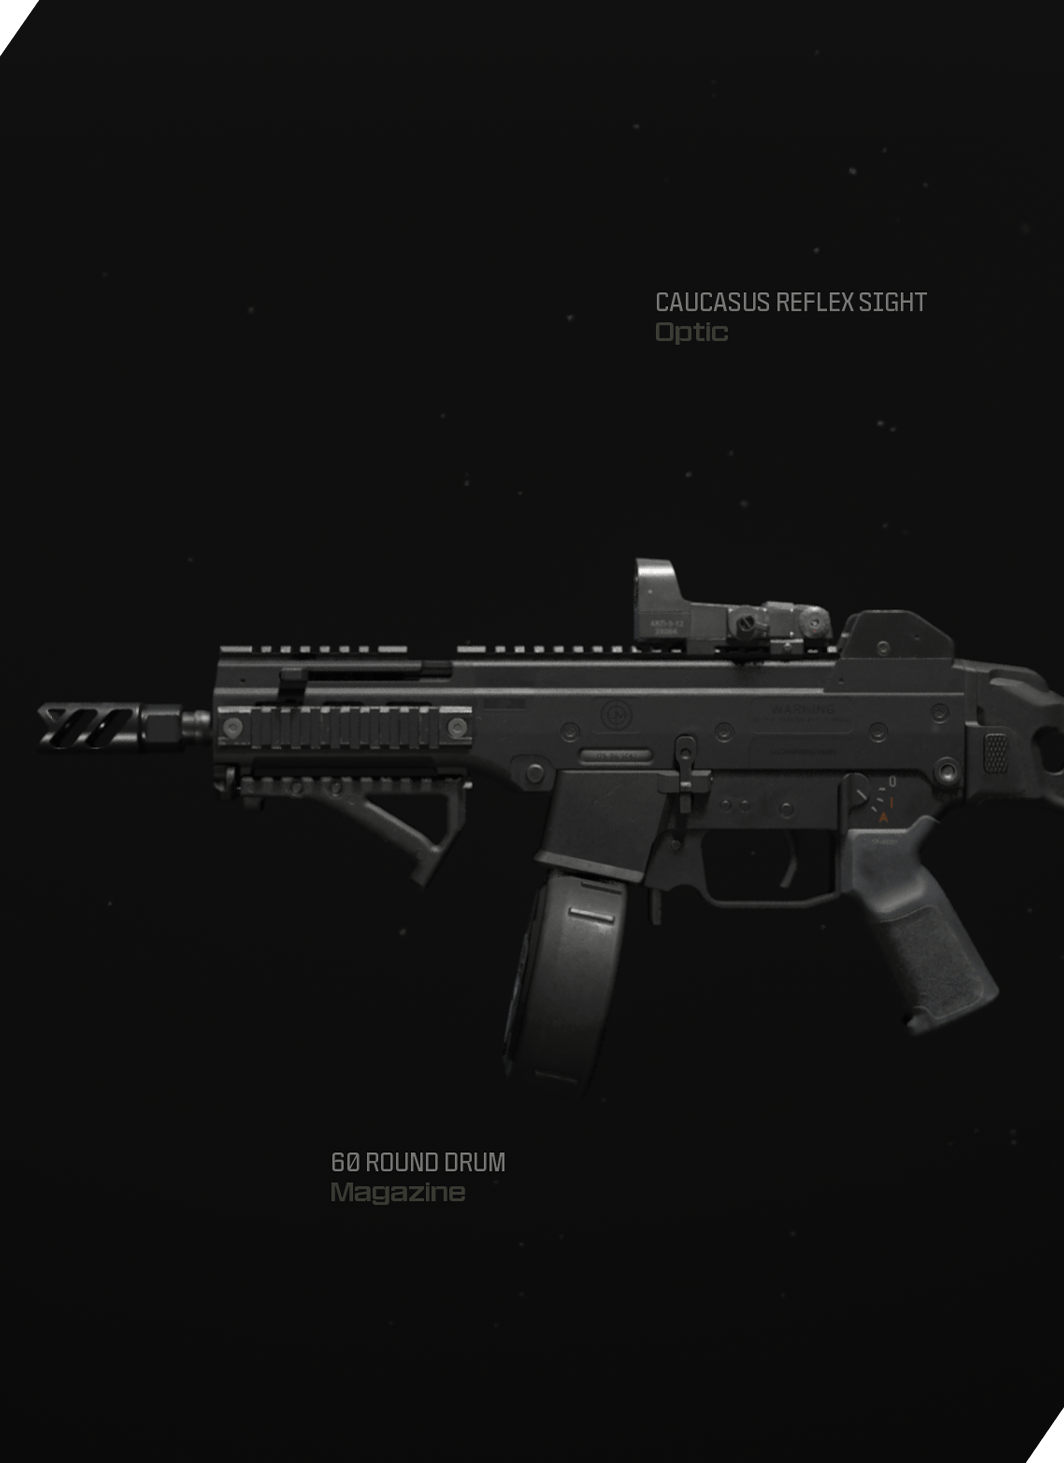
The setup idea for this Striker is keep recoil down while not doing too much to hurt the ADS speed. This setup also give a good amount of Tac-Stance capabilities, especially when slotted into the Tactial Sweeper Loadout Idea.
- Optic: Caucasus Reflex Sight
- Muzzle: T51R Billeted Brake S
- Underbarrel: FTAC RS-9 Stealth Angled Grip
- Rear Grip: Sakin ZX Grip
- Magazine (Optional): 60 Round Drum
Using Equipment Before Firing
Every engagement can be won before firing a single bullet — all it takes is using the rest of your Loadout, from equipment to Field Upgrades and more, to give an early advantage.
Some equipment, such as Frag Grenades and Throwing Knives from your Lethal Equipment, can deal lethal or near-lethal damage. Others, such as Stun and Flash Grenades from your Tactical Equipment, can disorient foes. And still others, such as the Inflatable Decoy Field Upgrade and Heartbeat Sensor or the Smoke Grenade equipment, can distract enemies, grant information, obscure vision, or have intangible benefits for an upcoming engagement.
Each Equipment and Field Upgrade has its utility; get comfortable with those utilities and make it a part of your engagement strategy just as much as that Primary and Secondary Weapon. The following section details the different pieces of equipment and their descriptions.
Tactical Equipment
// INTEL CARD
- MWIII
- WZ
- WZM
Tactical Equipment
// MULTIPLAYER: PRE-GAME // WEAPONS AND LOADOUTS
Shocking amount of uses: Shock Sticks have a use for almost every situation. Use them to cause enemy players to think twice about walking through a doorway, destroy equipment that may be holding a hallway, and just make it harder for the enemy to hit you. This works somewhere on any MP map.
Decoy XP: Decoy Grenades are great for earning XP on any elimination in their vicinity. By throwing Decoy Grenades, you are effectively assisting with any elimination where the enemy players can hear the decoy noises.
Battle Rage, Battle Rush: Battle Rage is an aggressive play that will pay off most of the time. If you find yourself taking on outnumbered fights often, Battle Rage can get you in and out of tough situations fast while keeping you constantly ready to fight.
Tactical equipment is generally the equipment that gives you the most utility in helping you eliminate your enemies. Tactical equipment is mostly nonlethal, but there are certain items that if it catches a player at low health, it will finish the job. For example, the Scatter Mine does a small amount of damage per explosive, but enough to get an elimination if they’re already hurt. Throwable equipment also deals one point of damage, and one point of damage is not zero. Here are all the Tacticals available to you in Modern Warfare III:
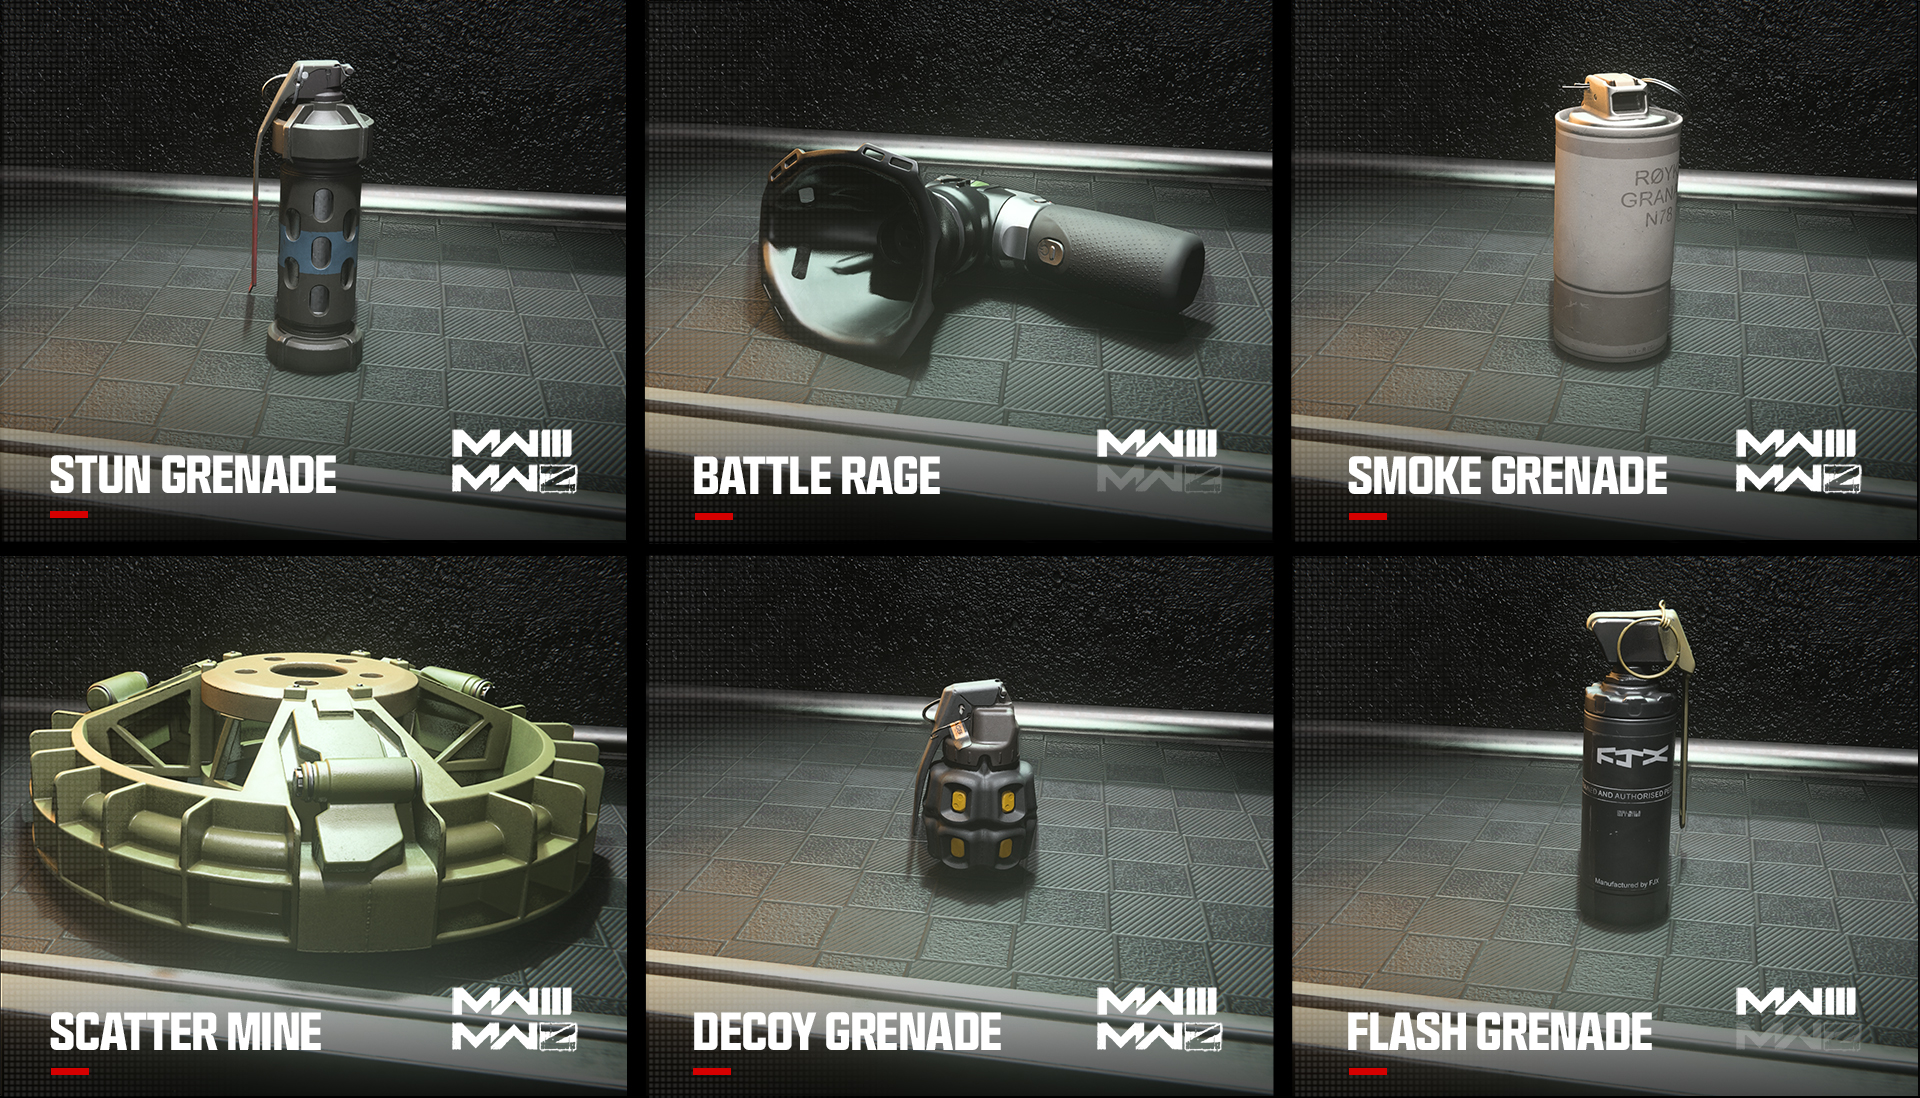
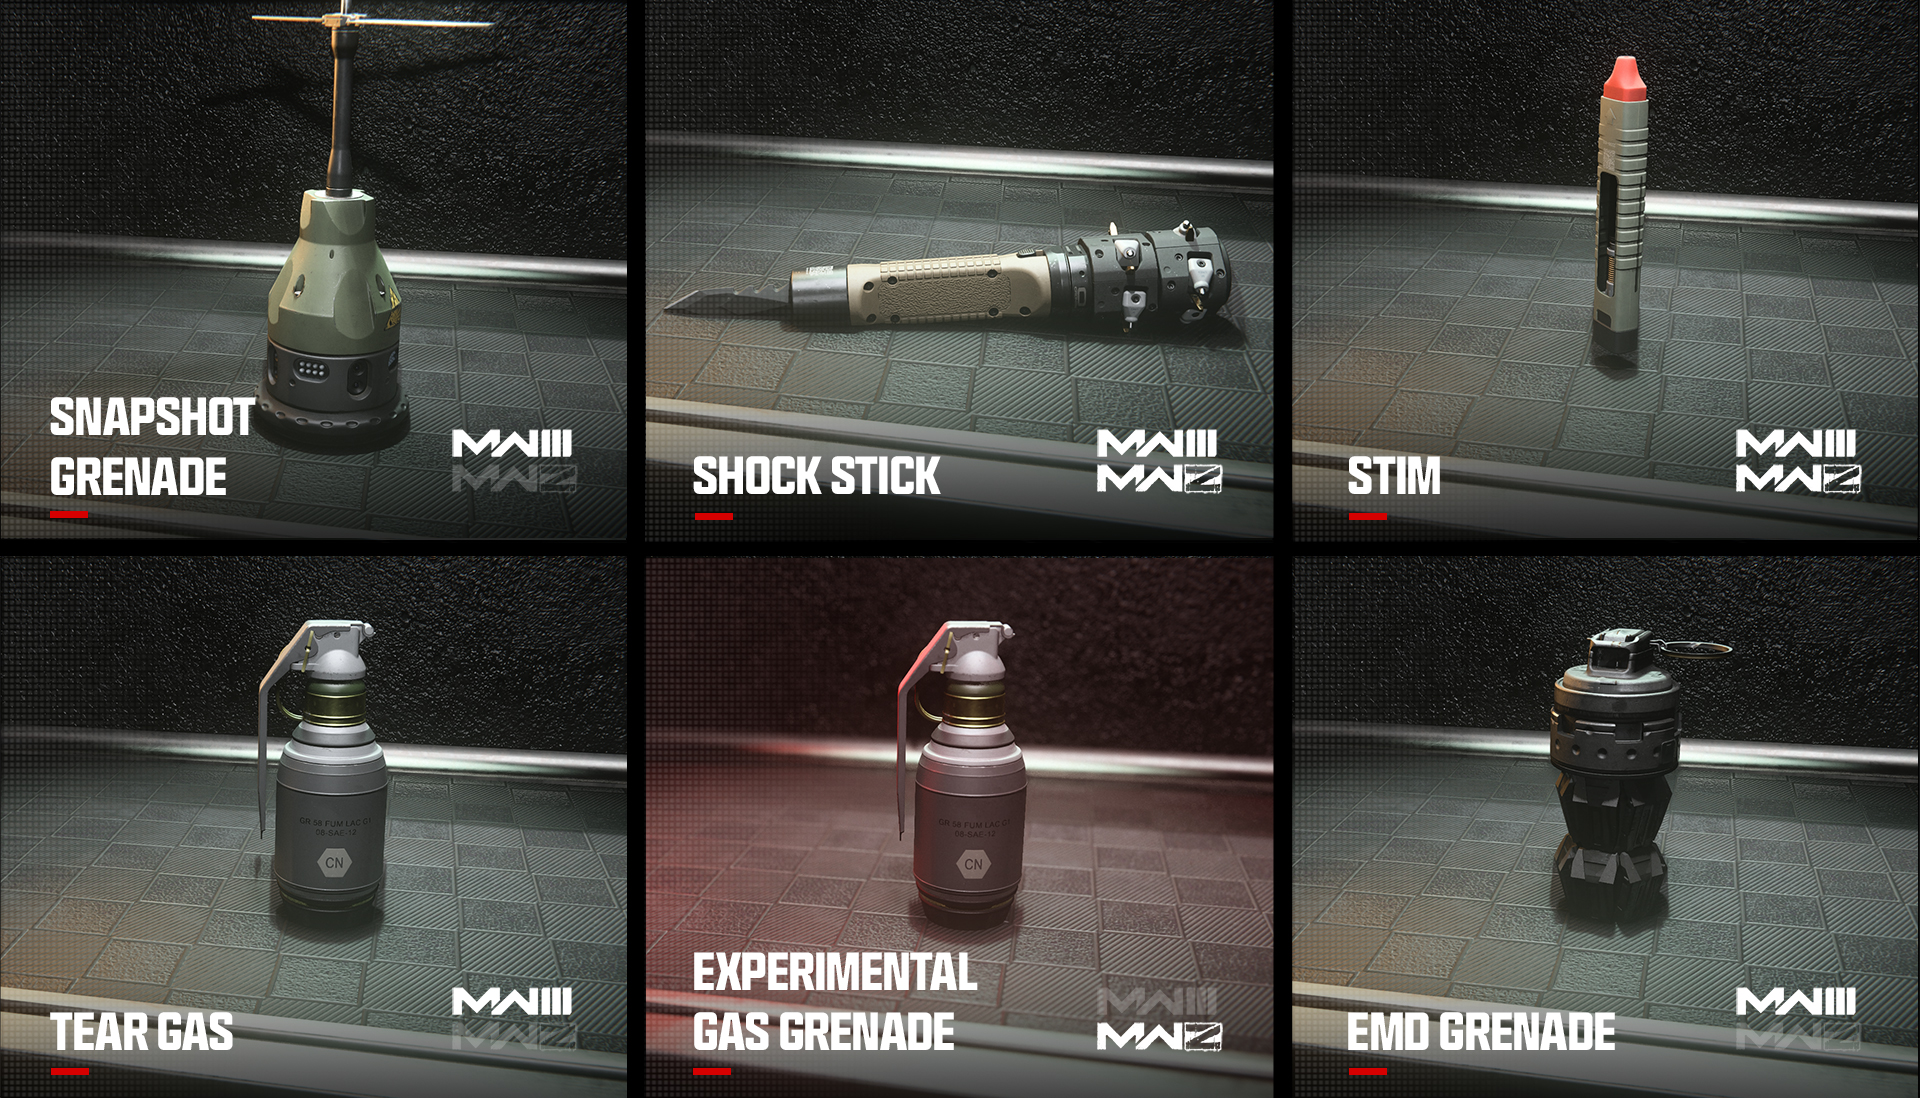
Flash Grenade: Blinds and deafens targets.
Battle Rage: Experimental stimulant that gives you an adrenaline rush. Health regenerates quickly, Tactical equipment is resisted, and Tactical Sprint is constantly refreshed.
Scatter Mine: Throw a field of mines across a wide area that detonate when enemies come within range.
Smoke Grenade: Deploys a smoke screen that blocks vision and automated targeting systems.
Decoy Grenade: Counter-intel grenade that simulates gunfire, movement, and radar signatures to confuse the enemy.
Snapshot Grenade: Provides a momentary glimpse of enemies within the blast radius for your team or squad.
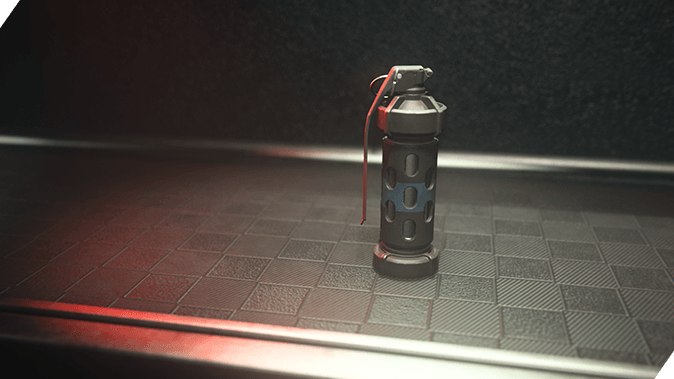
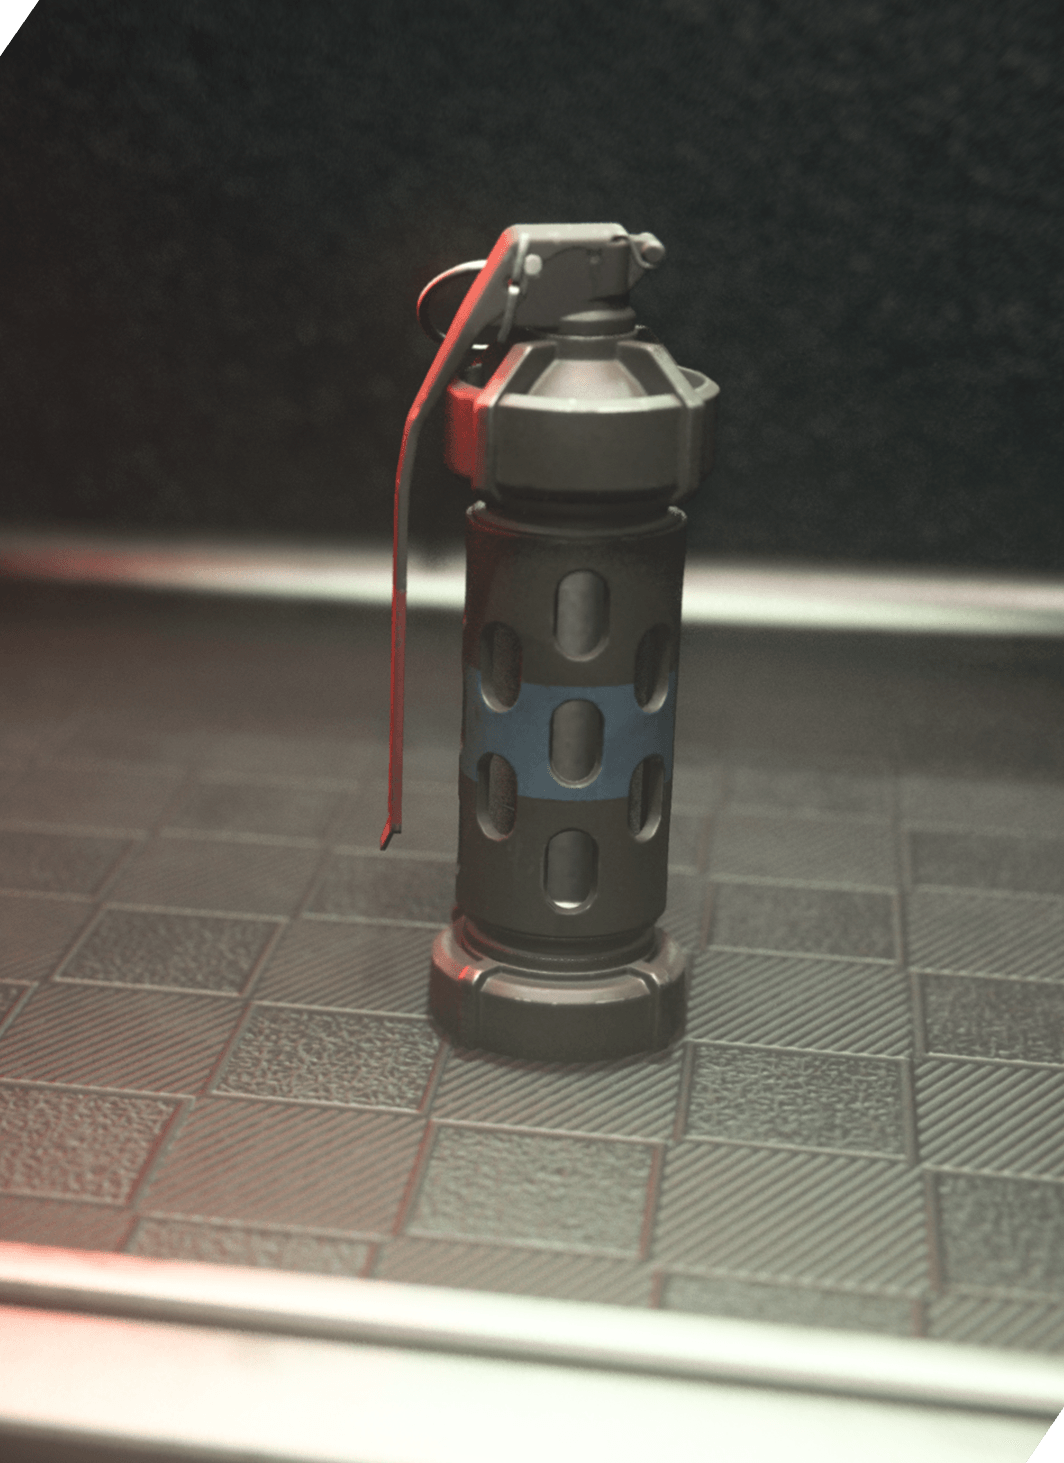
Stun Grenade: Slows victim’s movement and aiming.
Shock Stick: Electrical device that sticks to surfaces. Electrocutes enemies, destroys equipment, and causes vehicles to go haywire.
Stim: Military stimulant that promotes clotting to close wounds quickly and refreshes Tactical Sprint.
Tear Gas: Explodes on impact with the ground, releasing a lingering cloud of tear gas that causes slowed movement, blurred vision, and coughing.
EMD Grenade: Applies a tracking device to enemies hit, revealing them on your team’s minimap.
Lethal Equipment
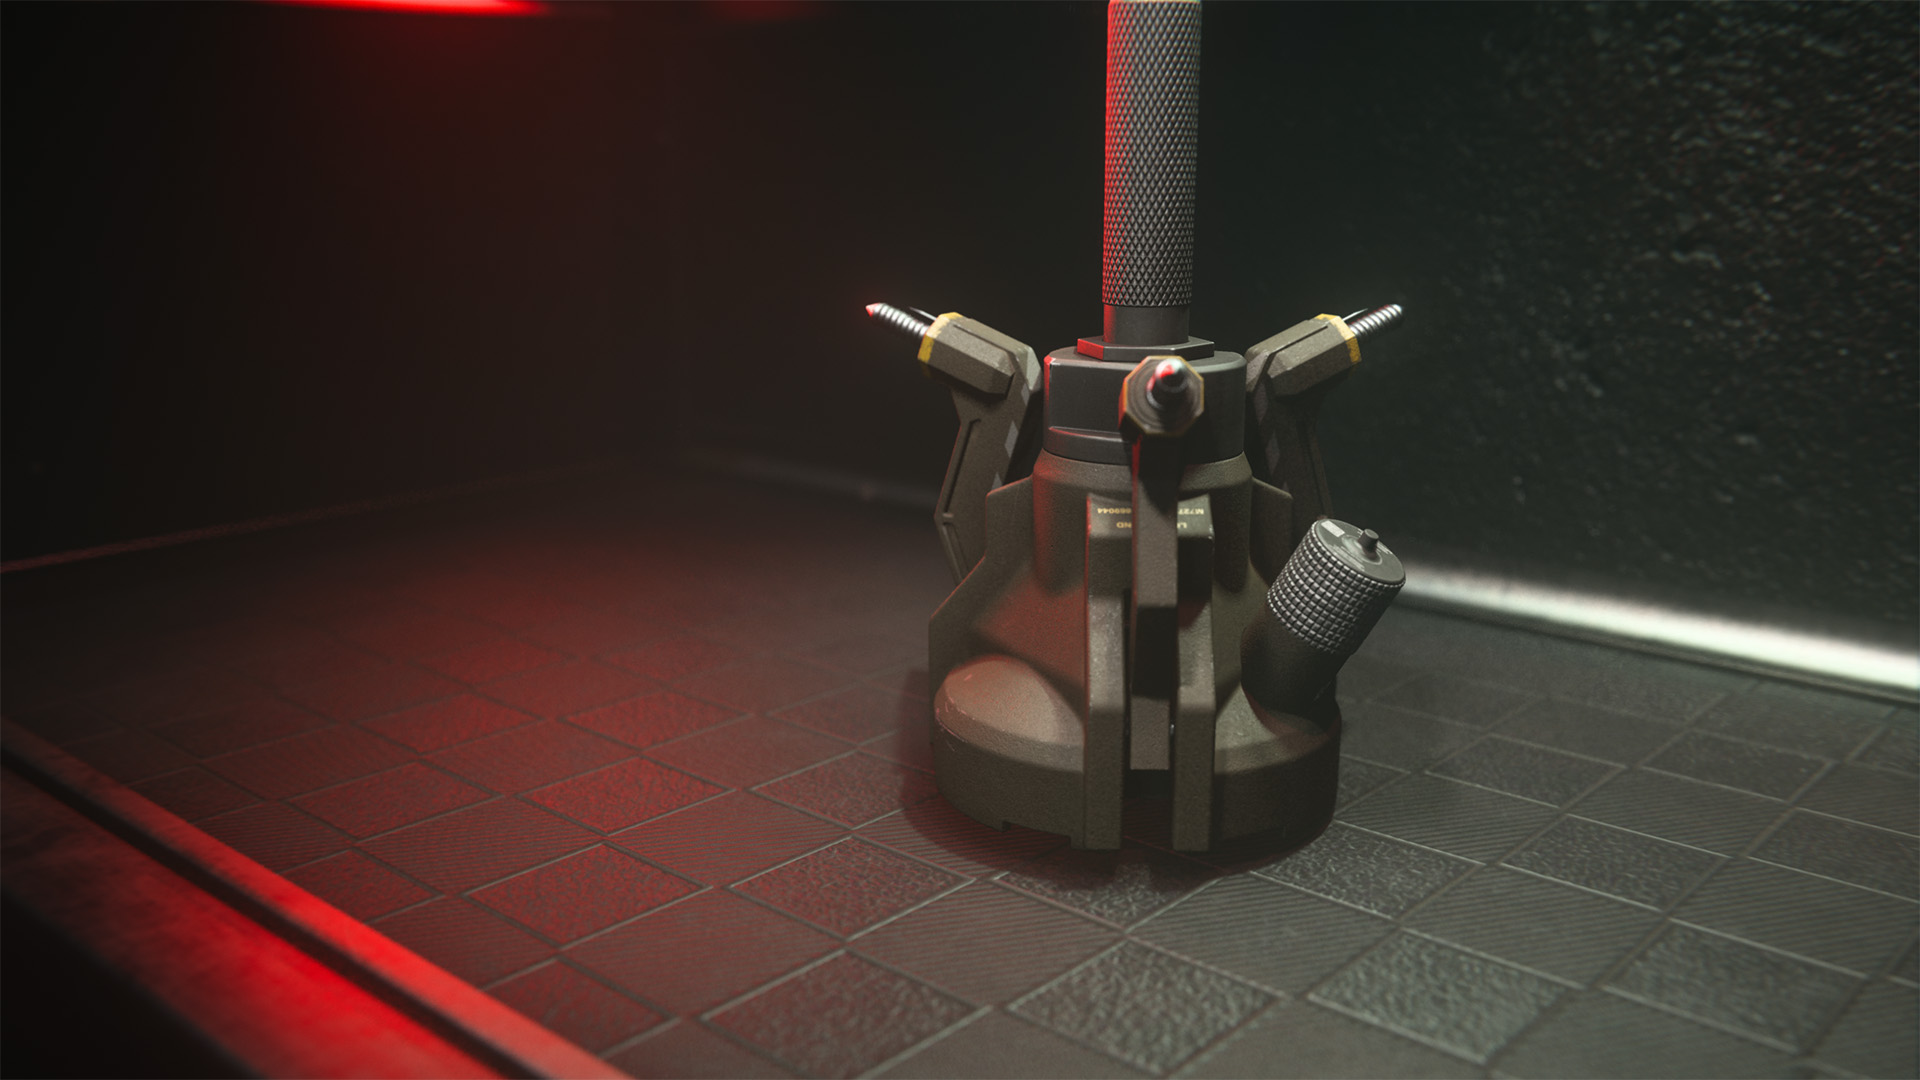
Lethal Equipment is the category of equipment that packs the biggest punch. Lethals are exactly that — lethal. Just like Tactical Equipment, there is a large variety of options to choose from when picking a Lethal for each Loadout, all with different uses and flavors. Below is the full list of Lethal Equipment choices you can unlock in Modern Warfare III:
// INTEL CARD
- MWIII
- WZ
- WZM
Lethal Equipment
// MULTIPLAYER: PRE-GAME // WEAPONS AND LOADOUTS
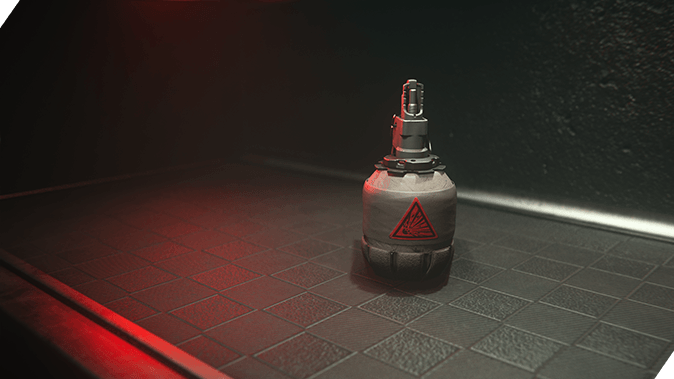
Spice of lethal life: Lethal Equipment has a lot of variety in how you equip yourself. Whether it’s a set-and-forget Claymore or a manual detonation C4, using the equipment that fits your style is key.
Breacher, Breacher!: The Breacher Drone, new to MWIII, is a great way to hit specific points from a great distance, as well as clue you in on where someone might be hiding. The drone explodes when it’s in close proximity to an enemy player, so sending it past a corner could cause it to detonate if someone is there.
Frag or Semtex: The choice between a Frag Grenade or Semtex comes down to a few things, but the map is a big factor. Does the map have a lot of stairways you need to roll the grenade down, or does it have large walls you can stick the grenade to, thus blocking off the path or exploding what you can’t see?
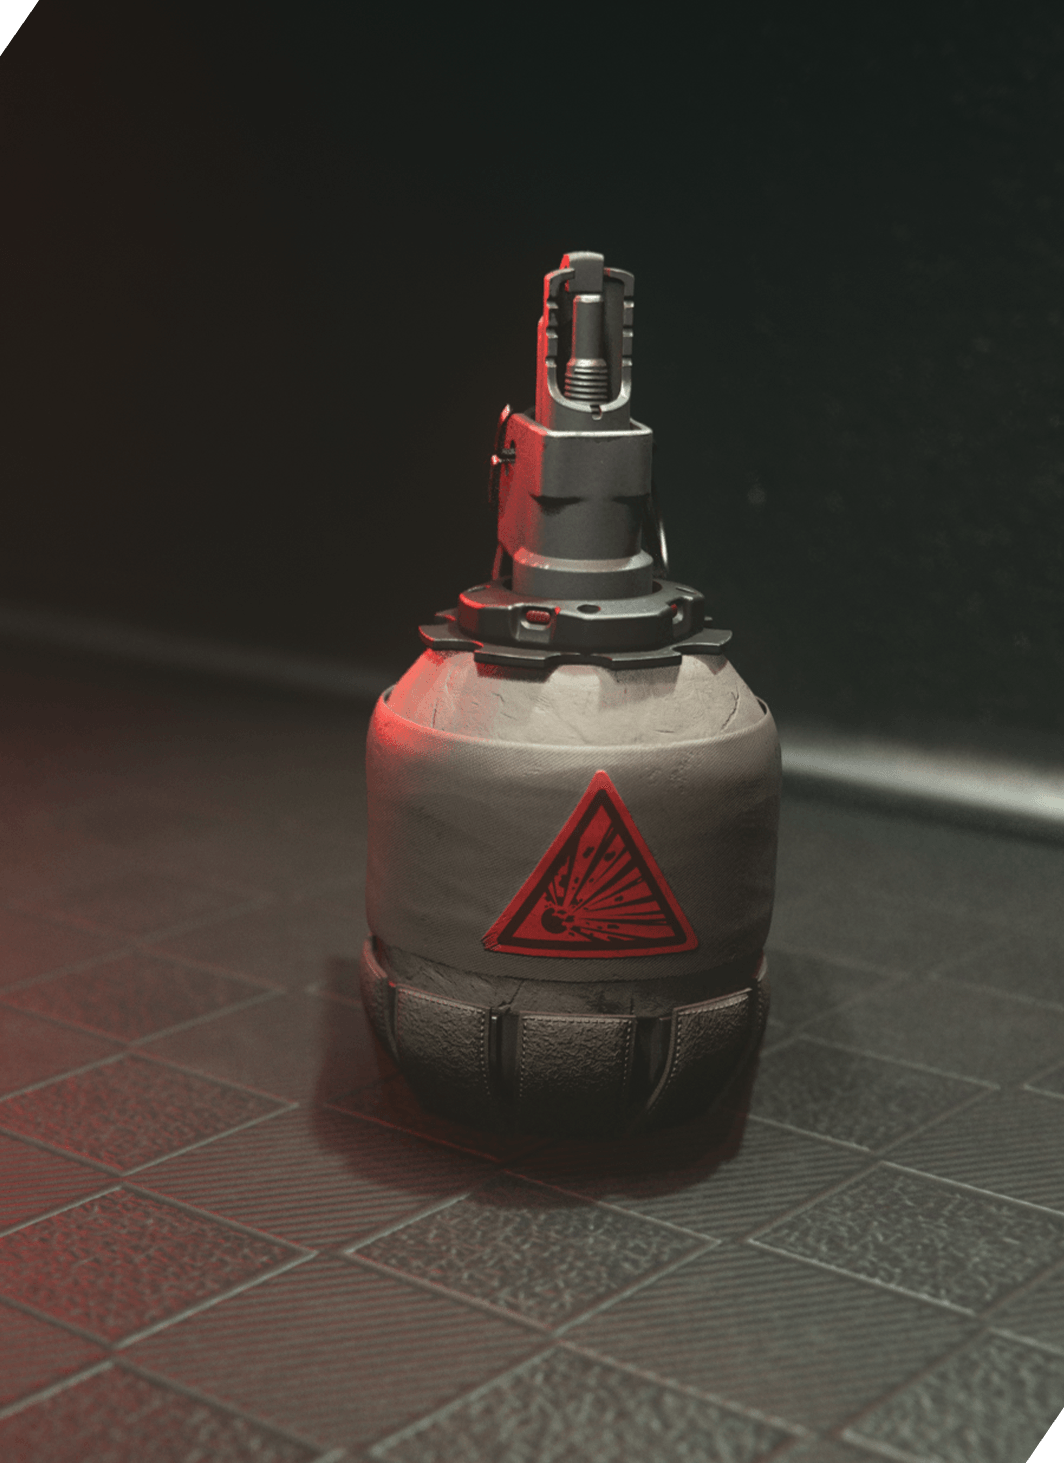
Frag Grenade: Cookable fragmentation grenade.
Claymore: Proximity-activated explosive mine.
Throwing Knife: Retrievable throwing knife that is lethal on impact in Core MP.
Thermite: Explosive incendiary device that sticks to all surfaces.
Thermobaric Grenade: Creates a large explosion that stuns, leaves a fiery residue, and increases the lethality of explosives for a period of time.
Proximity Mine: Proximity-triggered explosive that launches in the air and deals heavy damage to the surrounding area.
Drill Charge: Charge with a thermal lance that can burrow into surfaces before exploding.
Semtex: Timed sticky grenade.
C4: Large explosive that sticks to surfaces and can be detonated remotely with the same button you used to deploy the C4 when it is deployed.
Throwing Star: A swift and deadly throwing star that inflicts a wounding effect on the target.
Breacher Drone: Explosive drone that explodes on proximity to an enemy or on impact.
Field Upgrade
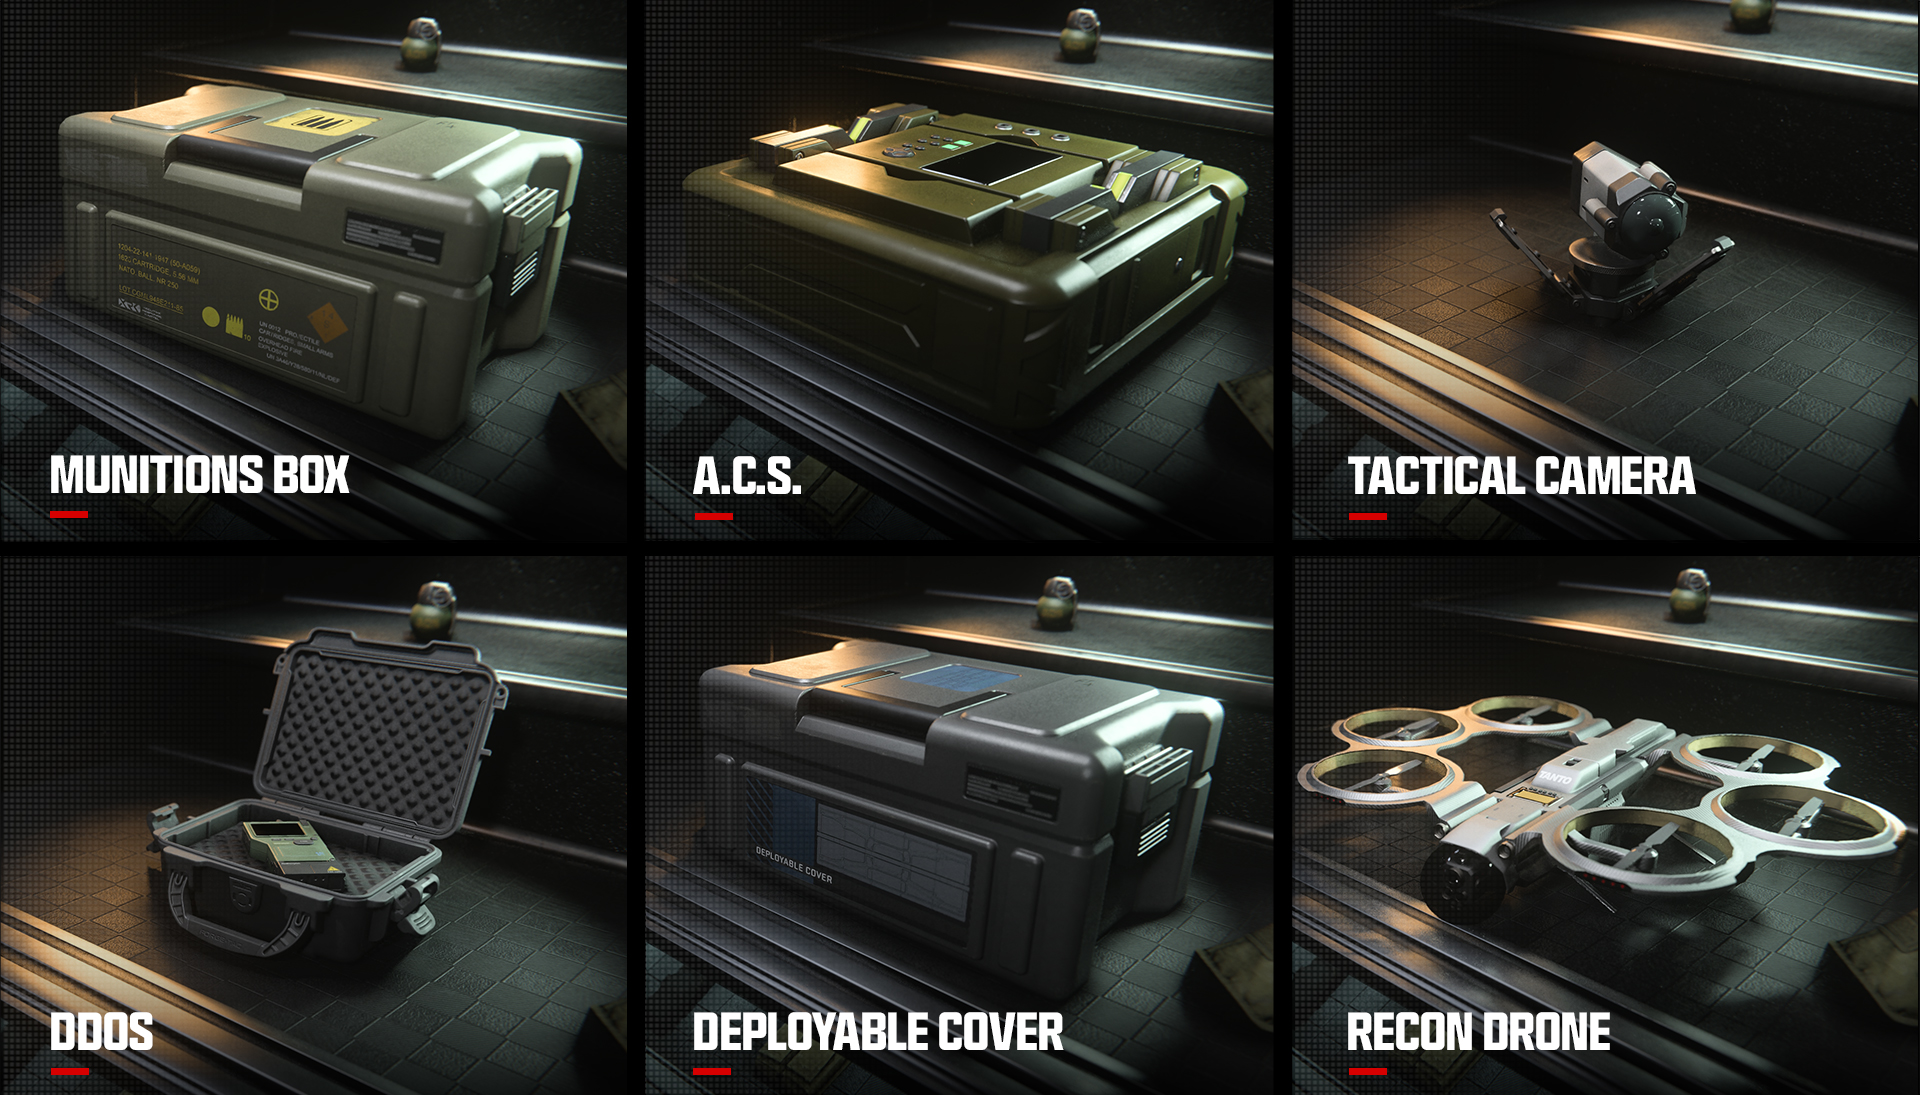
Field Upgrades are powerful and rechargeable, but due to how useful it is, it does not recharge upon death. You will have to wait to recharge your Field Upgrade in real time after the beginning of a round or after you’ve used it. Listed below are all of the Field Upgrade options available in Modern Warfare III and their descriptions.
// INTEL CARD
- MWIII
- WZ
- WZM
Field Upgrade
// MULTIPLAYER: PRE-GAME // WEAPONS AND LOADOUTS
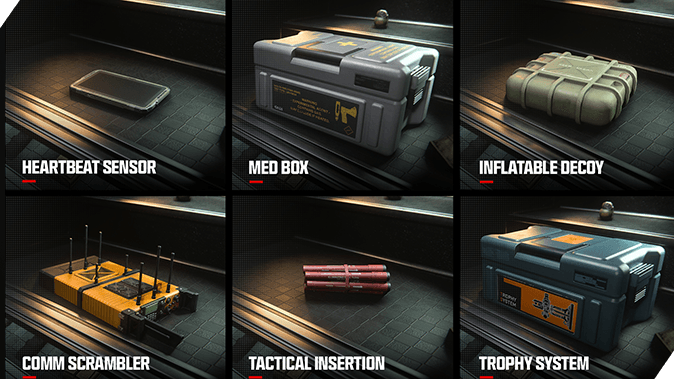
The great equalizer: Tired of enemy equipment stopping you from dominating? Keep a DDoS at the ready and use it whenever you’re about to breach a building or round a corner and detect enemy equipment.
Munitions are always needed: When in doubt, equip a Munitions Box. It’s never a bad idea to have extra ammo on you because it is virtually always the right time to drop one. Most of your teammates will either not spawn with full ammo or they will have already spent a good amount of it. Drop a Munitions Box next to a group of friendlies and they’ll likely need it.
Smoke cover: Deploying a smoke wall via the Smoke Airdrop is a good idea when your team is having trouble breaching an area. It is also a good move when your team is outnumbered while defending a Hardpoint and need to conceal their location.
Heartbeat Sensor: A limited-use tablet that displays rough information about nearby enemies.
Inflatable Decoy: Portable, rapidly deployable ballistic cover.
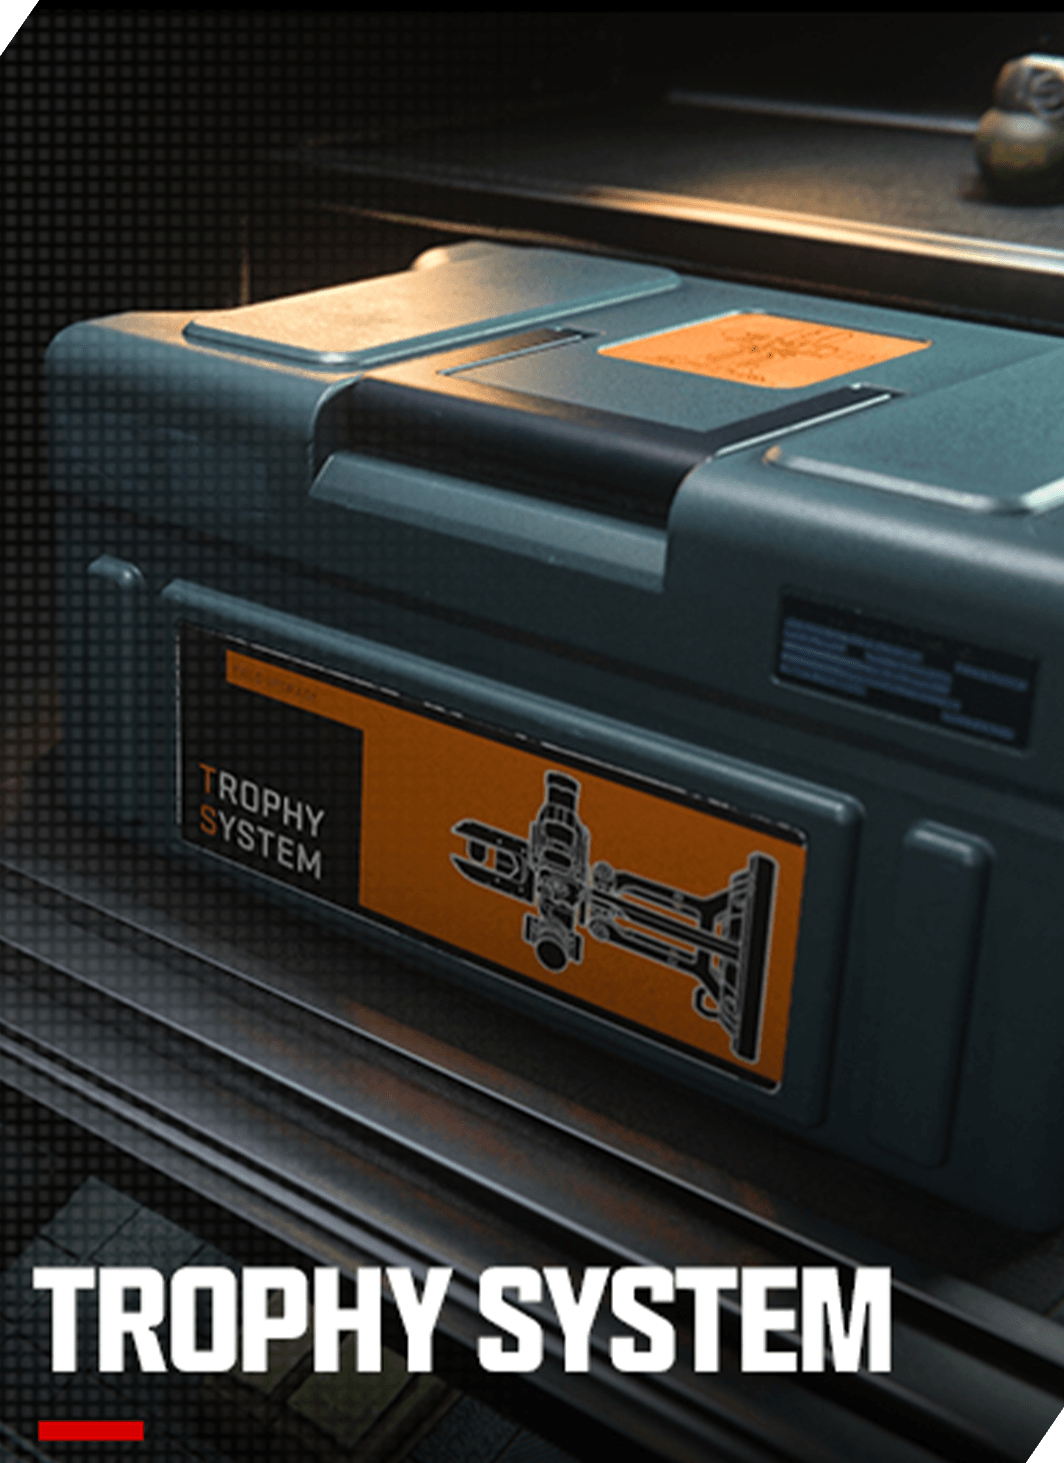
Trophy System: Deployable autonomous defense system that destroys up to three nearby pieces of equipment and projectiles. Some larger targets may take multiple shots.
Munitions Box: Deploy a box of ammo and equipment for you and your teammates.
Tactical Camera: Remote-controlled camera that marks enemies. Press both the Tactical Equipment button and the Lethal Equipment button to throw it, and press them again to connect to it. When left on its own, the camera will monitor the area and warn players of nearby enemies by sound.
DDoS: Activates a device that deactivates electronics and disrupts enemy sensors in the immediate area for a short time.
Recon Drone: Remote-controlled drone that has manual and auto-marking capabilities.
Dead Silence: Temporarily makes your footsteps silent and applies Ghost. Gun, melee, and throwing knife kills refresh duration.
Loadout Drop: Call in a team-based Loadout crate with limited uses. Each player can only use it once.
Portable Radar: Emits a periodic radar ping to detect nearby enemies.
Suppression Mine: Trip mine that when triggered, emits a constant sound wave that disrupts enemy vision and slows their movement.
Anti-Armor Rounds: Gives weapon ammo that applies bonus damage against armored targets; this includes vehicles, equipment, body armor, and targets behind penetrable cover.
Comm Scrambler: Disables communication with intel within its radius. Enemies will not be able to activate Killstreaks. Enemy UAV and intel systems will not detect you and your teammates. Location of the Scrambler is visible in the enemy minimap.
Deployable Cover: Portable, rapidly deployable ballistic cover.
Juggernaut Recon: Juggernaut Recon gear delivered by care package. The suit is equipped with a radar that pings nearby enemies. Contains a riot shield, SAS-12, and smoke grenade.
A.C.S.: The Automated Computer Spike slowly captures points and temporarily hacks nearby enemy devices.
Tactical Insertion: Marks a location as your next spawn point. (Tactical Insertion doesn't have an effect in one-life modes.)
Smoke Airdrop: Call in a line of drones to deploy a smoke wall at a targeted location.
Medbox: Deploy a box of medical supplies for you and your teammates.
Gloves
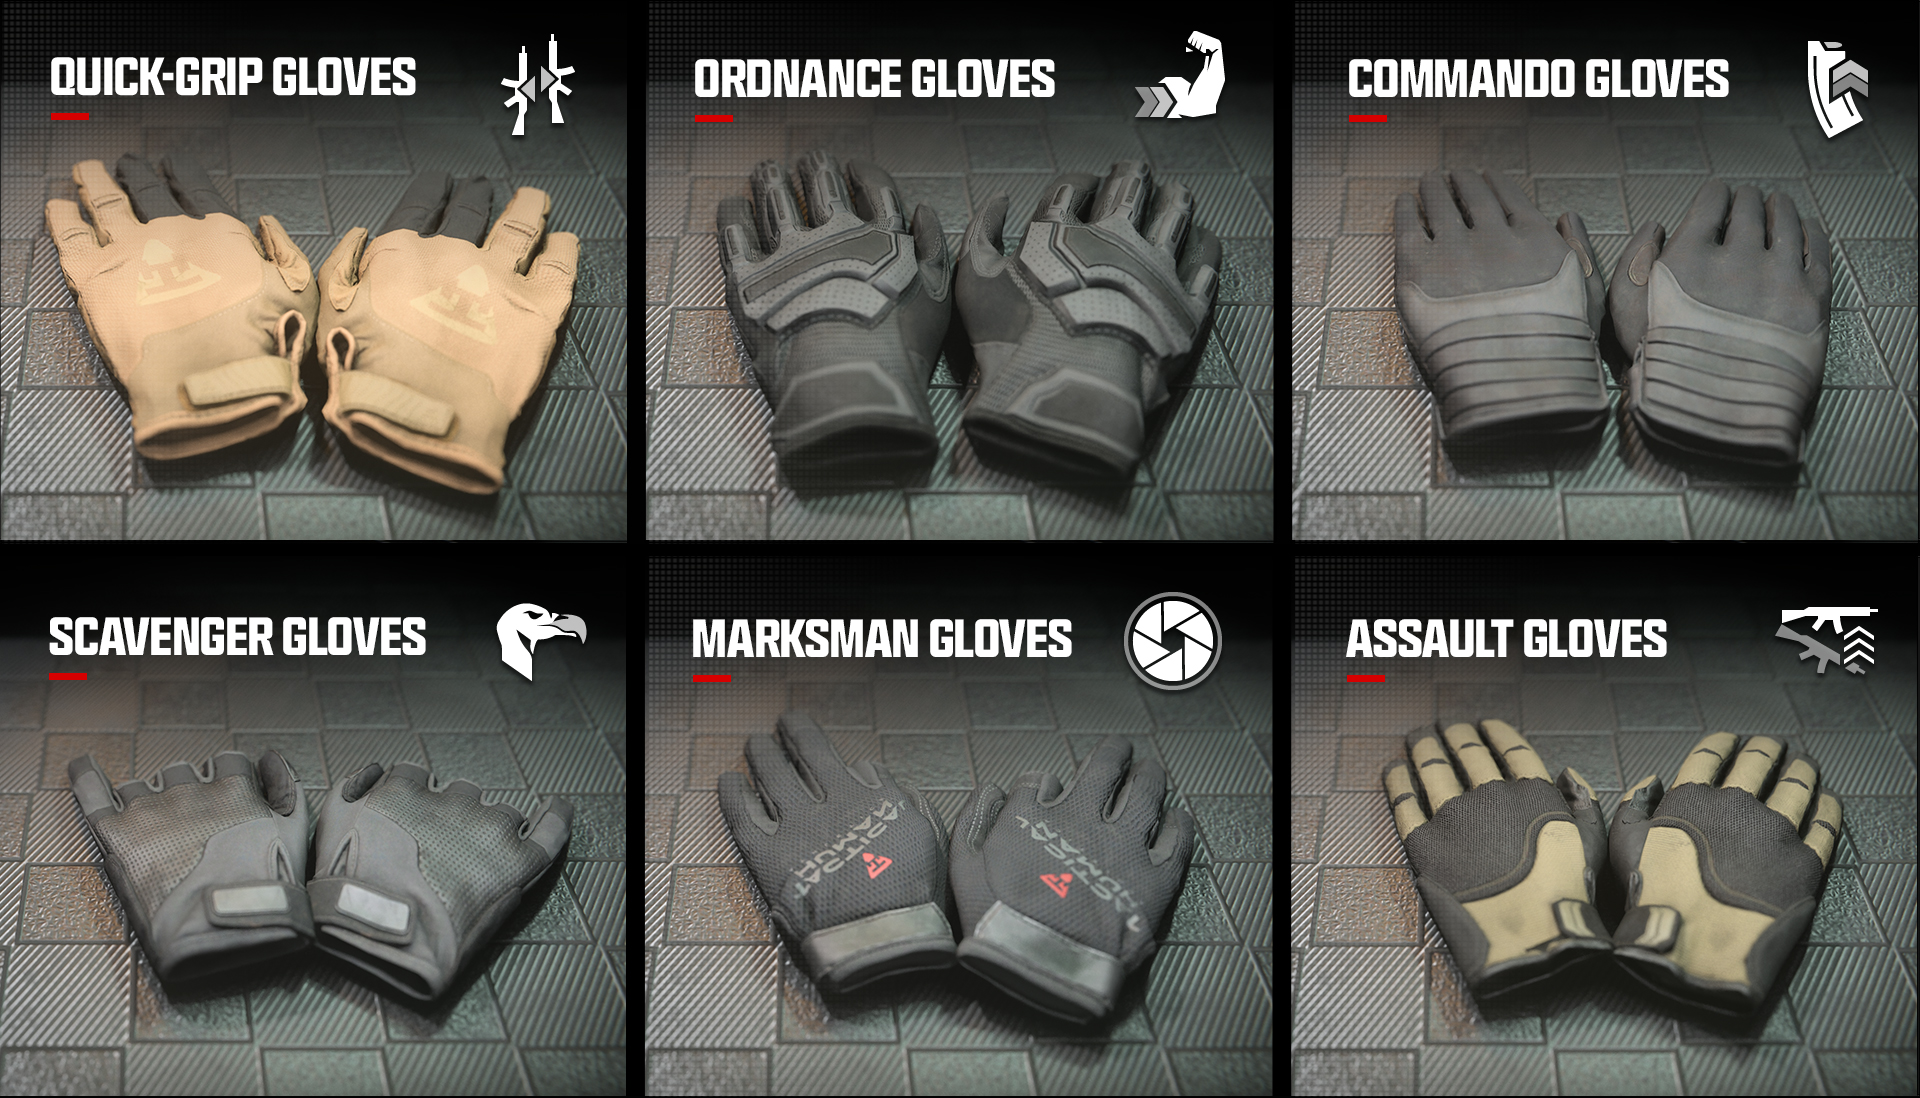
Gloves are a piece of equipment that directly affect the Perks that relate to your Operator’s hands. When choosing the right set of Gloves for your Loadout, it’s important to remember which Vest you have equipped and the focus of your Loadout. However, if you’re unsure of which Gloves to choose, throw in the Scavenger Gloves. This will help ensure you always have enough ammo before each fight. Read through the list of Gloves available in Modern Warfare III, and choose the ones that make the most sense for your playstyle.
// INTEL CARD
- MWIII
- WZ
- WZM
Gloves
// MULTIPLAYER: PRE-GAME // WEAPONS AND LOADOUTS
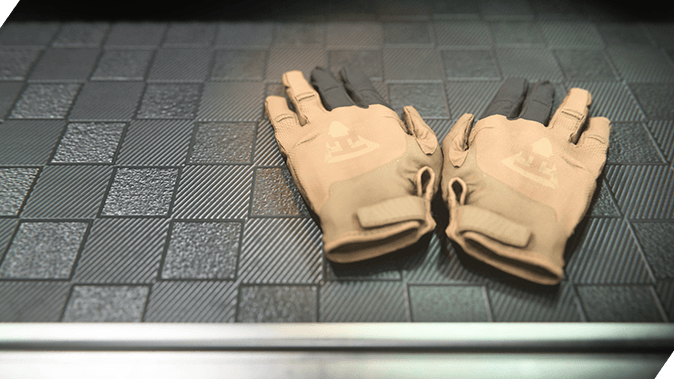
No time to stop: Don’t have any time to stop and reset because you’re too busy whipping around corners with your shotgun? Equip the Scavenger Gloves, so you’re always resupplying your ammunition.
Consult your Vest: Unsure about how you enabled a Perk? There’s a chance that’s because you’ve doubled up on Perks via having Gloves that have the same perk as your Vest, and a backup Perk has been enabled in the duplicate’s place.
Quick-Grip Primaries: Quick-Grip Gloves are great for many situations, but they shine when you have two Primary Weapons equipped at once. It takes time to swap from one Primary to another, so why not speed it up? This also works great for when you’re swapping from your Secondary Weapon back to your Primary.
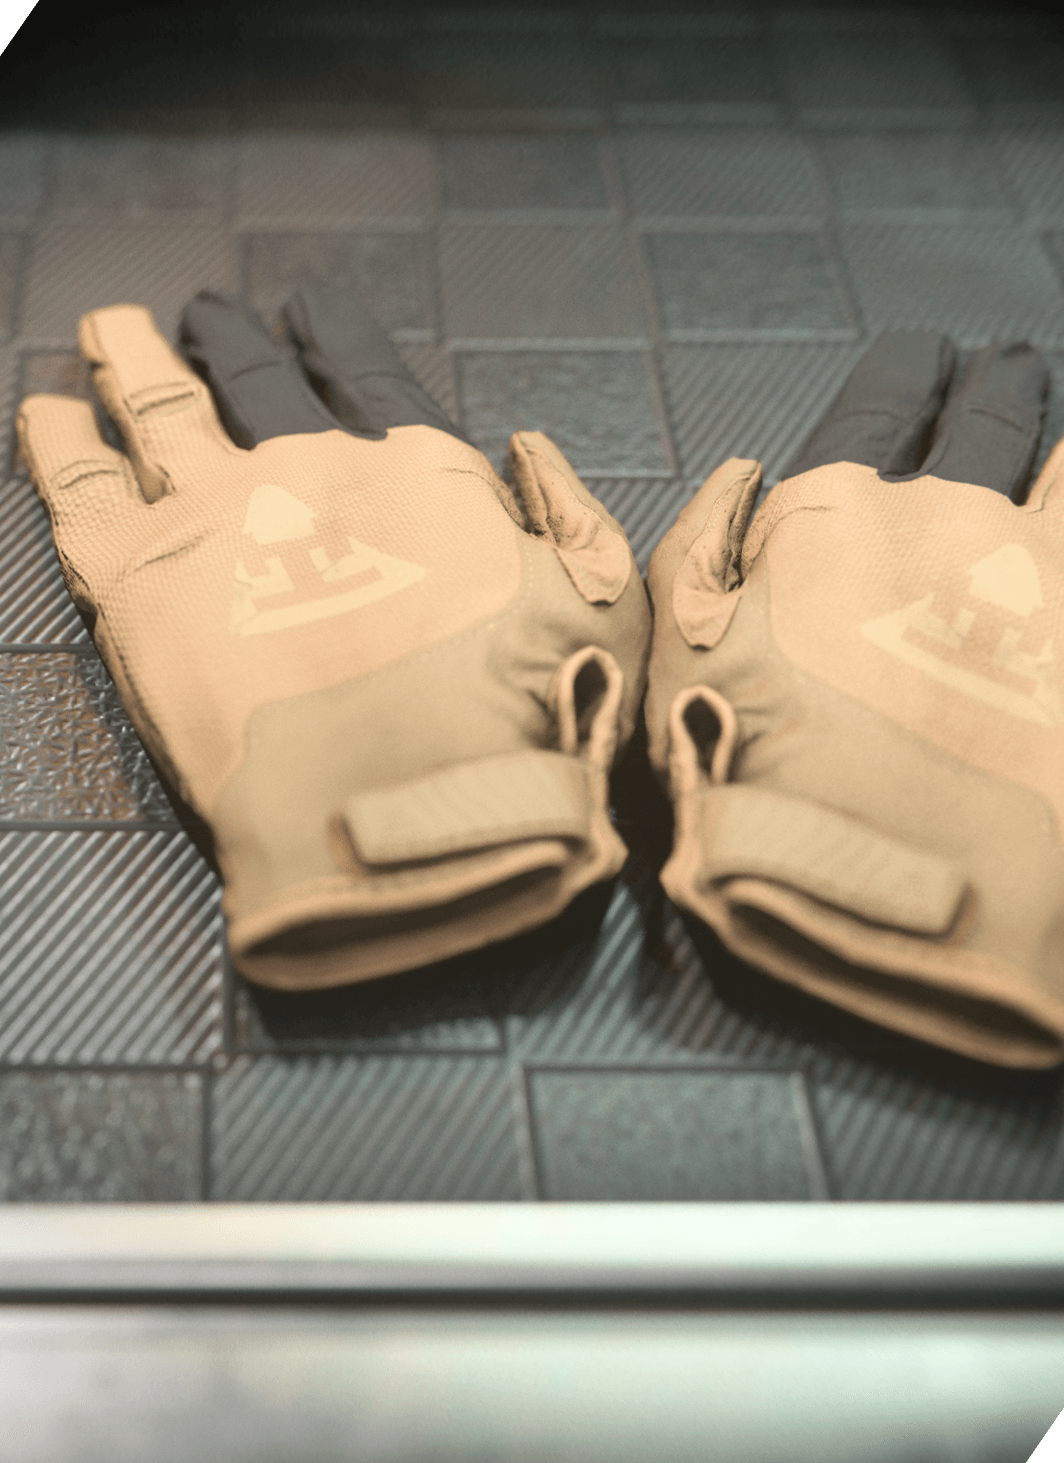
Quick-Grip Gloves: Increased weapon-swap speed.
Ordnance Gloves: Throw equipment farther. Reset fuse timer on thrown-back grenades.
Commando Gloves: Enables reloading while sprinting.
Scavenger Gloves: Resupply ammo and throwing knives from eliminated players.
Marksman Gloves: Reduced sway and flinch while ADS.
Assault Gloves: While jumping, accuracy and time to ADS is improved.
Boots
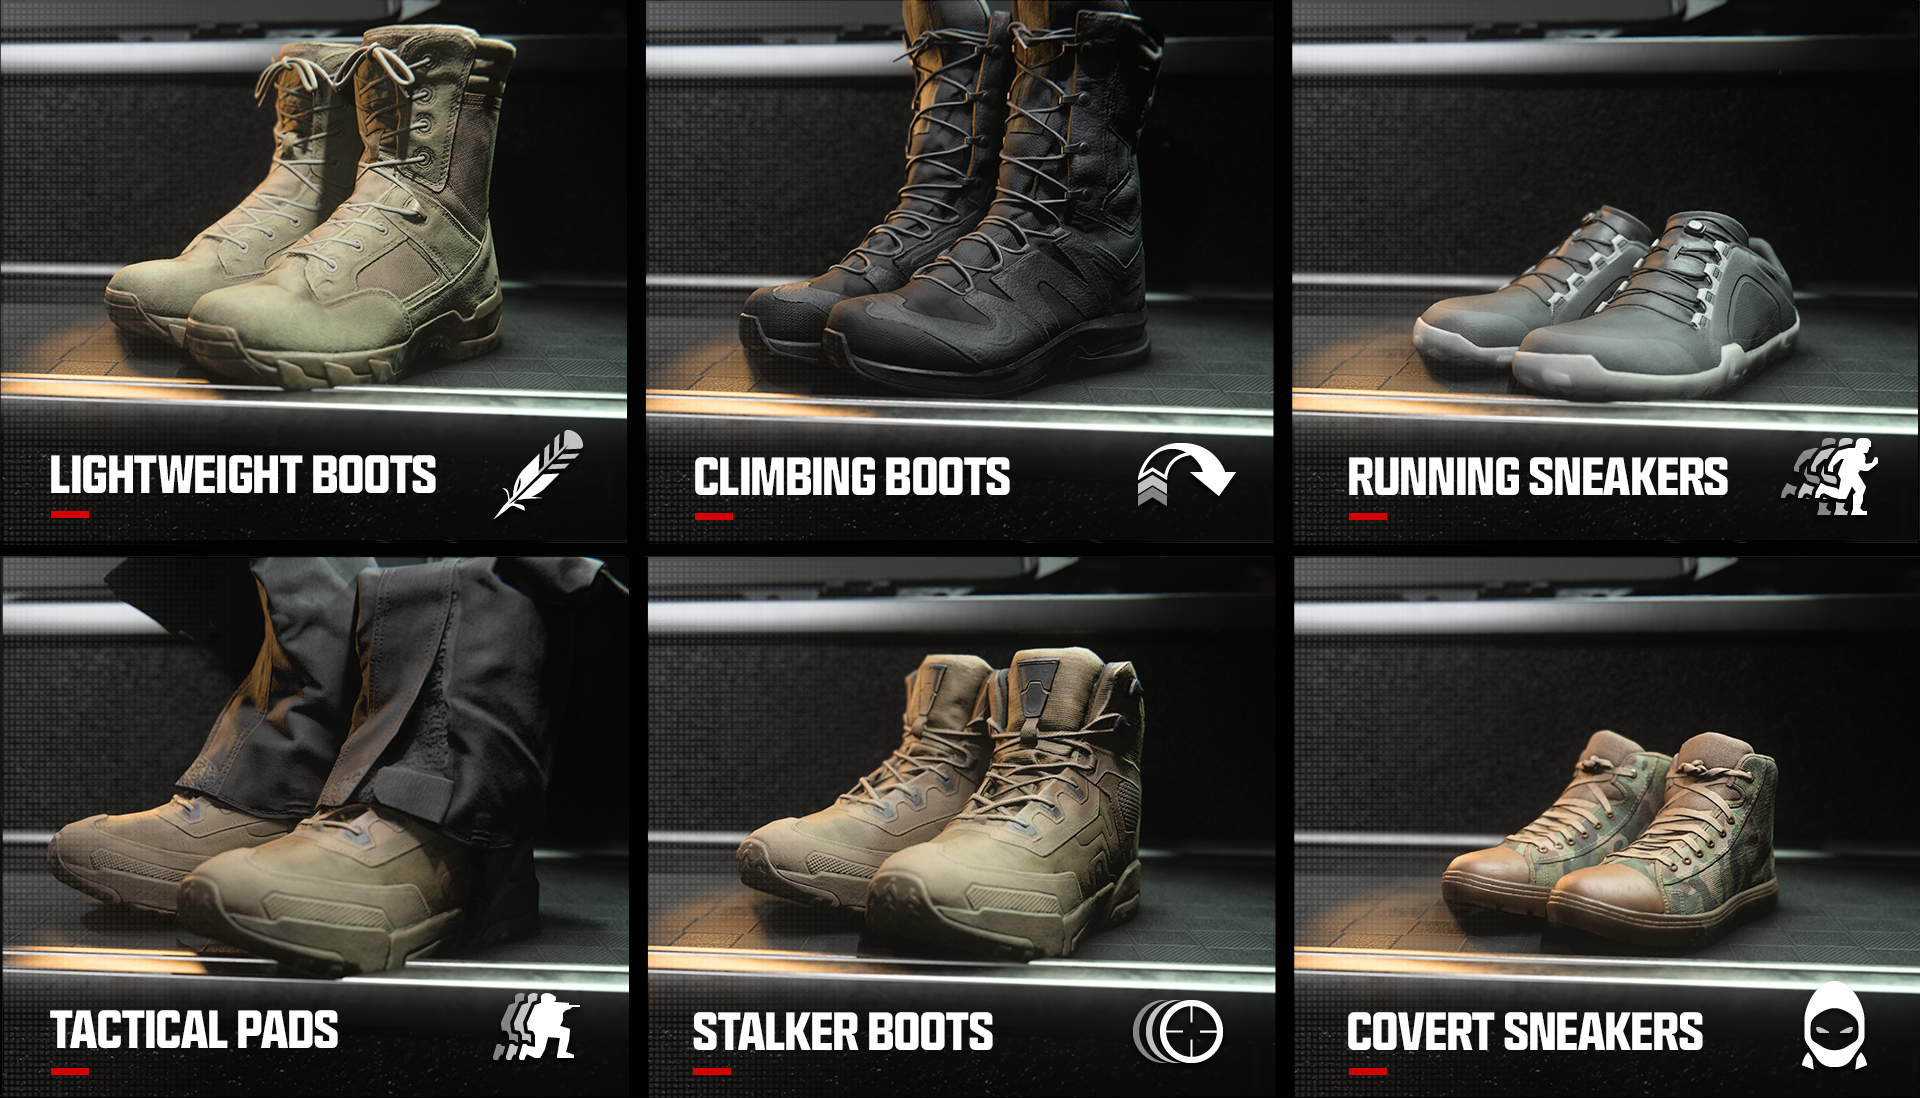
Boots are a piece of equipment that directly affect the Perks that relate to your Operator’s feet. In Modern Warfare III there is a vast number of movement options, new and classic combined. Read the Movement Guide to learn about all the things you can do in the game; you might be surprised by the possibilities, even if you’re a seasoned Call of Duty player. Boots are built by the Perks that speed you up, extend the distance you can slide, even eliminate your footstep sounds, and more.
Generally, as long as your Loadout has some type of Boots equipped, you will receive a benefit. Note that the Engineer Vest doesn’t allow you to wear any Boots while the Vest is equipped in your Loadout. Keep this in mind as you look through the list of Boots available in Modern Warfare III below.
// INTEL CARD
- MWIII
- WZ
- WZM
Boots
// MULTIPLAYER: PRE-GAME // WEAPONS AND LOADOUTS
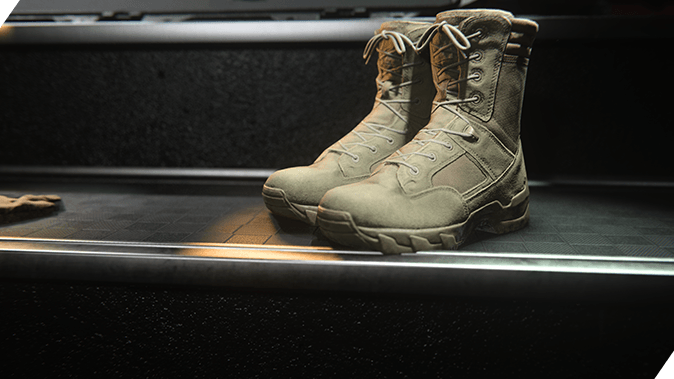
Vest limitations: Everything in Call of Duty has a trade-off. For things like Vests, the limitations often lie in what cannot be equipped. The Gunner Vest does not allow any Boots to be equipped. Think of the Gunner Vest as a heavy gunner setup.
Tactical sliding: The Tactical Pads are great for many reasons, and while maintaining full ADS while sliding is a large boon, it can take some getting used to. Practice sliding with the Pads on; you might need it.
Stalk with speed: You took the time to equip yourself with an SMG and fast ADS attachments, and nothing to slow you down. Add to that by using the Stalker Boots to maintain some of this speed while ADS or strafing.
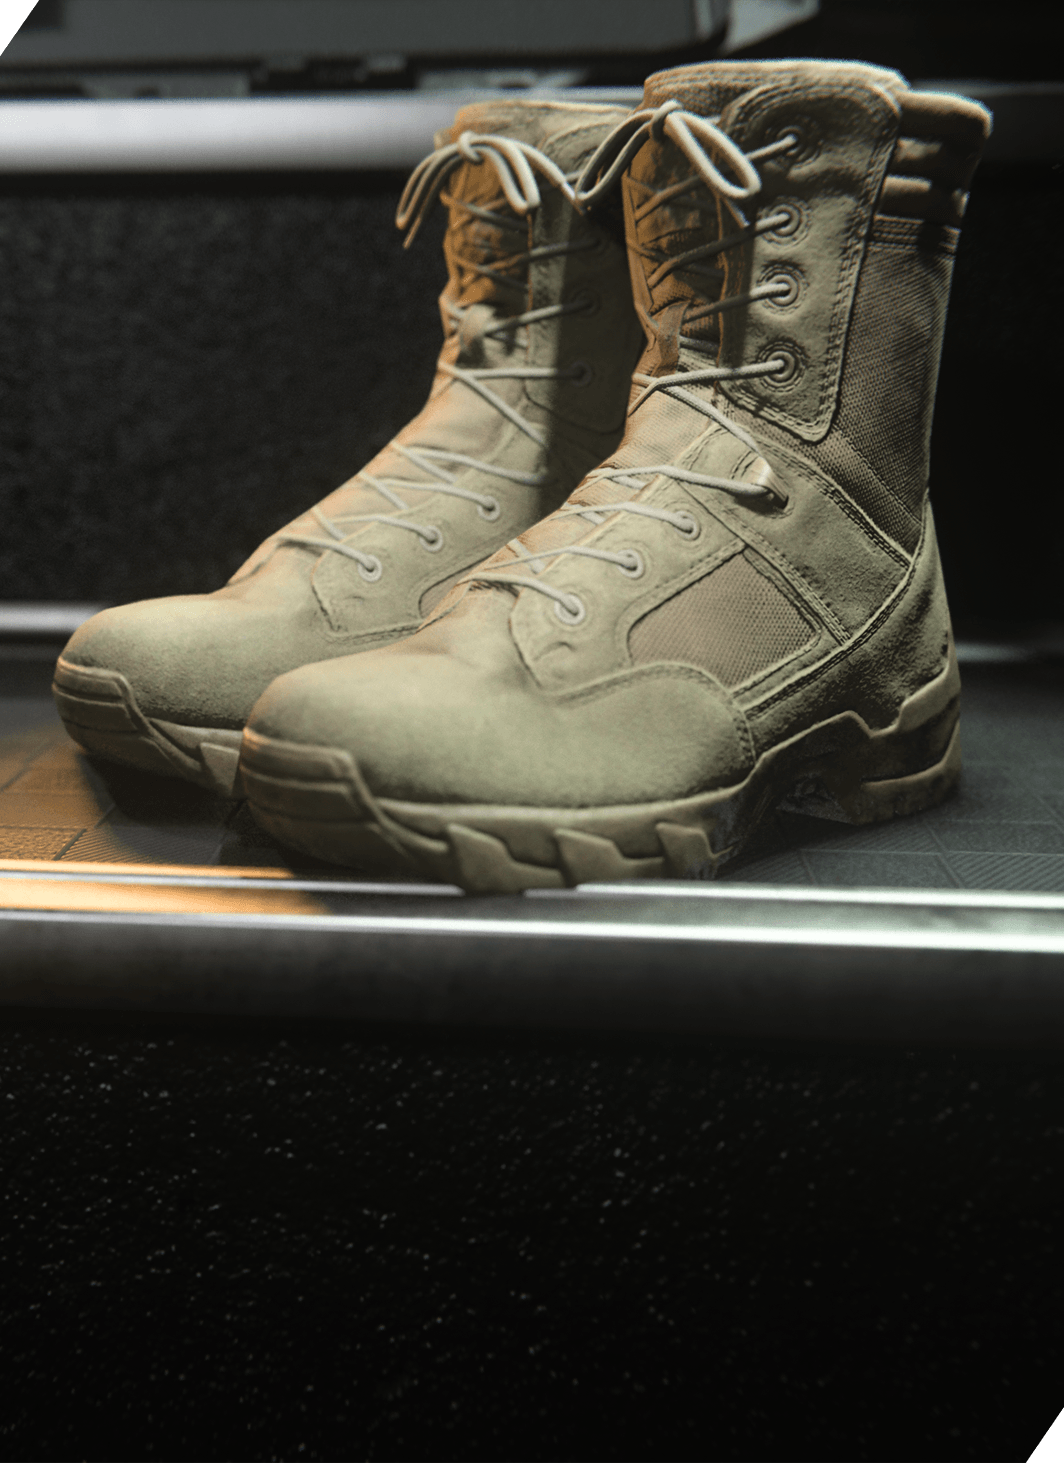
Lightweight Boots: Increases movement and swim speed. Additionally, these Boots reduce noise while swimming.
Climbing Boots: Increased climbing and mantling speed. Additionally, these Boots reduce fall damage.
Running Sneakers: Increases Tac-Sprint duration and reduces refresh time.
Tactical Pads: Increases slide distance and allows for full ADS while sliding. Additionally, these Boots increase stance transition speeds as well as crouched movement speed.
Stalker Boots: Increased strafe and ADS movement speed.
Covert Sneakers: Eliminates footstep sounds.
Gear
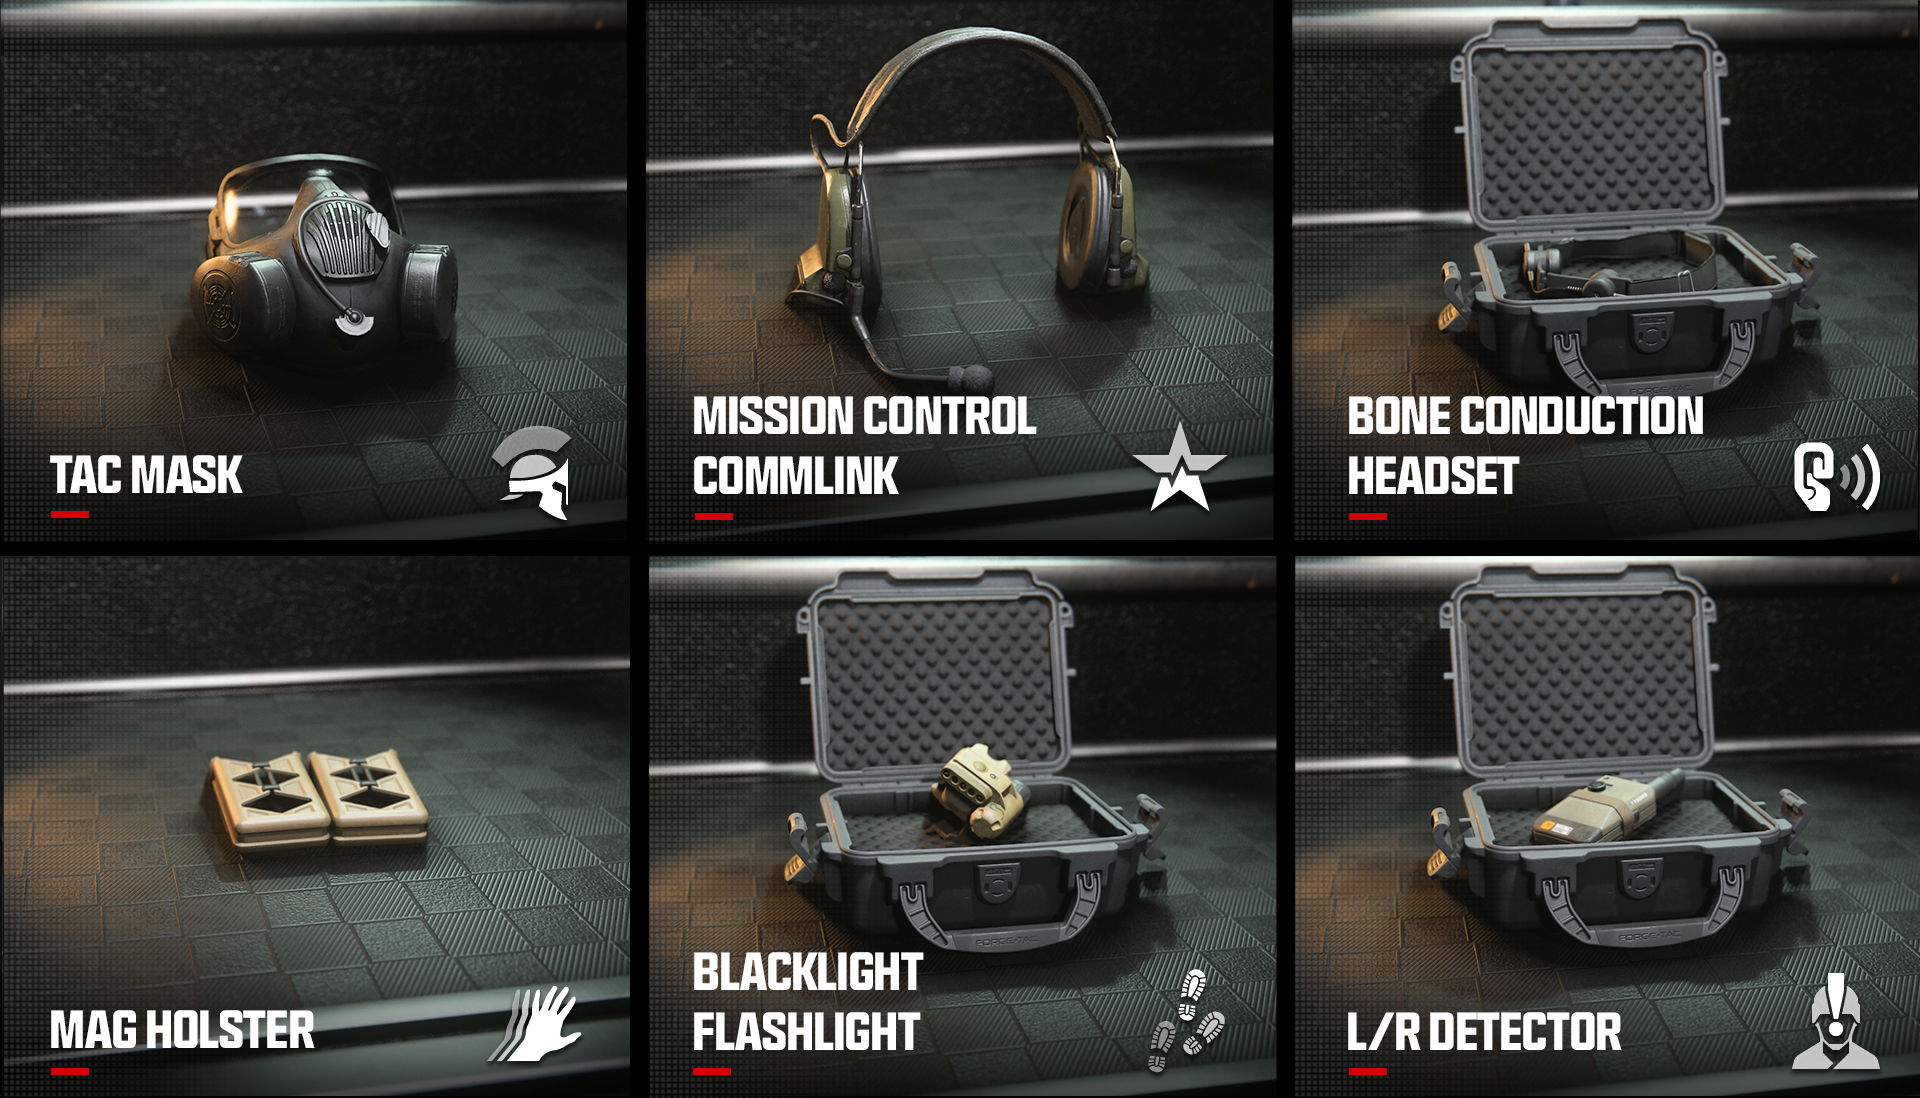
Gear refers to a miscellaneous slot on any Loadout. There isn’t a focus for your Operator in the anatomical sense, but that’s where these Gear slots become extremely important. Note that both the CCT Comms Vest and the Engineer Vest allow your Loadout to include two pieces of Gear. This is very useful because of how vastly different the Perks can be from Gear. Gear can be anything from a Mag Holster to improve reload speed, which is always good, to the Threat Identification System, which automatically pings targets that you’re aiming at for your team’s benefit. Keep this in mind as you read through the Gear and their descriptions that are available in Modern Warfare III listed below:
// INTEL CARD
- MWIII
- WZ
- WZM
Gear
// MULTIPLAYER: PRE-GAME // WEAPONS AND LOADOUTS
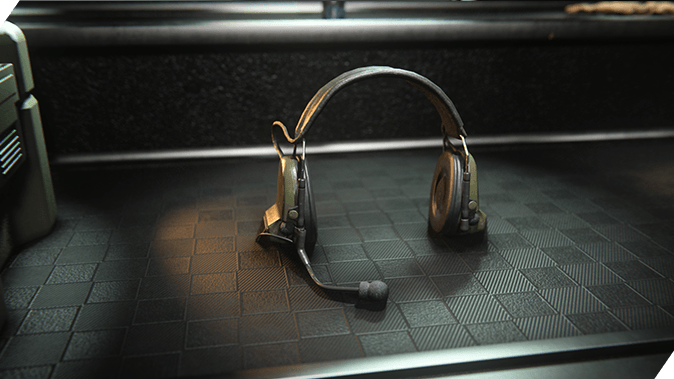
Last for a reason: Gear is listed as the last thing to choose from when reading the Loadout from left to right for good reason. Gear should be the piece that becomes icing on the cake that is your Loadout.
Don’t get caught reloading: Just because you don’t have the Gunner Vest equipped doesn’t mean you can’t still reload at rapid speed. Mag Holster is always a good option if you’re not sure what Gear to equip.
Unknown elements: Audio cues are not always the easiest thing to recognize, and sometimes they’re covered up by other audio. Tac Mask can help negate some of these instances by at least reducing what happens to you when you didn’t see the Stun Grenade coming.
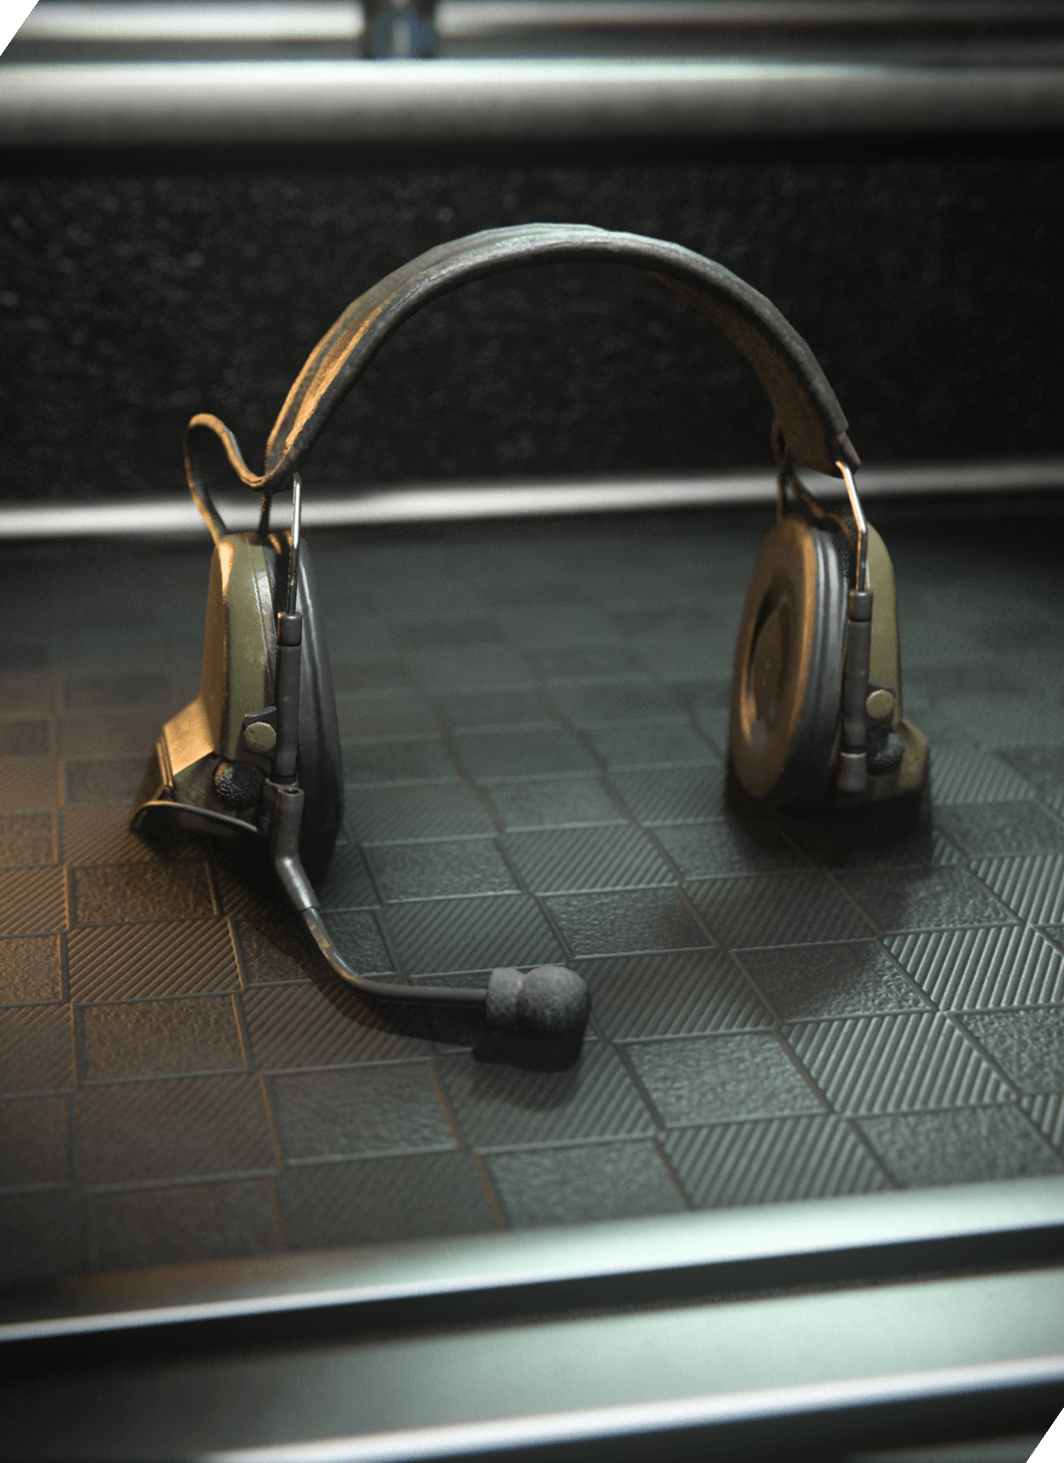
Mission Control Comlink: Reduce Killstreak cost by one elimination. If Scorestreaks are toggled on, this Gear reduces Scorestreak cost by 125.
Tac Mask: Reduces strength of enemy flash, stun, and gas grenades.
Bone Conduction: Reduces combat noise, allowing users to better identify enemy footsteps and gunshots.
Mag Holster: Improved reload speed.
Backlight Flashlight: Shows recent enemy footsteps.
L/R Detector: Warns users of hostile laser and radiation sources.
Threat Identification System: While ADS, automatically pings enemy locations in your crosshairs.
Hijacked IFF Strobe: Undetectable by AI targeting systems, and thermal optics. This Gear also enables your Operator to not be highlighted in enemy Tactical Cameras or Recon Drones.
Data Jacker: Enemies you eliminate drop a datapad. Collecting the datapad generates a radar ping from that location.
Ghost T/V Camo: While moving, this Gear blocks detection by UAVs, enemy radar sources, and Heartbeat Sensors.
Signal Jammer: Emits a signal that disrupts placed enemy Claymores and mines. This Gear also warns you of nearby enemy equipment.
EOD Padding: Take reduced damage from non-Killstreak explosives and fire.
Killstreaks
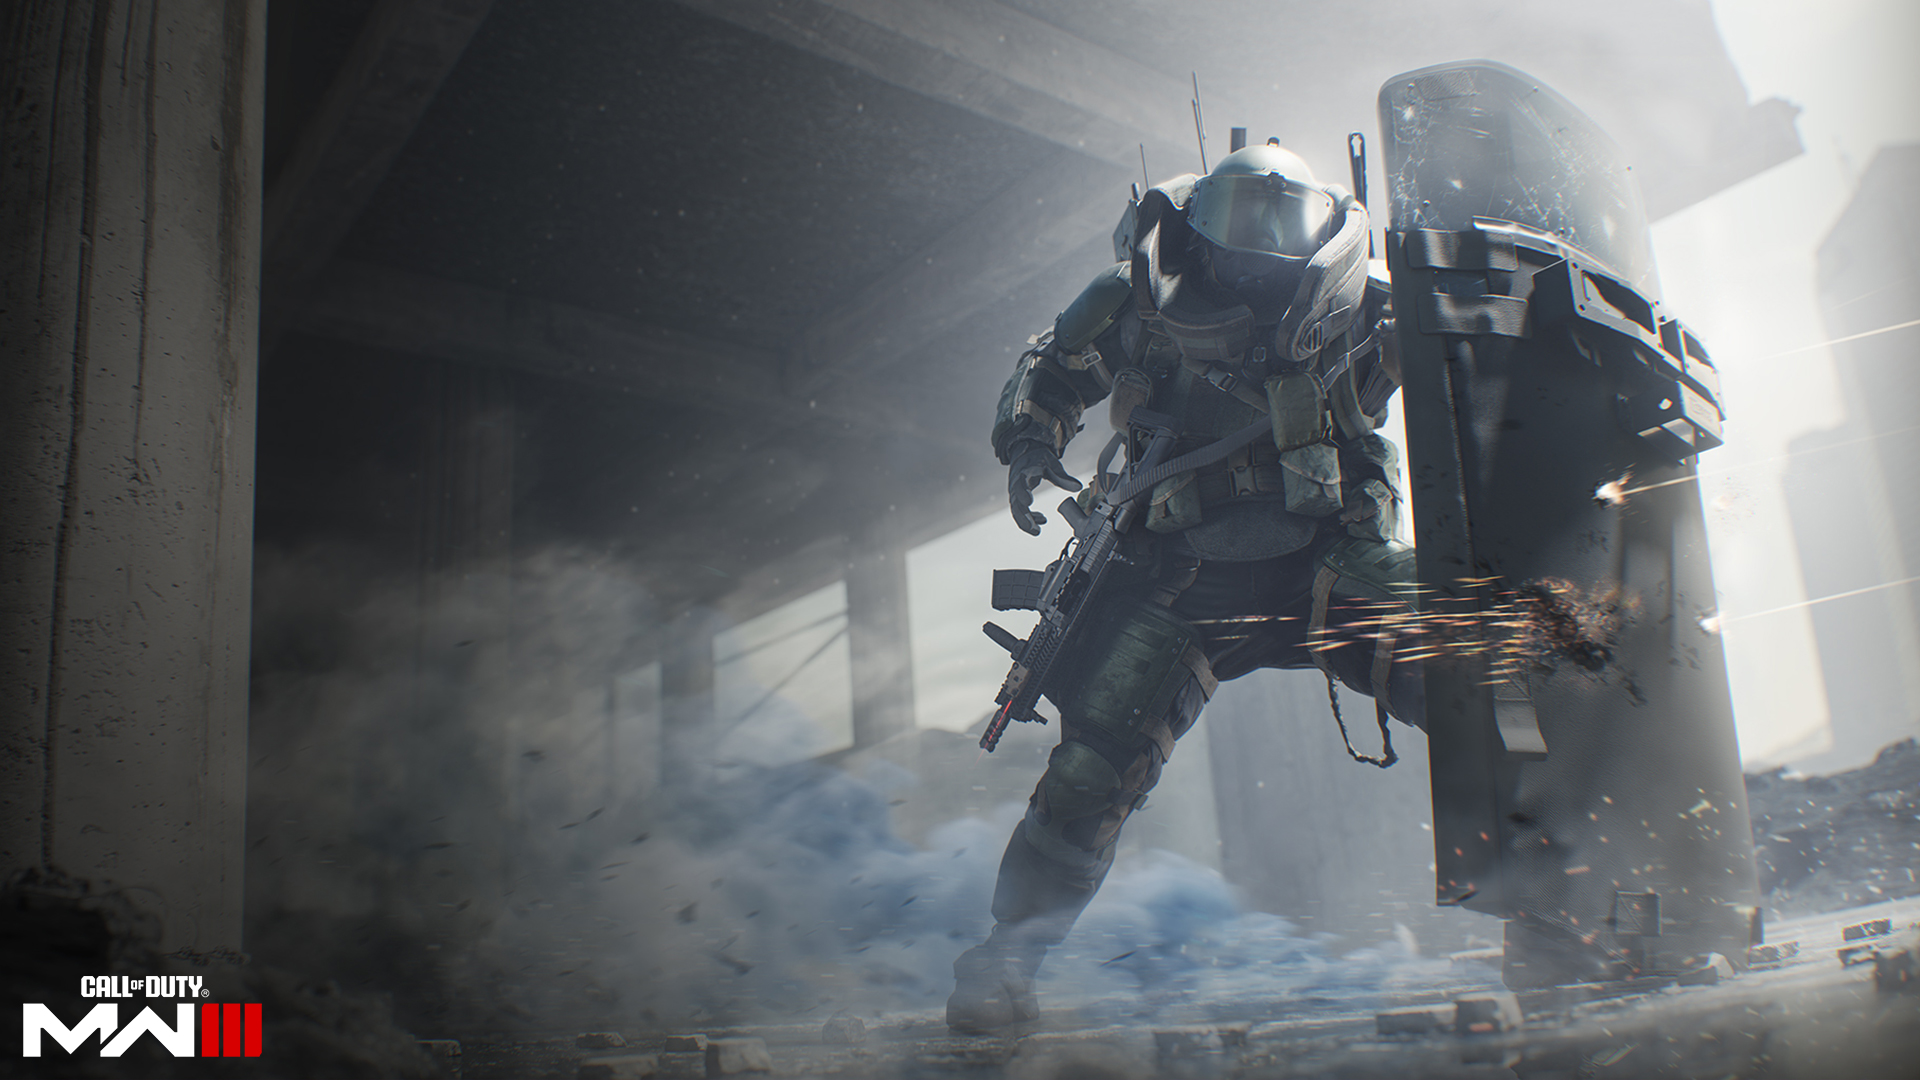
Killstreaks are rewards that you can earn by playing well in any single life in an in-game match. As much as you can play well and lead your team to victory, there are many instances where your Kill to Death to Assist ratio (K/D/A) can be impressively high while also earning very few Killstreaks. Thankfully, Killstreaks do not need to be earned in quick succession and you can technically earn a third and final equipped Killstreak right before the end of the match, as long as you receive no deaths between your first and last elimination. The only thing that matters is the streak of eliminations that you earn without deaths.
There is an alternative to Killstreaks that can earn you the same rewards in a match without earning any eliminations; however, eliminations will still help you earn Killstreaks faster. In the menu where you equip your Killstreaks, you can toggle them from Killstreaks to Scorestreaks. Scorestreaks are the same rewards but how you earn them is based on the score you earn instead of the number of eliminations you rack up in a single in-game life. Scorestreaks are good to have toggled on if you are more of an objective player. Playing the objective is how teams win games, so Scorestreaks are often the viable option.
Killstreaks and Scorestreaks are divided into groups of kills or scores, respectively. Because of this, you are allowed only one streak reward from each group as well as only three streaks in total. As the rewards require more kills or higher scores, they become far more powerful. However, when you’re playing a tactical mode, utility is king, and those rewards tend to be on the lower and more attainable end of the line. Below is a list of the Killstreaks available in Modern Warfare III and their descriptions:
// INTEL CARD
- MWIII
- WZ
- WZM
Killstreaks
// MULTIPLAYER: PRE-GAME // WEAPONS AND LOADOUTS
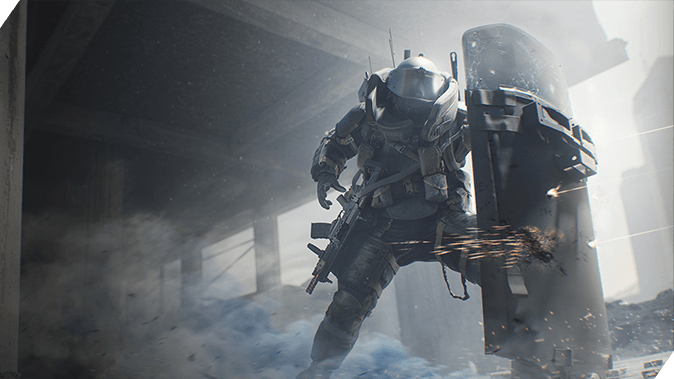
Intel is king: Whether you’re a veteran player to the Call of Duty franchise or not, some of the lower requirement Killstreaks are the most useful. UAVs and Counter UAVs will always be helpful to your team even if there is no direct damage.
Killstreaks don’t expire until use: You just earned a Killstreak and you’re excited to use it. Don’t waste it by using something that doesn’t need to be used right then and there. For instance, UAVs don’t double up. Wait for a UAV to complete its run before using another one.
Attainment above utility: It is always more important to equip Killstreaks or swap to Scorestreaks that are what your Loadout is built to attain. If you’re sniping and keeping you Operator away from the action, you might be able to attain larger Killstreaks. But sometimes you’re in a run-and-gun mood, which might lead to a large amount of eliminations, but also deaths in-between, thus losing out on your Killstreak opportunities.
4 Kills / 500 Points
UAV: UAV recon ship that reveals enemy locations on the minimap.
SAM Turret: Launch a targeted missile strike against air vehicles.
Mosquito Drone: Explosive drone that circles the area around where the drone is launched. It then dive-bombs enemies it spots and explodes.
Bomb Drone: A remote-controlled drone with an attached C4 charge.
5 Kills / 625 Points
Counter UAV: A drone that scrambles all enemy minimaps.
Guardian-SC: A beam shaped, nonlethal, area-denial weapon. Enemies entering the beam have similar effects to a stun grenade, reduced movement speed, blurred vision, and removed UI.
Care Package: Call in a random Killstreak care package to your location.
6 Kills / 750 Points
Cluster Mine: Throw a device that launches a cluster of smaller mines within the immediate area.
Precision Airstrike: Call in twin jets for a precision strike along the best available path.
Cruise Missile: Control a long-range cruise missile with boost capabilities.
7 Kills / 875 Points
SAE: Call in a trio of jets to release aerial explosives onto specified targets.
Mortar Strike: Signal several waves of mortars to attack a location.
Remote Turret: Automated turret that scans for nearby enemies, and fires incendiary-based rounds.
8 Kills / 1,000 Points
Wheelson-HS: Remote-controlled amphibious vehicle with auto sentry capabilities.
Overwatch Helo: An escort helo that will watch over your position and ping nearby enemy locations before engaging them.
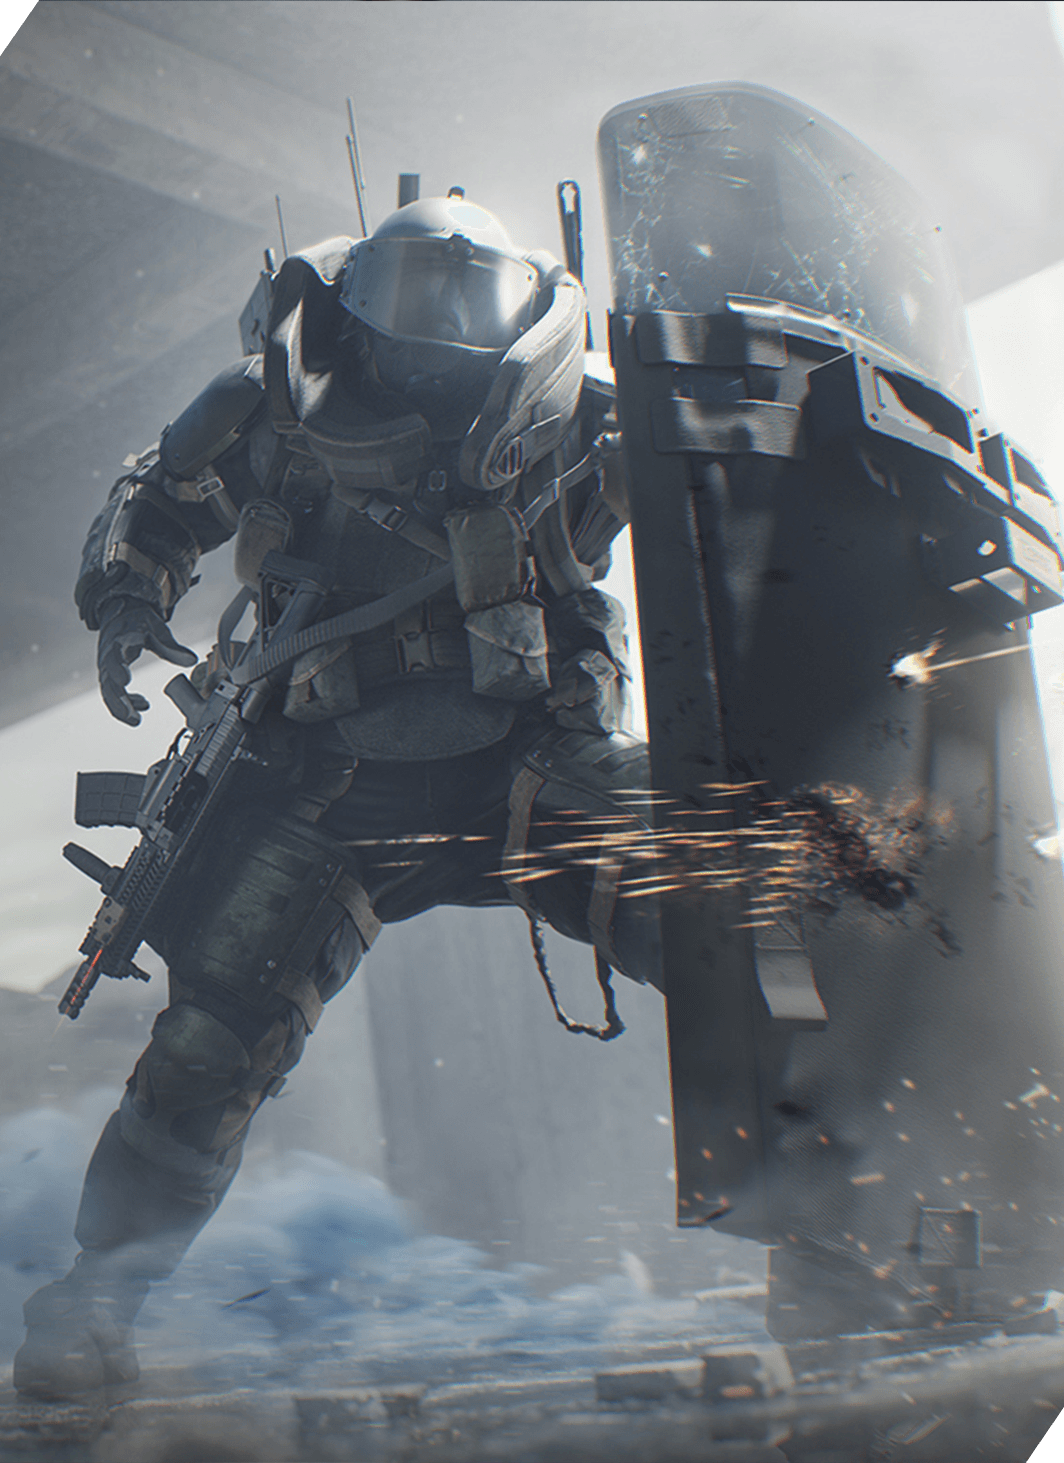
Juggernaut Recon: Juggernaut Recon gear delivered by care package. The suit is equipped with radar that pings nearby enemies. Contains a riot shield, SAS-12, and smoke grenade.
10 Kills / 1,250 Points
Emergency Airdrop: Call in three random Killstreak care packages to your location.
Stealth Bomber: Call in a bomber that releases a large line of explosives along its path.
Chopper Gunner: Control an assault chopper armed with a turret and air-to-land missiles.
VTOL Jet: Releases a pair of precision bombs before circling back and guarding a location of the player’s choice.
12 Kills / 1,500 Points
Gunship: A heavy assault gunship equipped with a laser tracking missile, along with the standard 40mm and 25mm cannons.
Advanced UAV: A targetable orbital UAV that reveals the enemy’s direction on the minimap in real time.
15 Kills / 1,875 Points
Juggernaut: Juggernaut assault gear delivered by care package. The minigun will drop when the Juggernaut dies.
The beginning of your level up and unlocking journey will consist of some simplified Loadouts and tactics. However, the more you play the game and the more you experience, the more comfortable you will be in building several Custom Loadouts that fit your playstyle for any given situation or mode. Always remember that you can change your Loadout on the fly, in the middle of a Multiplayer match, and it is encouraged to do so if something doesn’t feel right.
Also remember that if you like something about a Loadout, use it in other Loadouts as you see fit. There’s no harm in having go-to attachments or Perks. In most situations, something that might be a “better” option may not fit your playstyle or fit the speed at which you like to play. Play how you want and build your Loadouts your way.

© 2024 Activision Publishing, Inc. ACTIVISION, CALL OF DUTY, and MODERN WARFARE are trademarks of Activision Publishing, Inc. All other trademarks and trade names are the property of their respective owners.
For more information, please visit www.callofduty.com and www.youtube.com/callofduty, and follow @Activision and @CallofDuty on X, Instagram, and Facebook. For Call of Duty Updates, follow @CODUpdates on X.
